


I remember sitting on my kitchen floor three years ago, staring at a tub of Greek yogurt and feeling totally defeated by my “clean eating” goals. I wanted a brownie. Like, badly. But every recipe I found online tasted like literal cardboard or required sixteen different kinds of expensive powders.
That night, I started experimenting. I realized that dessert doesn’t have to be the enemy of your progress. It can actually be the thing that keeps you on track.
These recipes are my absolute favorites. They’re the ones I make when I’m craving something sweet at 9:00 PM but still want to hit my protein goals. They aren’t just “good for being healthy.” They’re actually delicious. Let’s get into it.
Fudgy Chocolate Protein Brownie Batter
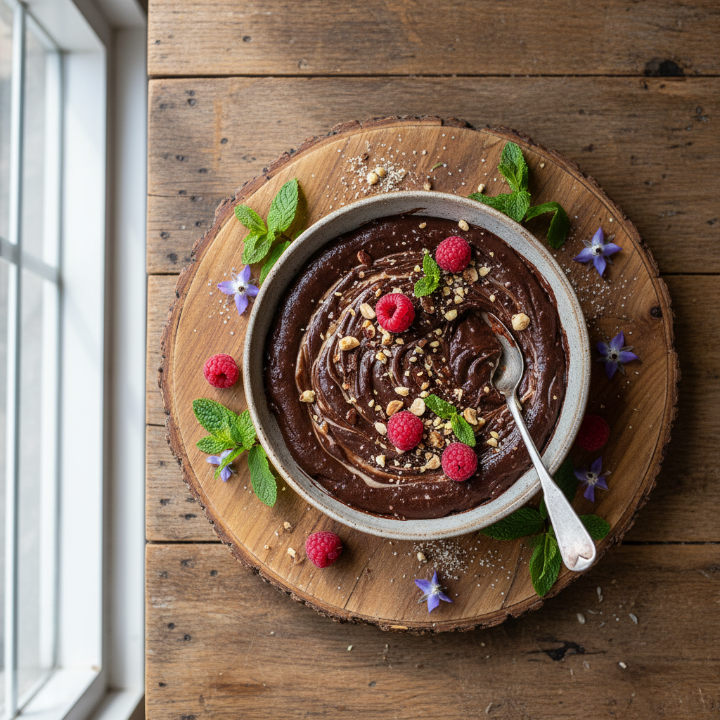
This is for the people who secretly prefer the batter over the actual baked brownie. It’s thick, rich, and ridiculously chocolatey. I use a secret ingredient—garbanzo beans—but I promise you cannot taste them. They just provide a silky, fudgy base that keeps you full for hours. It’s my go-to when I need a chocolate fix fast.

Ingredients
– 1 can (15 oz) chickpeas — drained and rinsed very well
– 1/2 cup chocolate protein powder — use a whey-casein blend for the best texture
– 1/4 cup almond butter — creamy works best
– 3 tbsp maple syrup — or your favorite liquid sweetener
– 1/4 cup dark cocoa powder — the Dutch-processed kind is awesome here
– 1/4 cup dark chocolate chips — for that essential crunch
– A pinch of sea salt — to balance the sweetness
Instructions
1. Rinse the chickpeas under cold water until the foam is completely gone.
2. Pat them dry with a paper towel. This is key for a smooth texture.
3. Throw everything except the chocolate chips into a high-speed blender or food processor.
4. Process on high until the mixture is completely smooth and looks like real frosting.
5. Scrape down the sides as needed. If it’s too thick, add a splash of almond milk.
6. Fold in the chocolate chips by hand.
7. Transfer to a bowl and eat it straight with a spoon or use it as a dip for apple slices.
Tips
– Skin the beans — If you have five extra minutes, pinch the skins off the chickpeas for an even creamier feel.
– Chill it — Pop the batter in the fridge for 30 minutes before eating. It thickens up beautifully.
I was so skeptical the first time I made this. I mean, beans? In dessert? But then I tried a spoonful and my mind was blown. It’s dense, decadent, and keeps me from raiding the pantry for Oreos later. My husband didn’t even know there were beans in it until I showed him the empty can.
📋 Recipe Card
Recipe 1: Fudgy Chocolate Protein Brownie Batter
🥗 Ingredients
- 1 can (15 oz) chickpeas, drained and rinsed
- 1/2 cup chocolate protein powder
- 1/4 cup almond butter
- 3 tbsp maple syrup
- 1/4 cup dark cocoa powder
- 1/4 cup dark chocolate chips
- 1 pinch sea salt
📋 Instructions
- 1Rinse the chickpeas thoroughly and pat dry with paper towels.
- 2Add chickpeas, protein powder, almond butter, maple syrup, cocoa powder, and salt to a food processor.
- 3Blend until completely smooth, scraping down the sides as needed.
- 4If the batter is too thick, add 1-2 tablespoons of almond milk.
- 5Fold in the chocolate chips by hand.
- 6Serve immediately or chill for a thicker consistency.
Creamy Strawberry Cheesecake Jars
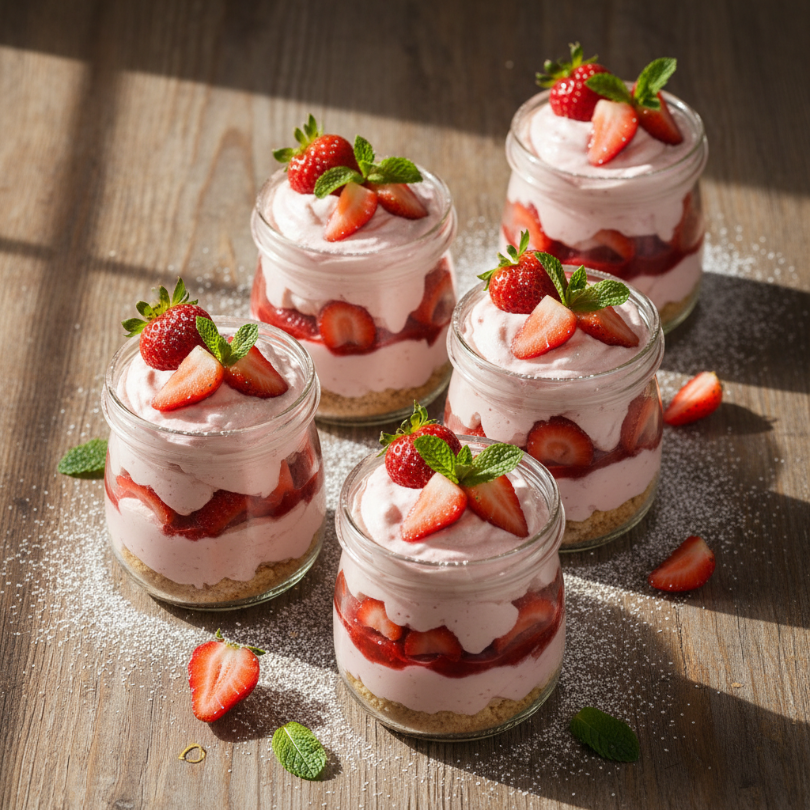
These little jars are a total lifesaver for meal prep. They feel like a fancy bistro dessert but they’re packed with protein thanks to a mix of cottage cheese and Greek yogurt. Don’t let the cottage cheese scare you—once it’s blended, it becomes a velvety cream that tastes exactly like cheesecake filling.
Ingredients
– 1 cup low-fat cottage cheese — look for the small curd variety
– 1/2 cup plain Greek yogurt — 0% or 2% fat both work
– 2 tbsp honey — or agave nectar
– 1 tsp vanilla extract — don’t skimp on this!
– 1 cup fresh strawberries — chopped into small pieces
– 4 graham crackers — crushed into crumbs for the “crust”
– Lemon zest — just a tiny bit for brightness
Instructions
1. Blend the cottage cheese, Greek yogurt, honey, and vanilla until it’s perfectly smooth. No lumps allowed!
2. Stir in the lemon zest for that authentic cheesecake tang.
3. Grab four small mason jars or glasses.
4. Layer the bottom of each jar with the crushed graham cracker crumbs.
5. Spoon the creamy mixture over the crumbs.
6. Top each jar with a generous handful of chopped strawberries.
7. Refrigerate for at least an hour to let the flavors meld together.
Tips
– Switch the fruit — Blueberries or raspberries are amazing if strawberries aren’t in season.
– High protein crust — You can mix the crumbs with a tablespoon of protein powder for an extra boost.
I’m obsessed with the texture of these. They’re so light and refreshing. I usually make a batch on Sunday nights so I have a quick “treat” ready for those mid-afternoon slumps. It’s the perfect way to use up that cottage cheese sitting in the back of your fridge.
📋 Recipe Card
Recipe 2: Creamy Strawberry Cheesecake Jars
🥗 Ingredients
- 1 cup low-fat cottage cheese
- 1/2 cup plain Greek yogurt
- 2 tbsp honey
- 1 tsp vanilla extract
- 1 cup fresh strawberries, chopped
- 4 graham crackers, crushed
- 1/2 tsp lemon zest
📋 Instructions
- 1Combine cottage cheese, Greek yogurt, honey, and vanilla in a blender.
- 2Blend on high until the mixture is silky smooth with no lumps.
- 3Stir in the lemon zest.
- 4Place 1 crushed graham cracker into the bottom of 4 small jars.
- 5Top each with the cheesecake mixture.
- 6Finish with a layer of fresh strawberries.
- 7Chill for at least 1 hour before serving.
Peanut Butter Protein Cookies
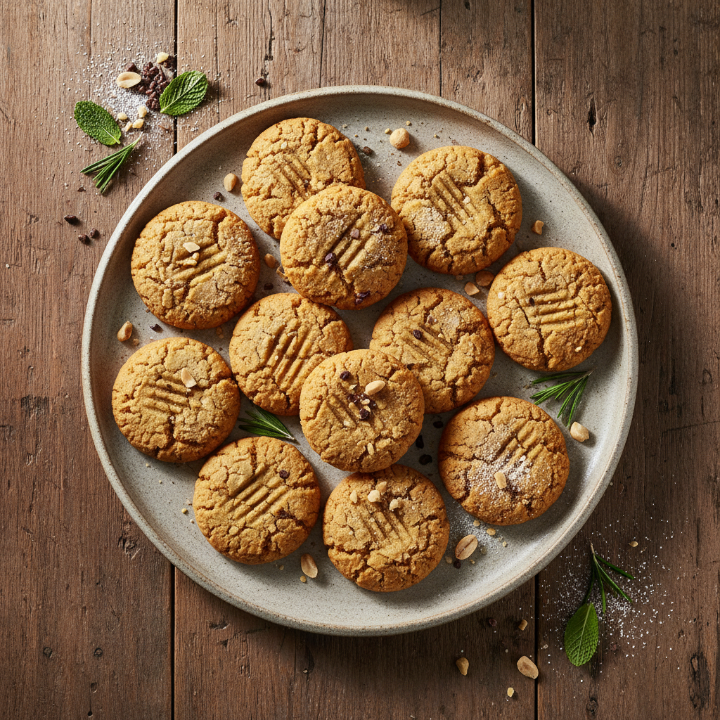
Three ingredients. That’s all you need for these chewy, nutty cookies. They’re flourless, which makes them naturally gluten-free, and they satisfy that peanut butter craving instantly. I love making these when I have five minutes to spare before I need to head out the door. They smell incredible while they’re baking.
Ingredients
– 1 cup natural peanut butter — the drippy kind with just peanuts and salt
– 1/2 cup vanilla protein powder — whey works best for the texture here
– 1 large egg — at room temperature if possible
– Optional: 2 tbsp stevia — if you want them a bit sweeter
Instructions
1. Preheat your oven to 350°F (175°C) and line a baking sheet with parchment paper.
2. Mix the peanut butter, protein powder, and egg in a medium bowl.
3. Stir until a dough forms. It should be thick and slightly tacky.
4. Scoop about a tablespoon of dough and roll it into a ball.
5. Place on the baking sheet and press down with a fork to make a criss-cross pattern.
6. Bake for 8-10 minutes. Don’t overbake! They will look soft but will firm up as they cool.
7. Let them cool on the pan for at least 5 minutes before moving them.
Tips
– Check your PB — If your peanut butter is very salty, skip any extra salt in the recipe.
– Add chocolate — Press a few sugar-free chocolate chips into the tops before baking.
These aren’t your grandma’s soft-and-pillowy sugar cookies. They’re dense and chewy, which I actually prefer. They’re incredibly filling. One or two of these with a cup of coffee is basically the perfect breakfast-for-dessert situation.
📋 Recipe Card
Recipe 3: Peanut Butter Protein Cookies
🥗 Ingredients
- 1 cup natural creamy peanut butter
- 1/2 cup vanilla protein powder
- 1 large egg
- 2 tbsp stevia (optional)
📋 Instructions
- 1Preheat oven to 350°F and line a baking sheet with parchment paper.
- 2In a medium bowl, mix the peanut butter, protein powder, and egg until a dough forms.
- 3Roll the dough into 12 even balls and place on the baking sheet.
- 4Use a fork to flatten each ball into a criss-cross pattern.
- 5Bake for 8-10 minutes until the edges are just set.
- 6Cool on the pan for 5 minutes before transferring to a wire rack.
Salted Caramel Protein Mousse
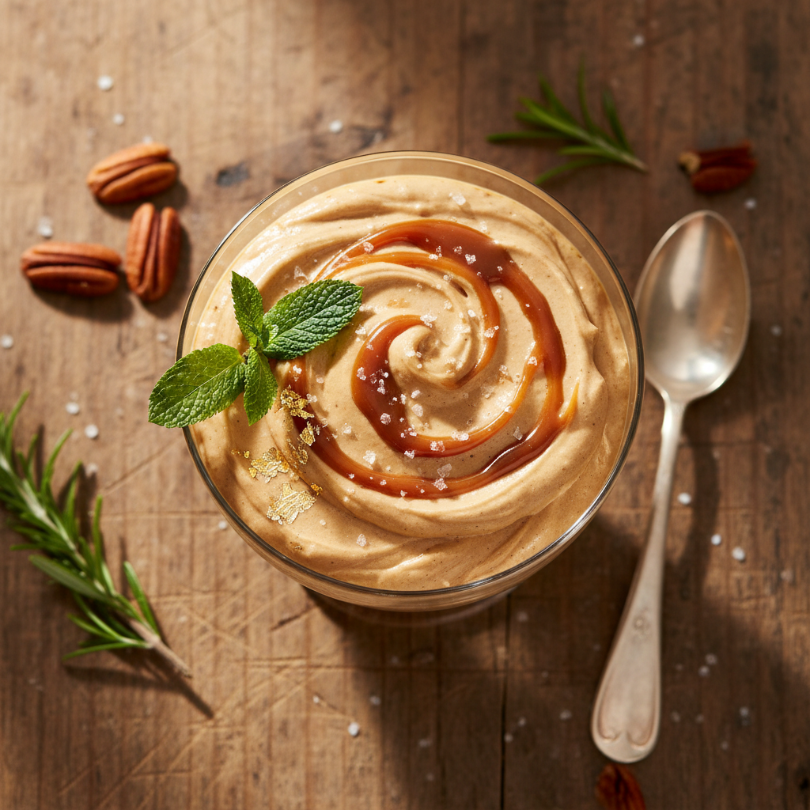
This mousse is impossibly airy. It uses whipped egg whites and protein powder to create a cloud-like texture that feels like a total indulgence. The salt cuts through the caramel perfectly. It’s fancy enough to serve to guests, but easy enough to make on a Tuesday night in your pajamas.
Ingredients
– 2 large egg whites — must be pasteurized since they stay raw
– 1 scoop salted caramel protein powder — or vanilla with a drop of caramel extract
– 1/2 cup non-fat Greek yogurt — cold from the fridge
– 1/4 tsp sea salt — for that salted caramel vibe
– 1 tsp stevia or monk fruit — adjust to your taste
Instructions
1. Whip the egg whites in a clean bowl using a hand mixer until stiff peaks form.
2. Whisk the Greek yogurt, protein powder, and sweetener in a separate bowl until smooth.
3. Fold 1/3 of the whipped egg whites into the yogurt mixture very gently to lighten it up.
4. Add the rest of the egg whites and fold with a spatula. Don’t stir! You want to keep all that air inside.
5. Divide into two small bowls or ramekins.
6. Sprinkle the sea salt over the top.
7. Chill for 20 minutes before serving for the best “mousse” consistency.
Tips
– Clean bowl — Make sure your whisk and bowl are totally grease-free, or the egg whites won’t whip.
– Toppings — A drizzle of sugar-free caramel sauce takes this to another level.
This is the “emergency” dessert. When I’m dying for something sweet but I’ve already eaten most of my calories for the day, this is my savior. It’s high volume, low calorie, and feels like eating a caramel cloud. Just be careful with the folding part—patience is a virtue here!
📋 Recipe Card
Recipe 4: Salted Caramel Protein Mousse
🥗 Ingredients
- 2 large pasteurized egg whites
- 1 scoop salted caramel protein powder
- 1/2 cup non-fat Greek yogurt
- 1/4 tsp sea salt
- 1 tsp monk fruit sweetener
📋 Instructions
- 1Beat egg whites in a clean glass bowl until stiff peaks form.
- 2In a separate bowl, whisk Greek yogurt, protein powder, and sweetener until smooth.
- 3Gently fold 1/3 of the egg whites into the yogurt mixture to lighten it.
- 4Slowly fold in the remaining egg whites using a spatula, being careful not to deflate them.
- 5Pour into ramekins and sprinkle with sea salt.
- 6Chill for 20 minutes before enjoying.
General Tips & Tricks
When making protein desserts, the type of powder matters. Whey tends to dry things out in the oven, while Casein or blends stay much moister. Always add a pinch of salt to balance the artificial sweeteners found in many powders. If a batter feels too dry, add liquid one tablespoon at a time. It goes from “perfect” to “soup” very quickly!
Conclusion
Eating healthy doesn’t mean saying goodbye to your favorite flavors. These four treats prove you can have your cake—or brownie batter—and eat it too. Try one tonight. You’ll be surprised how much better you feel when dessert actually fuels your body!