Blogs
How to Create a Postpartum Meal Plan

How to Create a Postpartum Meal Plan for Weight Loss and Energy

Discover tips on how to create a postpartum meal plan that promotes weight loss

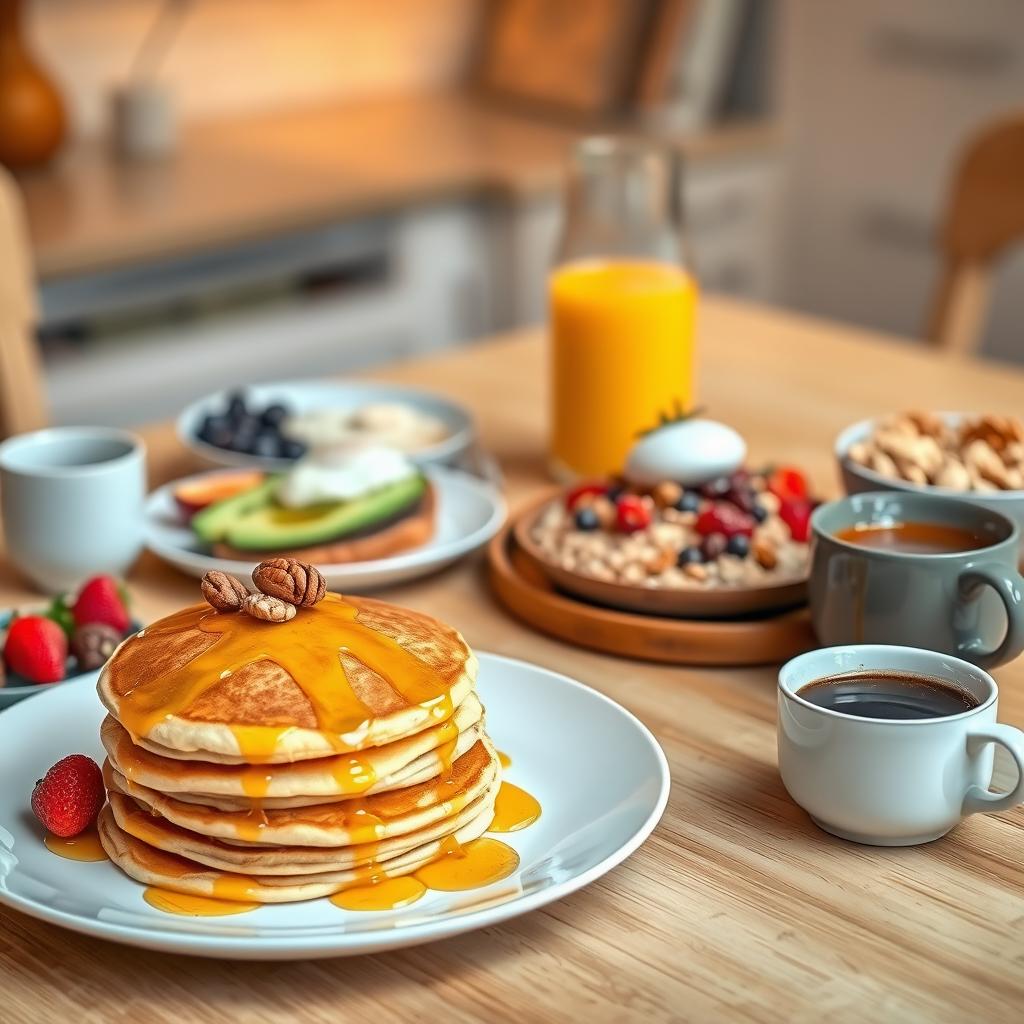
I wrote this guide to help map out a simple diet plan for after having a baby. It focuses on healing, steady energy, and gentle fat loss. I want to be strong for taking care of my newborn, not looking for quick fixes. With tips from nutrition expert Dara Godfrey, MS, RD, the plan includes drinking plenty of water, eating balanced meals, and being patient with my body.

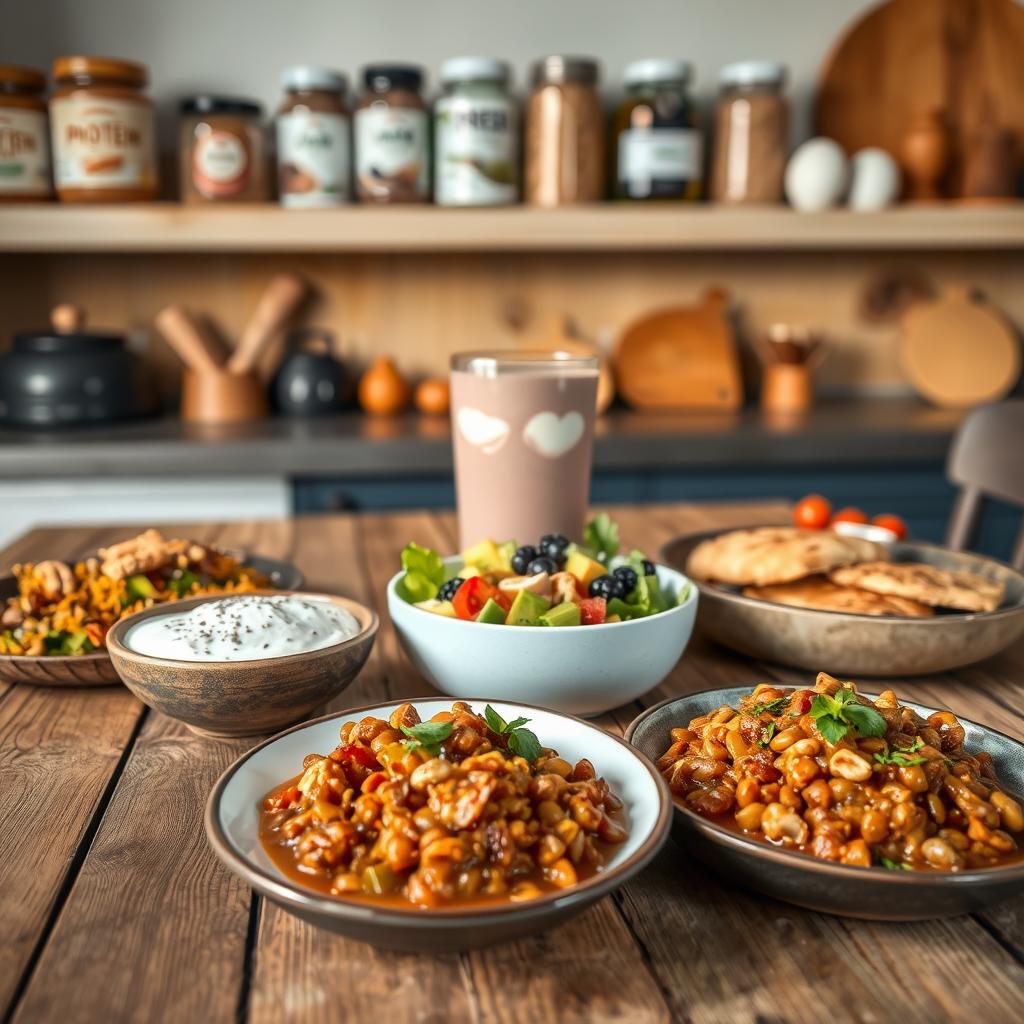
I start with the plate method: half the plate with veggies that aren’t starchy, a quarter with lean protein, and a quarter with whole grains. This keeps my meals balanced and makes losing weight manageable, even when I’m busy. I focus on foods that boost energy like oats, salmon, Greek yogurt, beans, berries, avocado, and leafy greens.

How many calories I need varies. If I’m breastfeeding, I need about 2,000–2,800 calories a day, according to the CDC. If not, I need about 1,600–2,400 calories. Breastfeeding means I need an extra 400–500 calories. But, I make sure to never go below 1,800 calories to keep my milk supply and energy up. Losing about 1 pound a week is a good goal, says the Academy of Nutrition and Dietetics.

Carbs are important for healing after childbirth, milk production, and balancing hormones. I stay away from very low-carb diets. Instead, I make sure carbs make up 45%-65% of what I eat. My doctor helps adjust this if needed. I also make sure to keep taking vitamins for important nutrients. And if I’m breastfeeding, I watch my caffeine intake and alcohol use.

Drinking enough water is key. I make sure to drink water every time I feed my baby and check that my urine is pale yellow. When things get busy, I rely on simple meals, cooking in batches, and eating leftovers. I use the slow cooker, Instant Pot, and oven for easy meals. With these habits, making a postpartum meal plan is doable. It helps me stay energized and reach my long-term goals.

Postpartum Nutrition Essentials for Recovery, Energy, and Healthy Weight Loss

I focus on what to eat after having a baby. This helps me heal and stay energized. I also aim to return to a healthy weight. I choose foods that are not only good for me but also quick to prepare. Making small dietary changes works well when caring for a newborn. These changes are also easier to keep up with over time.

Balanced macronutrients: proteins, fiber-rich carbs, and healthy fats

I make sure to eat protein with every meal and most snacks. Good sources include eggs, chicken, and lean beef, along with plant-based options like beans and tofu. Seafoods like salmon and sardines, and dairy like Greek yogurt, also help my body heal.

I eat fiber-rich carbs like quinoa, oats, and whole wheat pasta. Fruits and vegetables are also important for fiber. I add them slowly to my diet to keep my stomach happy.

Healthy fats give me stable energy. I add avocados, olive oil, and nuts to my meals. Omega-3 fats from fish and seeds help my mood and my baby’s development.

Key micronutrients: iron, calcium, choline, iodine, vitamin C, zinc, and selenium

For key vitamins and minerals, I mix lean meats, beans, and leafy greens. They give me iron. I get calcium from dairy or fortified nut milks. This is very important after giving birth.

I find choline and iodine in eggs and fish like cod and sardines. For vitamin C, I eat citrus fruits and berries. Zinc comes from seafood and beans. Brazil nuts give me selenium. These nutrients help my immune system and recovery.

Hydration targets and signs you’re well-hydrated

Hydration is key, especially for breastfeeding. I aim to drink up to 3 liters of water a day. Some signs of good hydration include light urine color and feeling energetic. I also count liquids like broths and smoothies. Foods with high water content, such as cucumbers and tomatoes, help too.

Breastfeeding vs. non-breastfeeding calorie needs

When breastfeeding, I need about 2,000 to 2,800 calories each day. This includes an extra 400 to 500 calories for nursing. If I’m not nursing, 1,600 to 2,400 calories usually works. To lose weight without affecting milk supply, I don’t go below 1,800 calories unless my doctor says it’s okay.

Safe caffeine and alcohol guidance during lactation

When it comes to caffeine, I limit myself to 300 mg a day. For alcohol, moderation is key. I time it well around breastfeeding sessions. I’m careful with seafood too. I avoid ones high in mercury like king mackerel. Instead, I choose safer options like salmon and shrimp.

By focusing on proteins, carbs, fats, and vitamins, I keep myself well-fed and energized. This helps me stay sharp and prepared for my day.

How to Create a Postpartum Meal Plan

I keep my routine simple for busy days. I use the postpartum plate method for balance. It matches the ChooseMyPlate postpartum guidance perfect. This keeps my energy up while I care for my baby.

Use the plate method: 1/2 non-starchy veggies, 1/4 lean protein, 1/4 whole grains

My plate at meals? Half is non-starchy veggies like greens and carrots. A quarter is lean proteins – think eggs or fish. The last part? Whole grains or starchy veggies like quinoa or sweet potatoes. This makes portion control easy and prevents energy drops.

Build meals around whole foods and minimally processed staples

My meals focus on whole foods like fruits, veggies, and lean proteins. I cut down on added sugars and fried foods. I pick healthier options like rotisserie chicken instead of chips. And I use simple swaps, like Greek yogurt instead of sweetened varieties.

Align portions with gradual weight loss while maintaining energy

I go for slow weight loss to stay strong. If breastfeeding, I consult my doctor for a safe calorie plan above 1,800 daily. I eat regularly—three meals, two snacks—to manage portions. I also adjust based on hunger, activity, and sleep.

Incorporate omega-3s for mood and recovery support

I include foods rich in omega-3s like salmon and walnuts often. They boost mood, fight inflammation, and support breastfeeding. It’s about rotating between fish and plant-based sources to get benefits.

Continue prenatal/postnatal vitamins with clinician guidance

I keep up with prenatal vitamins postpartum for essential nutrients. I check with my doctor to adjust as needed based on diet and health changes.

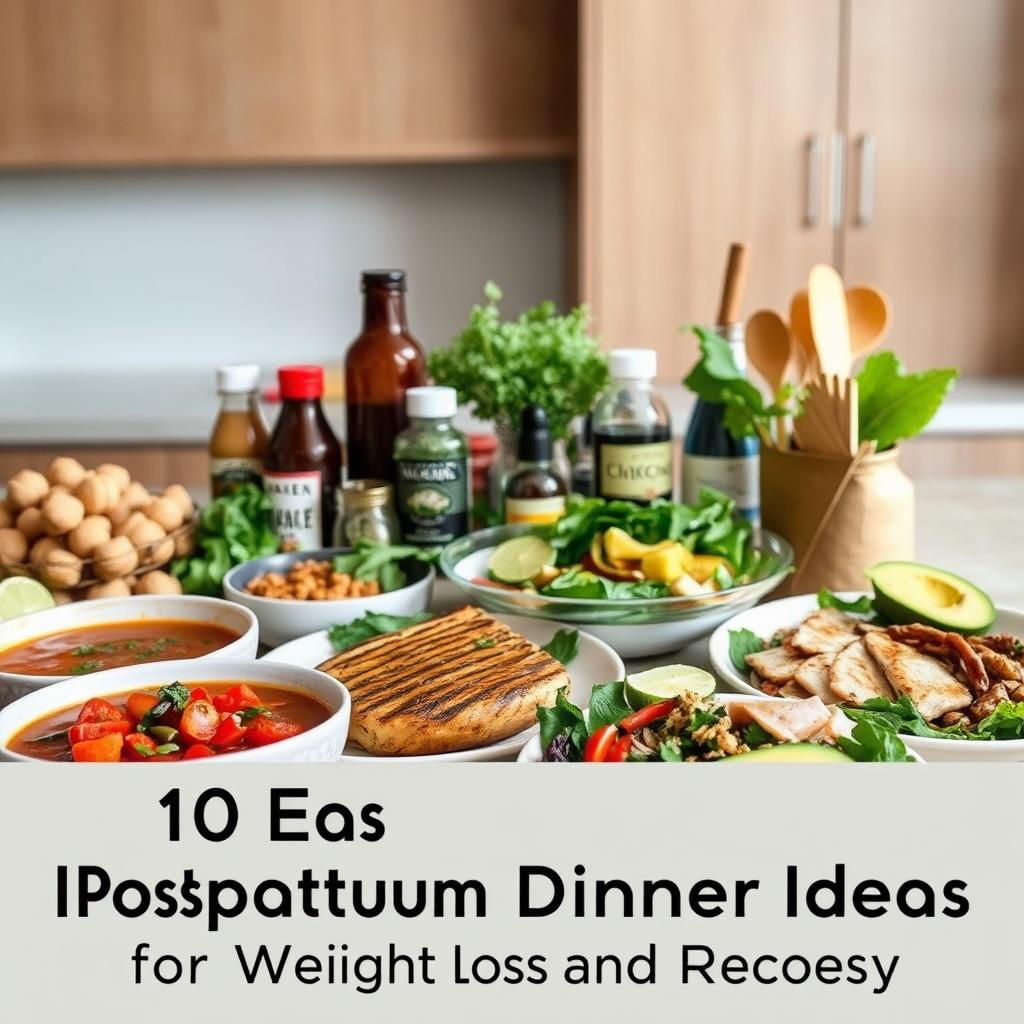
Here are some meal ideas: apple-cinnamon oatmeal or chia pudding for breakfast. For lunch, a quinoa salad with chicken, or a chickpea pasta salad. Dinner? Lemon-garlic chicken with veggies fits the postpartum plate method. These choices are practical and healthy.

Breastfeeding, Hormones, and Sustainable Weight Loss Strategies

I aim for slow progress so my body can heal and my energy stays steady. My plan respects the day-to-day shifts of postpartum hormones like estrogen and cortisol. I keep choices simple, consistent, and mindful of my milk supply and mood.

Why slow and steady loss (about 1 lb/week) protects milk supply

I follow a plan to lose about 1 pound per week. This guards my milk supply and prevents energy crashes. I consume at least 1,800 calories and monitor hunger cues, diaper counts, and my baby’s growth with my clinician’s guidance.

Gentle changes allow me to lose weight while nourishing my baby.

Carbohydrates for milk production and hormone regulation

I rely on carbs because they power milk production and help balance hormones. I try to get 45%–65% of my calories from whole grains, beans, fruits, and starchy veggies. This keeps my energy even as my hormones, estrogen and cortisol, adjust after birth.

Managing hunger and satiety hormones with protein + moderate carbs

To control my hunger, I combine protein with moderate carbs in my meals and snacks. This strategy helps manage spikes and maintains postpartum rhythm in hormones like ghrelin and leptin. Including fiber and healthy fats helps me stay full and avoid processed foods.

Personalizing calories and macros based on activity, health status

My needs change based on my body size, sleep, and breastfeeding frequency. Therefore, I set my macros postpartum on a personalized basis. I use the CDC’s calorie ranges as a starting point and then adjust for my activity, medications, and blood sugar targets.

If I exercise more, I increase carbs to support my energy output and recovery.

Movement ideas that support recovery and energy

Once I get the green light, I start with low-impact activities like walking, yoga, Pilates, and swimming. I keep exercise sessions short and easy to repeat, focusing on walks with the stroller and gentle flows. As I get stronger, I add light interval training or strength exercises, always checking that my energy level and milk supply remain stable.

Time-Saving Meal Prep, Snack Ideas, and a 5-Day Framework

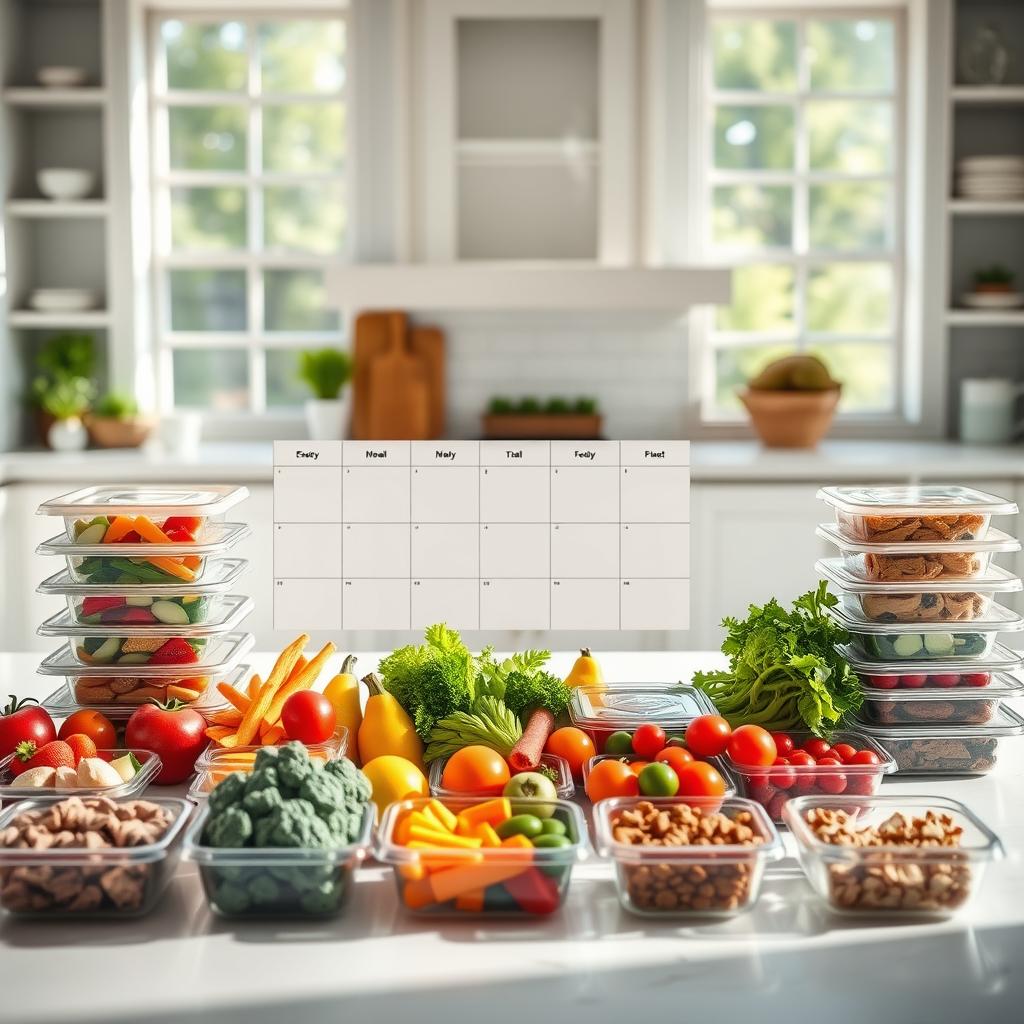
I make my postpartum meal prep easy to have time to rest and still eat healthy. Having a 5-day plan lets me map out meals, enjoy my favorites more than once, and cuts down on last-minute decisions. I focus on making large amounts of a few dishes and choose high-protein snacks to keep my energy up.
Time-Saving Meal Prep, Snack Ideas, and a 5-Day Framework

Batch-cook and rely on leftovers: slow cooker, sheet pan, and Instant Pot

I use my slow cooker, Instant Pot, and sheet pan to make cooking and cleanup quicker. Cooking big amounts means I freeze some for later, so I don’t get tired of what I’m eating. I switch between slow cooker steel-cut oats, chicken soup, and one-pot pasta dishes that are simple and filling.

These meal options are quick for lunch or dinner, just add some greens or fruit. Keeping some meals frozen means I’ve got backup plans for busy days.

Grab-and-go snacks: Greek yogurt, nuts/seeds, trail mix, cottage cheese, smoothies

For busy days, I stock up on snacks high in protein. I pick things like Greek yogurt with berries, cottage cheese with fruit, and nuts. Trail mix, cheese with apples, and hummus with pita are also on my list.

Smoothies are easy to make ahead of time, and peanut butter protein bars are a freezer-friendly snack. A banana with peanut butter helps keep hunger away until dinner.

Sample meal ideas: oatmeal, chia pudding, rotisserie-chicken salads, soups, one-pot pasta

Day 1 starts with oatmeal; lunch is a chicken quinoa salad, and dinner is chicken tortilla soup. I make enough salad for a couple of days.

Day 2: I have chia pudding for breakfast, a Mediterranean pasta salad for lunch, and a stuffed pepper casserole at dinner.

Day 3: It’s carrot cake oatmeal for breakfast, a chicken salad sandwich for lunch, and for dinner, a turkey burger with sweet fries.

Day 4: I eat a mango smoothie bowl, have “egg roll in a bowl” for lunch, and one-pot pasta for dinner.

Day 5: Breakfast is protein pancakes; lunch is a salmon bagel, and dinner is lemon-garlic chicken with veggies.

Smart swaps and convenience: precut produce, frozen grains, mason-jar salads

I use precut veggies, ready-to-eat chicken, and quick-cook grains to save time. Making salads in mason jars keeps them fresh longer.

Accepting help with meals and choosing convenient options helps me stay on track during busy times. These smart choices make meal prep doable.

Hydrating foods and beverages to reduce fatigue and support digestion

I eat foods that help me stay hydrated and support digestion. Favorites include watermelon, cucumbers, and juicy fruits like peaches and kiwi. I also drink broths, smoothies, and plenty of water to stay hydrated.

Drinking water regularly, especially when nursing, keeps me feeling good. I enjoy coffee or tea in moderation, keeping it away from feeding times.

This meal plan makes eating well and resting easier in the postpartum period. With simple slow cooker meals and salads ready to go, I don’t have to spend too much time cooking.

Conclusion

My postpartum meal plan is all about recovery and keeping my energy up. I make sure half my plate is filled with veggies that are not starchy. I also include lean protein and whole grains. To top it off, I add healthy fats and fiber.

I don’t skip carbs because they help with hormones and milk production, if I’m nursing. Eating regularly, choosing balanced snacks, and foods rich in omega-3 boost my mood and energy.

If I’m breastfeeding, I aim for 2,000 to 2,800 calories a day. If breastfeeding is my baby’s only food source, I add 400-500 calories. But, I never eat less than 1,800 calories when trying to lose weight. Losing more than one pound a week is a no-go.

I keep caffeine under 300 mg a day. I’m careful with alcohol, waiting two hours after a drink before nursing. I choose fish that’s low in mercury, like salmon and shrimp, and avoid those high in it, like shark and king mackerel.

To stay energized and hydrated, I drink lots of water, sometimes up to 3.8 liters when nursing. The color of my pee, pale yellow, helps me know I’m drinking enough. I continue taking vitamins to get enough iron, calcium, and other essential nutrients. My meal portions depend on what my body needs. I also work closely with my doctors, especially if I have health conditions.

Life with a new baby keeps me on my toes. So, I use tricks like batch cooking and easy-to-prepare meals. This way, I can stick to my meal plan even on tough days. With a bit of patience and good habits, I’m able to take care of myself and my baby. A dietitian’s advice helps me keep my weight loss goals realistic and healthy.

One-Pot Meals for Busy Moms

One-Pot Meals for Busy Moms: Lose Weight Without Losing Time

Discover hassle-free One-Pot Meals for Busy Moms to help you shed pounds and save

As a mom, I need quick, healthy dinners for busy nights. I promise: easy one-pot meals for busy moms can help you lose weight without sacrificing taste or family happiness. With one pot, like a Dutch oven or Instant Pot, you get a full, balanced meal.

I love this cooking style because it’s simpler. It uses less oil and fewer sauces. Cooking grains, lean proteins, and veggies together means less fat and more taste. This way, I save time cleaning and stay on track with my weight loss goals.

I set aside 20–30 minutes for cooking and aim for 20–35 grams of protein per dish. I include lots of greens and smart carbs like quinoa. I use USDA MyPlate for balance, keep an eye on sodium with American Heart Association tips, and always read food labels to keep dinners healthy and hearty.

All my tips are tested at home and don’t break the bank. I find everything at places like Costco and Trader Joe’s for affordable, healthy meals. Soon, I’ll share 30-minute recipes, shopping advice, and ideas for meals that everyone will love. This includes options for vegetarians, dairy-free diets, and easy freezer meals. Let’s make dinner easy and fun again.

Why One-Pot Cooking Helps Me Lose Weight and Save Time

I rely on one-pot meals for healthier dinners during the week. They help me eat right without much trouble. Using just one burner and a lid, I can make tasty, portion-controlled meals that my family enjoys. The best part is, there’s hardly any mess, so I’m more inclined to cook at home.

How one-pot methods cut calories without cutting flavor

I begin with sautéing onion, garlic, celery, and carrots in a little olive oil, then add broth or vinegar. This method reduces fat and salt, following advice from America’s Test Kitchen and the American Heart Association. It makes the food flavorful and light.

Then I add flavor enhancers like tomato paste, mushrooms, and soy sauce in small amounts. These ingredients replace heavy creams but keep meals filling. By cooking grains and proteins together in a tasty broth, I avoid extra sauces yet still enjoy rich flavors in protein-packed dishes.

The time-saving domino effect: fewer dishes, faster cleanup

My routine is simple: one cutting board, one pot, and a quick dishwasher run. Easy cleanup means I cook more and avoid unhealthy takeout. Meals with less mess make it easier to stick to cooking, even when I’m super busy.

With less cookware to watch over, I keep an eye on the food, adding seasonings just right. This keeps dinner preparation calm and speedy, helping me maintain consistent meal habits.

My simple formula for balanced macros in a single pot

My one-bowl rule is straightforward: fill half with veggies like spinach or zucchini; add 25–35 g of protein from chicken or beans; and include 20–40 g of carbs from grains like quinoa. I mix in a bit of healthy fats from sources like olive oil for balanced nutrition.

I choose broth and lean proteins over heavier options and add salt sparingly. Using a cup for serving helps control portions. Incorporating fiber-rich foods keeps me satisfied longer. This way, my one-pot meals are hearty, healthy, and always delicious.

Pantry and Produce Staples I Keep On Hand

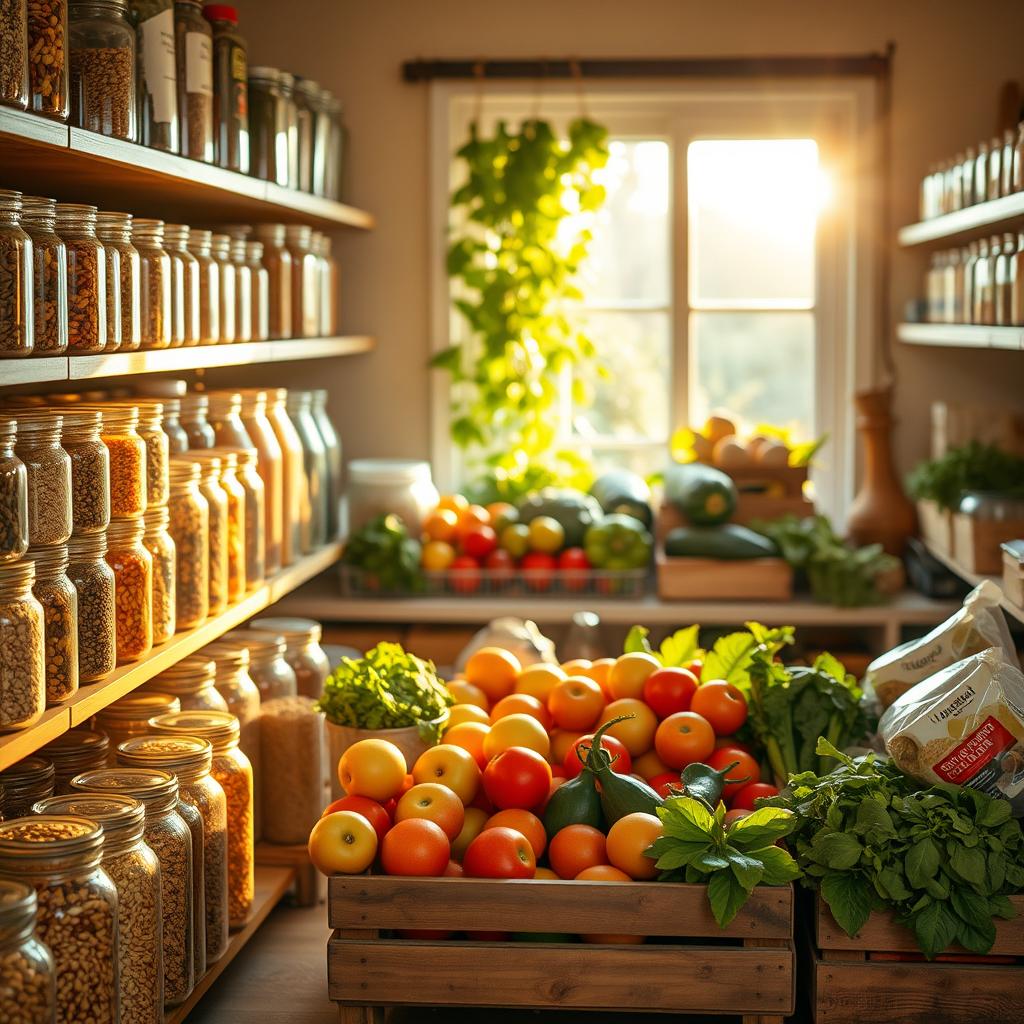
I keep healthy pantry items so I can whip up meals quickly. My shopping list includes reliable proteins like canned beans, lentils, tuna, salmon, chicken, tofu, tempeh, turkey sausage, and eggs. These proteins help me make soups, skillets, and bakes in no time.

I stock up on grains like brown rice, quinoa, farro, barley, polenta, and small potatoes. I also have whole-wheat or chickpea pasta for busy evenings. These are affordable, add taste, and keep me satisfied, making them key for weekday meals.

Liquids and flavors like broth, crushed tomatoes, coconut milk, soy sauce, fish sauce, vinegars, and lemon juice enhance dishes quickly. Just a spoonful can transform a meal from bland to flavorful effortlessly.

I use extra-virgin olive oil, avocado oil, and a bit of ghee for fats and taste. Then, I add Dijon mustard, harissa, gochujang, Thai curry paste, and various spices. These let me season once and enjoy delicious meals all week.

Aromatics like onions, garlic, ginger, celery, and carrots are crucial. They’re the foundation of many one-pot dishes and enrich my pantry without added calories.

My go-to vegetables include bell peppers, zucchini, and leafy greens, plus frozen veggies like cauliflower rice and peas. These help me make quick, balanced meals even when I’m pressed for time.

For finishing touches, I keep Parmesan, feta, Greek yogurt, and fresh herbs on hand. Adding a bit at the end makes any dish special and tasty.

On busy days, I rely on pre-washed greens, microwaveable grains, pre-cut veggies, and frozen gnocchi. These shortcuts reduce preparation time while maintaining a focus on health.

Simple storage tips ensure everything is ready to use. I organize my pantry by expiry date, keep grains in sealed containers, and freeze broth and tomato paste. Choosing low-sodium products and rinsing beans helps keep my meals healthy and easy to make.

Pantry and produce staples I keep on hand

One-Pot Meals for Busy Moms

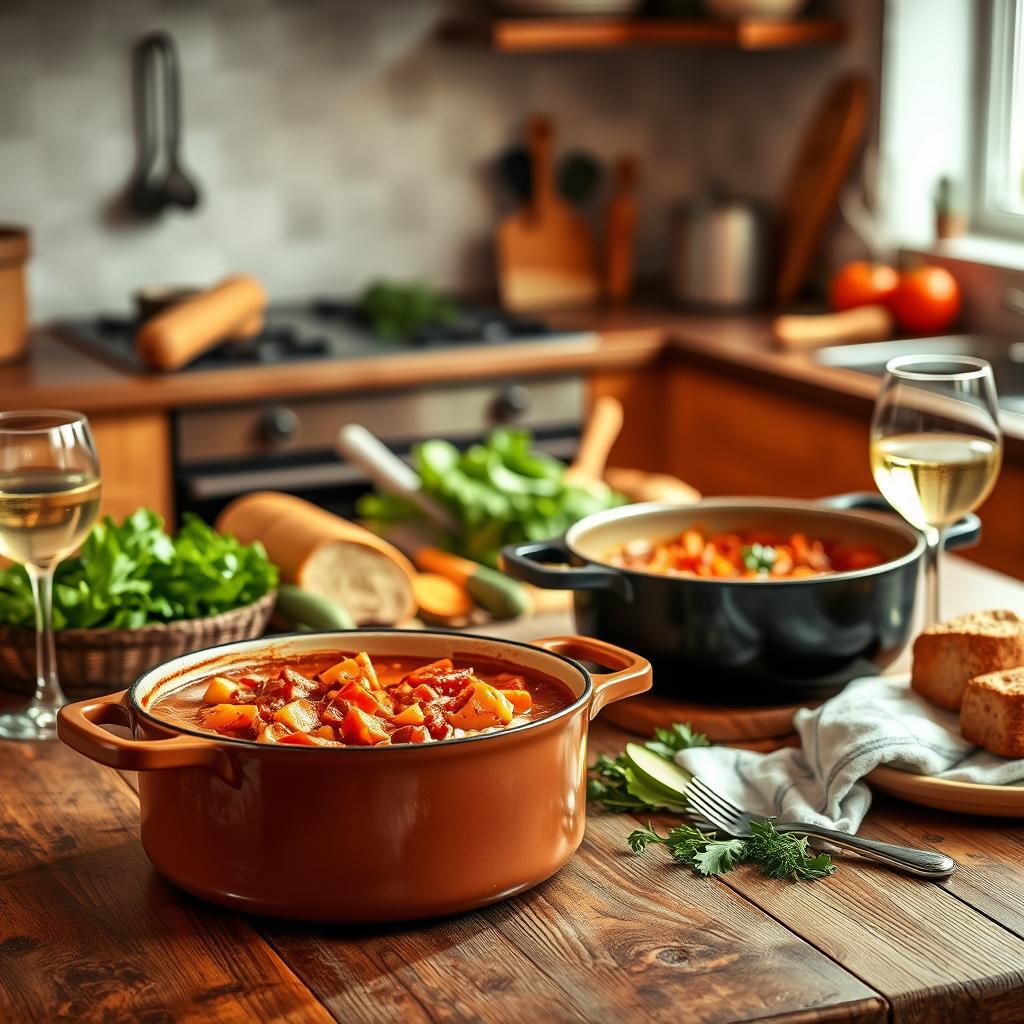
I rely on my Dutch oven, cast-iron pan, and Instant Pot to make dinner fast. These tools make cooking quick and clean-up easier. I focus on meals that take 30 minutes, tasty skillet dishes, and Instant Pot favorites to keep evenings smooth.

One-Pot Meals for Busy Moms

High-protein, low-effort dinner ideas

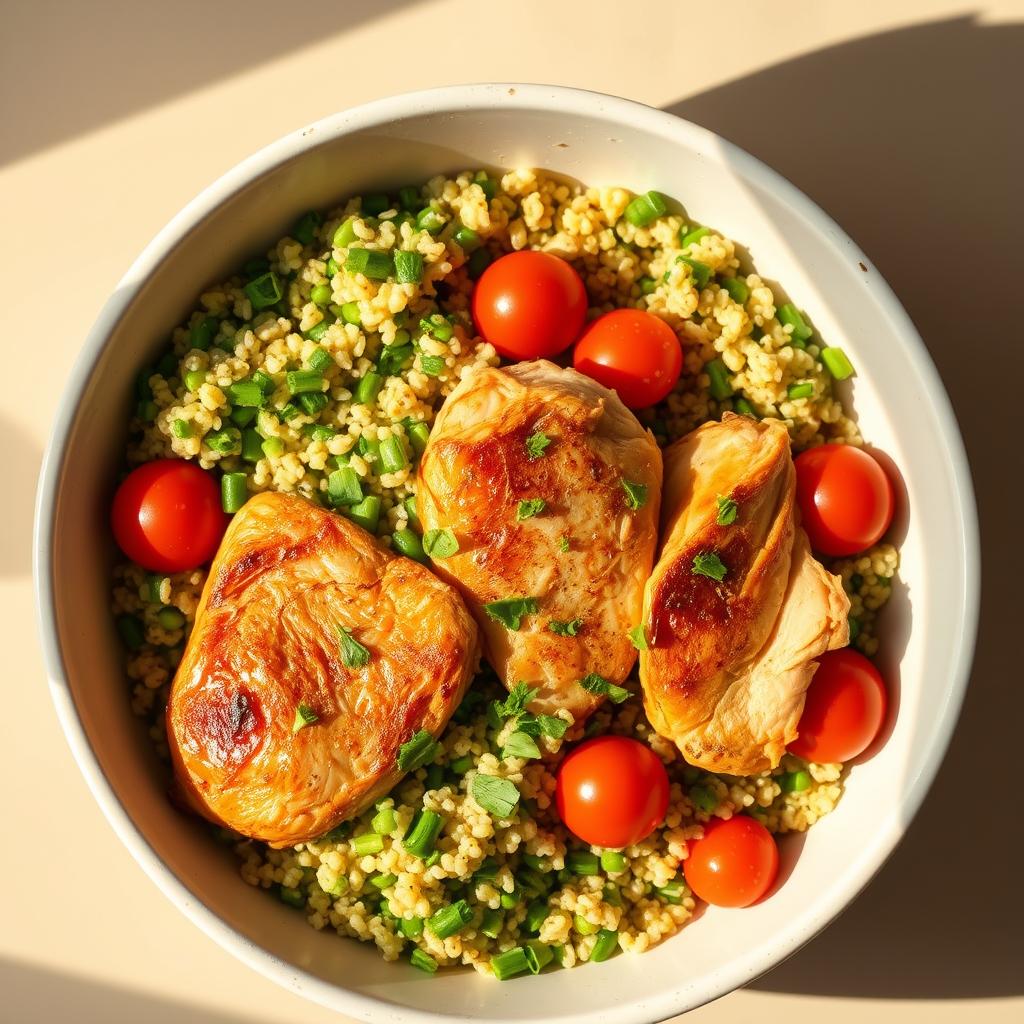
For a meal with about 30 grams of protein, I go for skillet lemon-garlic chicken with quinoa and broccoli. First, I brown the chicken, then add quinoa and broth, and steam the broccoli on top. A bit of lemon and parsley makes everything taste fresh.

The turkey taco rice pot is a high-protein favorite of mine. I cook turkey with onions and spices, mix in brown rice, tomatoes, and corn, and garnish with cilantro and Greek yogurt.

When I want seafood quickly, I make shrimp and cauliflower “risotto.” I start with garlic, add cauliflower rice, peas, and shrimp, and top it with Parmesan and lemon zest. It’s a quick, 30-minute meal that’s both light and satisfying.

Family-friendly options kids actually eat

One-pot cheeseburger pasta is a hit where I swap in healthier pasta and lean meat, adding tomato sauce and a bit of cheddar. I slip in some spinach for good measure. Kids love it, and there’s no fuss at dinner.

My version of chicken noodle soup includes extra veggies like carrots, celery, and peas. I choose egg noodles or a whole-wheat pasta and brighten it with dill and lemon. It’s a comforting, nutritious bowl everyone enjoys.

BBQ chicken and sweet potato skillet mixes sweet and smoky. I combine sweet potato cubes with chicken and a lower-sugar BBQ sauce, adding coleslaw mix for crunch. This skillet meal quickly disappears at the table.

Vegetarian and dairy-free swaps that still satisfy

Chickpea coconut curry with spinach and tomatoes is creamy without dairy. I cook it with light coconut milk and spices, serving over brown rice. This dish is a favorite among my vegetarian and dairy-free recipes.

Lentil Bolognese pasta is filling and easy on the wallet. I cook lentils with marinara and pasta, finishing with basil. Nutritional yeast adds a dairy-free cheesy flavor.

For a quick vegetarian meal, I make tofu and veggie teriyaki. I brown tofu, add frozen veggies, and use a sauce of tamari, ginger, and sweetener. It’s perfect for a fast weeknight dinner.

Freezer-friendly picks for hectic weeks

White bean chicken chili is great for freezing. I make a lot, cool it, then freeze it in portions. It’s easy to reheat and fresh herbs brighten it up.

A turkey and vegetable stuffed pepper skillet is full of flavor and freezes well. I freeze it flat in bags for easy storage and quick thawing.

Hearty minestrone with quinoa is perfect for the freezer. I use low-sodium broth and add greens and herbs. It’s compatible with my go-to Instant Pot recipes, quick dinners, and pre-made freezer meals.

Healthy Cooking Techniques That Make a Difference

I use healthy cooking methods that boost flavor while keeping calories low. With smart tools and low-oil tips, I can handle busy nights smoothly. These techniques help me create balanced meals easily.

Sweat, simmer, and steam: extracting flavor with less oil

I start by sweating onions and veggies in a little oil with some salt, then cover them to keep the steam in. To add more taste, I use broth, white wine, or apple cider vinegar. This lifts the fond and adds depth without much oil.

For proteins, I simmer them softly to keep them juicy without needing thick sauces. Near the end, I add greens to steam right above the pot, which keeps their color and nutrients. For creaminess, I reduce the cooking liquid and add Greek yogurt after turning off the heat.

Smart carb strategies: whole grains, legumes, and veggies

I pick whole grains like quinoa and brown rice for their fiber and energy. I also use beans and whole potatoes to help feel fuller. This way, I can cook everything in one pot without extra work.

I add lots of non-starchy veggies to make meals bigger without many calories. Using these methods, my dishes are both tasty and filling. Instead of butter, I rely on textures to keep things interesting.

Portion control with ladles, bowls, and meal-prep containers

I use a 1-cup ladle for even servings and measure oil with a teaspoon. My 28–32 oz bowls are great for making sure I eat lots of veggies, some protein, and a bit of starch. Simple tools like these keep my eating on track.

For lunches, I pack leftovers in 2-cup containers. Adding lemon, vinegar, or herbs at the end enhances the taste. Using these portion tips makes my daily cooking routine smooth.

My 20-Minute One-Pot Recipe Frameworks

I use simple formulas that change based on what’s in my pantry. These methods help me cook fast meals. I stay around 450–600 calories and make sure each serving has enough protein, fiber, and low sodium.

Framework 1: It’s all about mixing protein, grains, and green veggies in one pan. I quickly cook chicken, shrimp, or tofu. Then, I mix in quinoa or rice with low-salt broth. After 10 minutes, I add broccoli or peas and top it off with lemon and herbs. This is a top pick for a speedy meal.

Framework 2: This involves pasta, lean meat, and a tomato base. First, I cook turkey or heat beans. Then, I add pasta and tomatoes into the mix. The dish is simmered until perfect and finished with Parmesan. These templates make creating different meals a breeze.

Framework 3: For a quick stir-fry, I cook tofu or shrimp, then add frozen veggies. I make a simple sauce and simmer it all together. Lastly, I warm up cauliflower rice in the same pan. This keeps cleanup easy.

Framework 4: I start with onion, carrot, and celery for a fulfilling soup. Next, I put in beans, grains, and broth and cook. I finish with greens and lemon, adjusting the taste as needed. This way, I can enjoy different flavors without extra effort.

Framework 5: For a speedy curry, I cook onion with spices, then add meat or chickpeas and veggies. After simmering, I add lime and cilantro. Sometimes, I use an Instant Pot for quicker meals.

To cook faster, I slice proteins thinly, pick small pasta, and have pre-cooked grains ready. These strategies ensure my meals are quick, stress-free, and always tasty.

Time-Saving Meal Prep Tips I Swear By

Meal prep for moms is a small routine that makes dinner smooth and healthy. A simple plan, clear tools, and fridge organization turn busy nights into successes.

Sunday prep shortcuts that pay off all week

On Sundays, I have a prep checklist: I wash and chop onions, peppers, carrots, and celery. I portion them into zip-top bags. I also cook quinoa or brown rice, and roast mixed vegetables.

I make garlic-ginger paste and chili-lime marinade for easy meals. For snacks, I divide berries and nuts into portions. Plus, I have a bin with spice mixes for taco, Italian, curry, and chili nights, making dinners quick and guess-free.

How I batch-cook proteins for mix-and-match pots

I love batch cooking proteins. I grill chicken, simmer lentils, and hard-boil eggs using an Instant Pot or stovetop. I also prepare slow-cooker shredded chicken with seasonings for various dishes.

I store proteins in 3–4 ounce containers for quick dinners. This way, I quickly mix flavors and manage portions.

Labeling, storing, and reheating for peak freshness

I use clear glass containers and label them with painter’s tape and a Sharpie. I ensure food cools within two hours, keep the fridge cold per USDA, and use or freeze cooked food in 3-4 days.

To reheat, I warm soups and stews on the stove with broth. Pasta likes a bit of water, and rice revives in the microwave with a wet paper towel. I only reheat single servings to avoid spoilage.

For freezing, I lay food flat in zip bags to thaw quicker. I keep an inventory on the freezer door and use the oldest items first. This keeps my meal prep easy and the fridge organized.

Conclusion

One-pot cooking keeps my meals even, my portions just right, and my sink empty. This simple method helps me lose weight without taking over my night. With these tips, I cook easy, healthy meals that don’t feel like shortcuts.

I start with basics from the pantry and fridge, then choose a quick recipe to make twice a week. By changing between high-protein, kid-friendly, vegetarian, and meals you can freeze, everyone’s happy. Using less oil, choosing whole grains, and serving with a ladle help keep things tasty and healthy.

To make weeknights smoother, I stick to a simple plan: pick a pot, add meat or beans, throw in veggies, and flavor with herbs and lemon. This routine makes evenings less hectic and keeps me on track. Plus, these tips mean hardly any dishes to wash, so I’m more likely to keep it up.

Next, I’m planning to cook three one-pot meals this week with what I have at home, tag leftovers for later, and warm them up for quick meals. This strategy improves my energy, lowers stress, and fills the table with healthy meals. They support my weight loss and work well for a busy week.

Lentil & Spinach Curry recipe

Lentil & Spinach Curry – Iron-Rich Freezer Meal for Postpartum Recovery

Discover a nourishing Lentil & Spinach Curry recipe perfect for postpartum recovery. Easy to

I crafted this Lentil & Spinach Curry to ease postpartum meal prep. After giving birth, my body craves constant energy. This is vital for nursing, healing, and resting. Curry is my go-to for quick, nutritious meals during these busy times.

Many cultures offer new moms warm foods like soup and curry. These meals are easy on the stomach and full of good stuff. They’re packed with iron, protein, and fats. It’s perfect for late-night feedings.

Prepping curry in advance helps me immensely. I freeze portions for times when I need a comforting meal fast. Whether it’s Instant Pot or slow cooker curry, my aim is simple: wholesome food that’s easy to make.

My approach is both smart and beneficial. Lentils and spinach provide iron, while coconut milk adds creaminess. These iron-filled meals are a boon for any new mom. They offer energy with minimal kitchen time.

In this guide, I’ll show you my freezer strategies and favorite recipes. It all begins with a hearty curry. This dish is a gesture of self-care that keeps me fueled and focused.

Why I’m Making Postpartum Nutrition a Priority

I’m focusing on my postpartum nutrition because healing, milk supply, and staying energized are crucial. They all relate to my diet. Since hospital stays and time off work are short, I pick meals that rejuvenate me. I depend on easy, nourishing foods that are quick to warm up and easy to eat.

Higher nutrient needs after birth (especially while breastfeeding)

My body needs to heal, regain iron, and balance hormones after giving birth. When nursing, I need an extra 500 calories daily in the early stages. I include protein, fiber, and electrolytes in my diet for better digestion and constant energy. Foods that are simple to eat and gentle on my stomach help me recover, even if I eat them late at night.

How “warming” meals support digestion, hydration, and recovery

Warming meals like broth-based soups make me feel better. They’re comforting, keep me hydrated, and help my body absorb nutrients. Bone broth, with its collagen, minerals, and hydration, is especially good. And, I can easily reheat these meals, ensuring I don’t miss eating even when I’m exhausted.

Traditional wisdom: soups, stews, and curries for healing

I’m inspired by cultures that cherish warm, rich foods. I love Chinese chicken soup with ginger, Korean miyeok-guk, and Mexican caldo de pollo. They’re my go-to recovery foods. These soups, stews, and curries provide comfort and nutrients without much work.

The Postpartum Benefits of an Iron-Rich Lentil & Spinach Curry

This bowl gives me steady energy and gentle nourishment when I need it. It’s an iron-rich curry that fits into my routine, freezes well, and tastes great. It helps me stay hydrated with its warmth, and its flavors are both bright and soothing.

Plant-based iron plus vitamin C for better absorption

Lentils and spinach are great for iron, and I always add them. I also add tomato, lemon, or bell pepper to up the vitamin C. This helps my body absorb the iron better and keeps the flavor fresh.

Protein, fiber, and electrolytes for energy and milk production

A good scoop of this curry covers the need for high-protein postpartum meals. Lentils add protein and fiber, making me feel full longer. Adding coconut milk or broth turns it into a hydrating, electrolyte-rich soup. It gives me energy and supports milk production for my baby.

Gentle-on-the-gut cooked veggies for easier digestion

The slow-simmered veggies in this curry are easy on the stomach. They’re soft and kind to a healing gut, and the spices are mild. Eating warm bowls like this helps me get enough nutrients, drink more fluids, and aids my recovery.

Lentil & Spinach Curry recipe

I love this dish for its steady energy and comfort. It’s rich in flavor but easy to make, even when you’re tired. You can switch it up with coconut milk or bone broth, keeping the cozy feel.

Ingredients that nourish

I pick red or brown lentils, baby spinach, and choose between coconut milk or bone broth. The curry starts with ginger and garlic for warmth. Then, I add onion and lemon for a fresh touch.

This meal draws from postpartum traditions, using easy-to-digest lentils, iron-rich greens, and filling coconut milk. Bone broth adds soothing electrolytes.

Warming spices that soothe

I start the flavor with a turmeric cumin cinnamon blend, adding black pepper to highlight the turmeric. Coriander and a bit of chili add flavor without too much heat. The goal is a nurturing, not spicy, dish.

These spices cook gently, giving a sweet and earthy taste. It’s a comforting bowl, made with care.

Simple method for any kitchen

On the stove, I sauté onion, ginger, and garlic, then add spices, lentils, liquid, and salt. After simmering, I mix in spinach and finish with coconut milk or broth.

Using an Instant Pot, I sauté aromatics, add spices, lentils, and liquid, and cook quickly. Then, I add spinach and coconut milk. In a slow cooker, I sauté for flavor, then slow cook until everything’s soft and blended.

Any method brings a fragrant, comforting dish. It’s rich in protein and iron, with a hint of spice. Perfect for a weeknight.

Freezer Meal Strategy: Prep Once, Eat Many Times

My postpartum freezer strategy focuses on meals like soups, stews, and curries. They’re quick to reheat and taste great the next day. I make a double batch of Lentil & Spinach Curry. Then, I eat half for dinner and freeze the rest to save energy on busy days.

For real-life ease, I freeze meals in single servings. This way, I can easily get a meal for breakfast, lunch, or a late snack. After cooling the curry, I pack it in airtight silicone Souper Cubes or freezer bags. I also make sure to label each with the dish’s name and reheating instructions.

Lentil-based curries last 3–6 months in the freezer. This is perfect for new moms like me who can’t cook every day. I organize the freezer to use the old meals first and keep easy meals ready.

When it’s mealtime, I either thaw food in the fridge overnight or use the microwave’s defrost setting. Then, I reheat it on the stove with a bit of broth. This method keeps my kitchen stress-free and ensures I always have something to eat when I’m hungry.

Make-Ahead and Batch-Cooking Tips I Swear By

I make a big pot of this curry every Sunday, so I have meals ready on busy nights. I let it simmer, then I cool it down, put it in containers, and freeze. It’s easy, quick, and helps me eat well after having a baby, while keeping my energy up.

I use containers that are easy to open with one hand. For individual servings, I like Souper Cubes because they let me thaw only what I need. This way, preparing food is easier and less stressful, especially for new moms.

I make sure the curry cools completely before freezing it. I put it in glass jars, dishes with lids, or silicone trays that seal tight. This helps prevent ice from forming. I also label everything clearly with the date and contents, and whether to heat it on the stove or in the microwave. This helps me keep track of what I have and use it within 3 to 6 months.

To thaw, I either put a serving in the fridge overnight or I defrost it in the microwave just until it’s easy to heat up. If I’m in a hurry, I put a frozen cube in a pot, add a little broth, and warm it up until it’s hot. These steps keep the food tasting good and make sure it’s safe to eat after having a baby.

Here’s what I always have ready: Souper Cubes for portioning, quart-sized freezer bags to save space, and a bold marker for labeling. With a slow cooker or an Instant Pot, I can make double the amount without much extra work. This is a great way to prepare meals ahead of time, which is very helpful for new moms.

How I Customize This Curry for Healing and Convenience

I enjoy making curry fit my needs after having a baby. I use warm spices, coconut milk, and tender veggies for comfort. Adding little changes lets me adjust to my hunger easily.

How I Customize This Curry for Healing and Convenience

Protein boosts: chickpeas or shredded chicken for extra calories

For plant protein, I mix in chickpeas with lentils. It gives me fiber too. If I need more energy, I add shredded chicken cooked in bone broth. This gives me collagen. I make portions to quickly grab during baby feedings.

Iron helpers: add tomato, lemon, or bell pepper for vitamin C

I boost iron from lentils and spinach with vitamin C. I do this by adding crushed tomatoes, lemon, or bell pepper. These ingredients make the curry taste fresh and help my body use the iron better.

Carb sides that stabilize blood sugar: rice, quinoa, or sweet potatoes

I balance my energy with sides like rice, quinoa, or sweet potatoes. Combining these carbs with fats and proteins helps keep my blood sugar stable. I prep these ahead, freeze in portions, and reheat for a soft texture.

I keep proteins, veggies, and carbs ready in separate containers. This lets me create varied meals easily, like chickpea curry one day and chicken curry the next. It keeps meals interesting and fits my dietary needs.

More Postpartum-Friendly Soups, Stews, and Curries I Love

I lean on postpartum soups and stews because they’re warm and easy to reheat. They’re perfect when I’m short on sleep. I always have different kinds in my freezer. This way, meals are always exciting and easy on my stomach.

Split pea, red lentil dal, and veggie-packed bean soups that freeze well

Every Sunday, I whip up a big batch of split pea soup in my Instant Pot. Then, I divide it into silicone trays for later. I also prepare red lentil dal with spinach, ginger, and tomato, perfect for adding iron and fiber.

I love mixing it up with black bean or three-bean soups full of carrots and bell pepper. Each bowl is hearty and full of flavor.

Broth-based comfort: bone broth hacks and creamy coconut soups

A bone broth soup is my go-to for electrolytes and a comforting base. I add noodles, shredded chicken, or rice to keep it interesting. For a creamier touch, I enjoy coconut soups like carrot-ginger or tomato-coconut. They’re just as smooth after freezing.

I make sure to label each container. That way, I know exactly what to do when I’m too tired to think.

Dump-and-freeze ideas for tikka masala, korma, and chana masala

I also prepare curry kits that I can just dump and freeze. These kits include onions, garlic, spices, and sauces. Favorites like tikka masala and korma are perfect in the slow cooker. Chana masala freezes well too.

Keeping rice or naan ready makes these meals easy to serve. No extra work needed.

Conclusion

My aim is simple: enjoy warm, nutritious food that boosts my healing and energy. The Lentil & Spinach Curry is perfect. It’s full of iron, protein, and soft spices. This recipe fits well for breastfeeding moms and is easy to digest. It’s the comfort food I crave during the post-birth period.

When prepping freezer meals for new moms, I think like I’m planning my week. I cook a large batch, divide it, cool, label, and then freeze. This way, I can easily warm up a portion without having to decide what to eat. Warming dishes like curry, dal, or soup helps me meet my nutrition and hydration needs. So, I can focus more on resting and caring for my baby.

I prefer broth- or coconut-based dishes with slow-cooked veggies and mild spices. For storage, I use Souper Cubes or glass containers, clearly marking the date. Then, I thaw them in the fridge or microwave. This makes my post-birth meals easy and routine.

When I want to switch things up, I add dishes like split pea soup, chana masala, and creamy coconut stews to the mix. Along with Lentil & Spinach Curry, these recipes keep meals interesting but simple. By establishing small, consistent habits, I support my breastfeeding diet with delicious, ready-to-eat meals.

Avocado Deviled Eggs recipe

Avocado Deviled Eggs – Creamy Low-Carb Snack Packed with Protein for New Moms

Discover a healthy twist on a classic with my Avocado Deviled Eggs recipe -

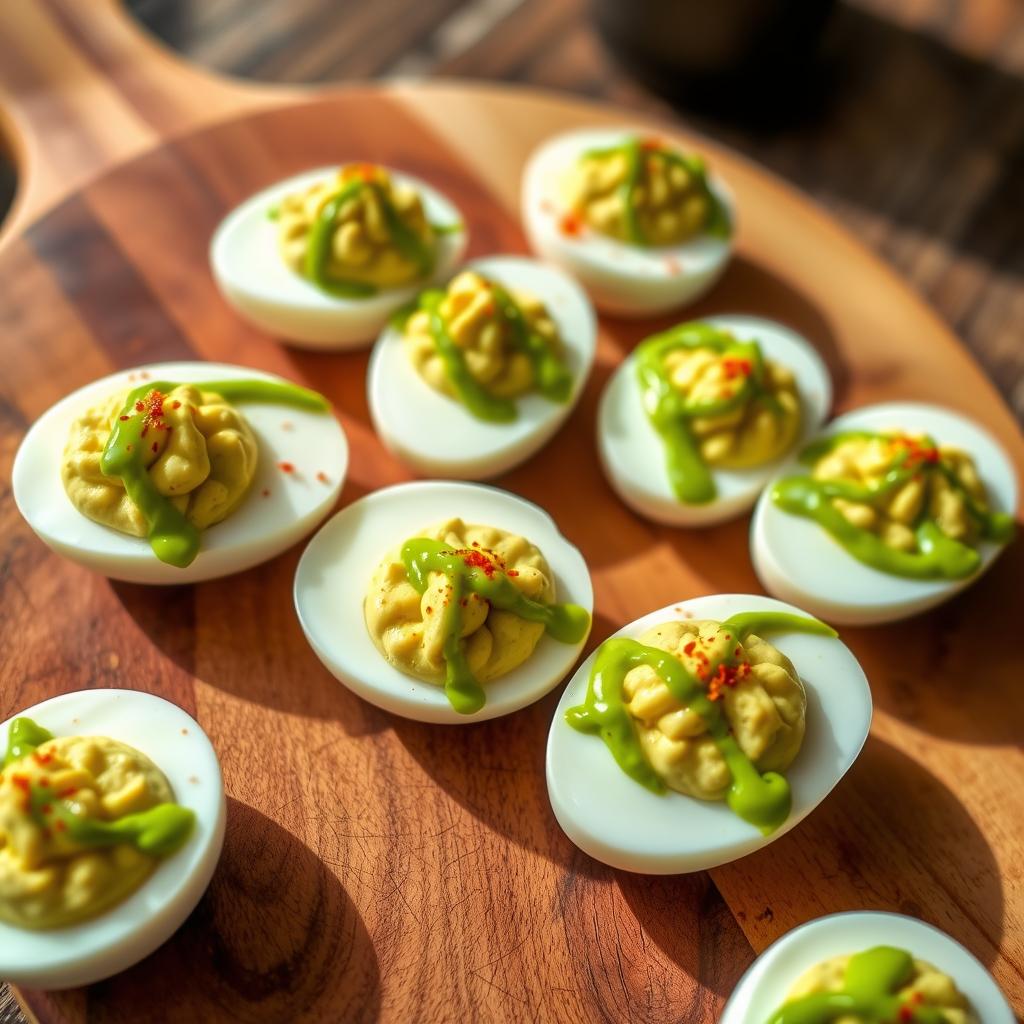
I rely on this Avocado Deviled Eggs recipe for a low-carb snack. Each bite is creamy and savory, giving off guacamole deviled eggs vibes. They’re perfect for busy days and are my go-to high-protein postpartum snack and keto appetizer.

Karly Campbell inspired this recipe. Each egg has about 67 calories, with 4g of protein and 5g of fat. It contains roughly 2g of carbs and 1g of net carbs. This version uses avocado, egg yolks, lime juice, and sour cream, seasoned with spices.

Sometimes, I crave more tang. Then, I go for mayonnaise, mustard, and the zest of pickle brine, finished with chives. Both versions are quick to prepare. I use a quick boil method or an Instant Pot for easy peeling. Adding lime or lemon juice helps prevent browning.

Meal prep is a breeze. I cook eggs up to 3 days ahead, keep halved whites for a day, and prepare the filling early too. A reader suggested adding jalapeño mustard for a spicy kick. These eggs are great for lunch, parties, or days when you need a quick, healthy boost.

Why I Love These Creamy, Low-Carb Deviled Eggs for New Moms

I make these keto-friendly deviled eggs for energy and a peaceful kitchen. They’re perfect for postpartum and low-carb snacks. They also work great when friends come over. They’re soft, tasty, and quick to make.

Protein-packed, satisfying, and ready in about 15 minutes

Starting cold, then boiling makes cooking eggs quick. Just boil, cover, turn off the heat, and let them sit. Then, cool them in ice. With an Instant Pot, they peel easily. Each half has a good mix of protein and fat to keep me full without crashing.

Healthy fats from avocado to keep me fuller longer

Mixed with ripe avocado, the yolks become creamy. This keeps me going through feedings and chores. Adding lime keeps the color bright and fresh. It’s a perfect pick for filling low-carb snacks.

No-mayo option that still tastes rich and indulgent

I use sour cream instead of mayo for a lighter texture. It still tastes rich. For a classic taste, I might use keto mayo and mustard or pickle juice. These alternatives make the eggs taste great without mayo.

Great for on-the-go snacking and postpartum meal prep

I boil eggs, mix the yolk with avocado, and keep it in a sealed bag. The egg whites are chilled separately. When I’m hungry, I just pipe the filling into the whites. This keeps snacks ready for any time, which is great for busy new moms.

Key Ingredients for Flavor and Nutrition

I use simple, fresh ingredients to make these special bites. I always pick ripe avocados, remembering that their texture and color are key. I also grab citrus to add some zing, and spices to give the classic taste of guacamole deviled eggs a fresh twist.

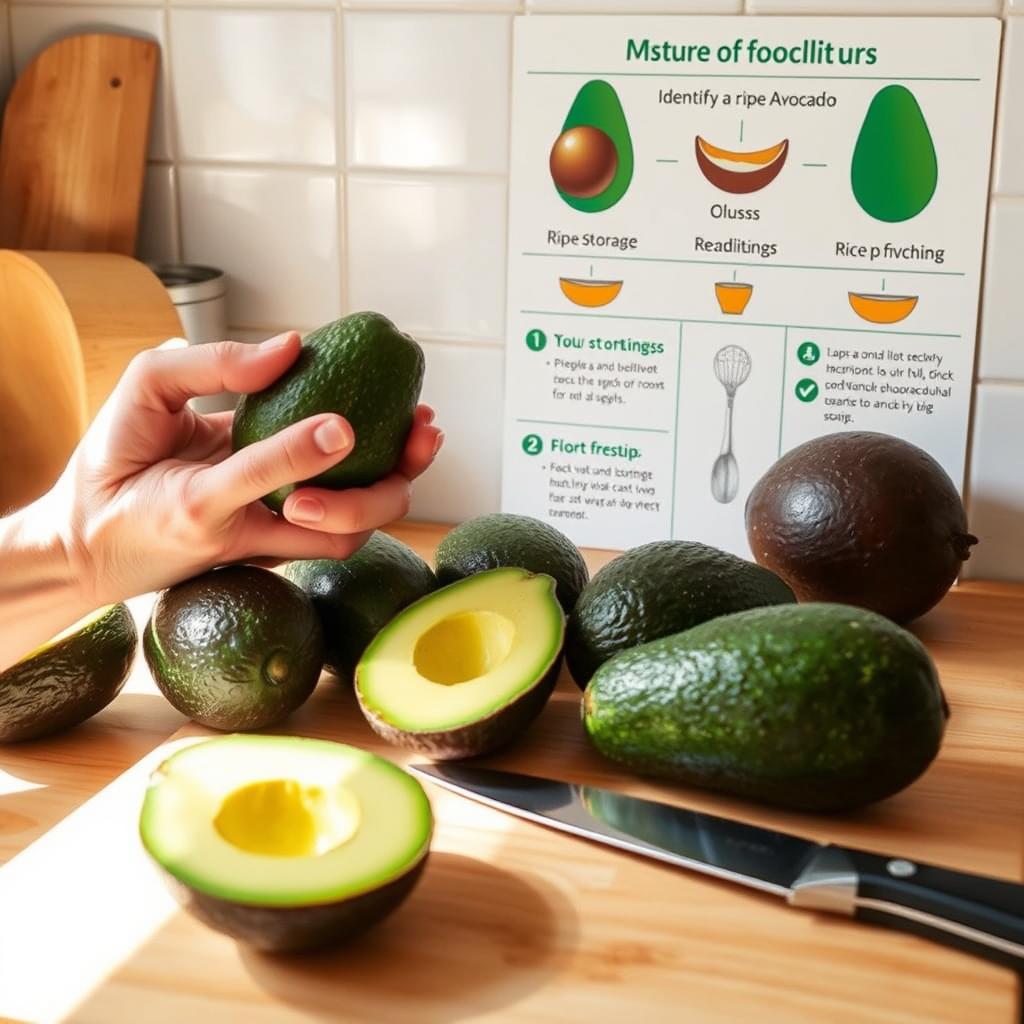
To start, I use 6 hard-boiled eggs and 1 ripe avocado. I look for an avocado that’s soft when squeezed, has deep green skin, and is green under its stem. These signs help me pick the best one and avoid any bitter flavors. Then, I mash the yolks and avocado together until they’re smooth.

I add fresh lime juice to brighten the flavor and keep everything looking fresh. Just a little lime juice makes a big difference, making each bite smell amazing.

For extra creaminess, I mix in 2 tablespoons of sour cream instead of mayo. If I’m in the mood for something richer, I’ll use keto mayo or regular mayo. Both make the mix velvety and they stick to the egg whites well.

The seasoning makes the dish stand out. I mix in onion powder, garlic powder, a bit of salt, and just enough chili powder. I also add cilantro for a fresh taste. This combination makes the eggs taste lively and perfectly balanced.

I sometimes add a teaspoon of pickle brine or vinegar for some tang, or mustard for zip. Chives or smoked paprika on top add color and warmth without overpowering the dish.

These choices ensure the deviled eggs have a creamy texture, layered flavors, and vibrant color. With tips like using ripe avocados and a touch of lime to prevent browning, the result is always fresh and satisfying.

Step-by-Step: How I Make Perfect Hard-Boiled Eggs and Filling

I make sure the avocado egg filling is smooth and vibrant. My method ensures no-fail hard-boiled eggs that peel easily. It also keeps the serving tray neat for gatherings.

First, I put eggs in a pot and cover them with cold water. Once it boils, I cover the pot, turn off the heat, and let them sit for 12–15 minutes. After resting, the eggs go into an ice bath for 5 minutes. This helps them peel easily, especially under a gentle water stream.

For quicker peeling on busy days, I use an Instant Pot or steam the eggs for 11 minutes. Then, I give them an ice bath and peel them carefully.

I cut the eggs in half and remove the yolks. In a bowl, I mix the yolks with ripe avocado, lime juice, and seasonings until smooth. I let the filling sit for 10 minutes before tasting. This lets the flavors meld.

If the mix is too thick, I add a bit more sour cream or mayo. The aim is to have a creamy filling that is perfect for piping. It should be smooth and hold its shape.

I put the filling back into the egg whites. For deviled eggs, I use a bag to pipe the mixture neatly. Final touches include chili powder and herbs. I keep the eggs chilled and serve them within 3 hours.

Avocado Deviled Eggs recipe

When I need a low-carb appetizer, I go for this Avocado Deviled Eggs recipe. It’s light yet creamy, making 12 halves from 6 large eggs. This makes it perfect for snacks or a quick bite. The recipe, inspired by Karly Campbell, skips mayo but keeps everything creamy.

The ingredients include 6 hard-boiled eggs, 1 large ripe avocado, and juice from half a lime. You’ll also need 2 tablespoons of sour cream and 1 tablespoon of minced cilantro. Plus, there’s 1 teaspoon each of onion powder, garlic powder, salt, and 1/2 teaspoon of chili powder for topping. First, peel and halve the eggs, then remove the yolks. Mash the yolks with the avocado, lime juice, sour cream, cilantro, and seasonings until smooth. Add more sour cream if needed. Then, fill the egg whites and top with chili powder and extra cilantro.

Each deviled egg offers about 67 calories, 2g carbs, and 4g protein. They’re a perfect fit for a low-carb diet. If you’re preparing ahead, keep the filling in a zip-top bag for 1–2 days. Then, pipe it into the egg whites right before serving time.

If you prefer the classic taste, there’s a mayo version too. This one calls for 12 hard-boiled eggs, 2 avocados, and 2 tablespoons of keto mayo. Add 1 tablespoon yellow mustard, 2 teaspoons of pickle brine, and seasonings. Mash, mix, fill the eggs, and chill before serving. Each half is roughly 74 calories.

Avocado Deviled Eggs recipe

Both recipes are great for transporting and suit my keto needs without losing their fresh taste. Lime juice keeps them colorful, and they’re best served cold. These are my quick, clean pick for a low-carb, mayo-free appetizer.

Smart Tips to Keep the Filling Green and Fresh

I treat avocados carefully because air turns them brown. To keep deviled eggs green, I use acid, cold, and cover them well. These tricks help whether I’m having guests over or prepping for the week.

Use fresh lime and minimize air exposure

Lime juice adds taste and stops the browning. I stir it in and get rid of any air. If I need more acid, a bit of lemon works. But, covering it well is key to avoid brown avocados.

Press plastic wrap directly on the surface when storing

I stick plastic wrap onto the filling to block air. For egg halves, I cover them carefully. This keeps the eggs green and the texture creamy.

Chill thoroughly and serve within about 3 hours for best color

I keep them cold, under 40°F, in a sealed container. I don’t leave them out or freeze, as it ruins the texture. For events, I serve the eggs cold and within 3 hours for best taste.

Assemble just before serving; store filling in an air-tight bag

When making ahead, I boil and separate eggs for up to 3 days. I put the filling in a bag, remove air, and chill it. Right before serving, I pipe it out. This keeps the eggs bright and ready.

Choosing and Storing Avocados Like a Pro

I always aim for creamy, bright green avocado filling. First, I pick ripe avocados and use ripening tips. I look for avocados that are firm but give in slightly when pressed, and I check the stem before buying.

Choosing and storing avocados like a pro

Check ripeness by gentle squeeze, color, and stem test

To test for ripeness, I gently press the avocado. It should be slightly soft but not mushy. The skin should look dark green. A quick stem check helps too: green means ready, yellow means wait, and brown means it’s too late.

Ripen faster by storing near bananas; refrigerate when ready

If the avocados are hard, I put them near bananas. Bananas help avocados ripen faster, especially if you put them together in a paper bag overnight. Once ripe, I keep them in the fridge. This keeps them just right for a day or two.

Avoid overripe avocados to prevent bitterness and browning

I avoid mushy avocados and those that have brown under the stem. Overripe avocados can become bitter and turn brown quickly. Choosing the right avocados and storing them properly makes a big difference. This keeps their taste and color fresh.

Nutrition, Macros, and Low-Carb Wins

I track what matters so every bite fits my day. The avocado deviled eggs help me log deviled eggs’ macros. They keep me on track with low-carb snack calories and keto nutrition facts. This method helps me maintain a high-protein, low-carb diet for steady energy.

Each deviled egg half has about 67–74 calories, around 4g protein, and 5–6g fat. This fits perfectly with the macros I aim for. It’s great for a quick bite or a needed boost after a long morning.

Total carbs are about 2g per half, with roughly 1g fiber, making net carbs about 1g. These facts make sticking to my keto plan easy. I count one deviled egg as half a serving in my tracker.

There’s about 94–108mg cholesterol per half. Sodium varies with the seasoning, around 46–228mg. Adding lime gives a fresh taste but doesn’t add calories. Using keto mayo helps me maintain a high-protein, low-carb balance.

Serving Ideas, Make-Ahead, and Flavor Variations

I start with a tray that’s both festive and simple. These appetizers stand out when I pipe the filling neatly. Adding smoked paprika as garnish brings color. They fit well in any keto platter and disappear quickly because they’re so popular.

For a classic touch, I sprinkle chili powder on each egg. Then, I top them with cilantro or chives. These herbs contrast with the creamy filling, making the eggs look fancy without much effort.

If guests like spicy food, I offer jalapeño mustard deviled eggs. Or, I might use smoked paprika for an extra kick. Both choices match the avocado base and keep the taste strong but pleasant.

To keep everything looking fresh, I have a make-ahead strategy. I boil the eggs up to three days before. Then, I store the egg whites by themselves for no more than a day. I prepare the filling right before serving, cover it with plastic, and assemble them within three hours. This way, they stay fresh and crisp.

I also serve the eggs with a green salad or Lemon Herb Chicken Salad. To complete the table, I add keto-friendly dishes like Bacon-Wrapped Asparagus and Smoked Salmon Blinis. These appetizers are prepared in advance. They help make the tray look more elegant and fit for a keto party.

Conclusion

My Avocado Deviled Eggs recipe is a delightful snack. It combines creamy avocado with hard-boiled eggs and sour cream or keto mayo. Quick to make, it’s a luxurious treat. Perfect for moms on a low-carb diet, it’s both delicious and energizing for busy days.

To keep the filling’s color bright, I use fresh lime and store it airtight. Pressing plastic wrap directly on it prevents browning. Assembling it within 3 hours keeps everything fresh. This trick is part of my keto snack routine, making it easy to prepare in advance.

Choosing ripe avocados is crucial, so I check for slight softness and look under the stem. The eggs need to be boiled, chilled, peeled, then mashed with the avocado. Adding pickle brine or mustard and topping with chives or smoked paprika makes them extra tasty.

Low-carb deviled eggs should be easy and tempting. This recipe is both, offering a clean, satisfying taste. It’s versatile for any setting, whether a casual cookout, a stroller walk, or serving friends. It’s always a hit, packing a protein punch.

No-Cheese Zucchini Lasagna

No-Cheese Zucchini Lasagna – Dairy-Free Low-Carb Dinner for Postpartum Weight Loss

Discover how to make No-Cheese Zucchini Lasagna – your go-to dairy-free, low-carb dinner ideal

I wanted a cozy bake that helped me feel light, fueled, and steady after birth. This No-Cheese Zucchini Lasagna ticks all the boxes. It’s a dairy-free dish that’s comforting and perfect for a low-carb postpartum dinner plan.

It’s a gluten-free zucchini lasagna. You can cut it cleanly, share with your family, and count on it for easy, nourishing meals that help lose postpartum weight.

I use proven techniques to make the layers stay and taste fantastic. I replace regular noodles with thin strips of zucchini lasagna, salt them to remove water, then dry them with high heat. For the sauce, I brown mushrooms, onions, garlic, and add a quality sugar-free marinara like Rao’s Arrabbiata. The result is a rich, umami-packed dairy-free lasagna that feels indulgent without the cheese.

When life gets hectic, planning is key. I prepare parts of the dish in advance, put it together when I have time, and bake it just before eating. With straightforward steps, a simple ingredients list, and the option to freeze, this method makes any evening special. It’s about flavor, nutrition, and real recovery.

Why I’m Making a Dairy-Free, Low-Carb Lasagna for Postpartum Weight Loss

I want dinners that keep my energy steady and make me feel full. That’s why I choose low-carb meals after giving birth that are still cozy and familiar. Making a wheat-free lasagna that feels like comfort food helps me manage my weight after baby. It also makes dinner simpler.

My postpartum goals and how low-carb dinners help me feel satisfied

My goals are simple: I want steady energy, less bloat, and to see progress. Eating dinners high in protein and veggies helps me feel fuller for longer. This way, I don’t get hungry soon after dinner.

Having leftovers is also key. If I can reheat a meal easily, I stay on track with my weight goals. It also saves me time on busy nights.

Swapping noodles for zucchini to reduce carbs without losing comfort-food vibes

I use zucchini noodles to lower carbs but keep the dish comforting. Thin slices prepped with high heat replace traditional pasta. This makes the dish filling without wheat.

This method works great for lunch the next day, too. Make sure the zucchini slices are dry before baking to maintain a good texture.

How I keep flavor high without cheese using umami-rich ingredients

To make up for no cheese, I focus on building flavor. I brown either ground beef or turkey thighs. Then, I add finely chopped mushrooms, onions, and garlic. A bold, sugar-free marinara like Rao’s Arrabbiata finishes the sauce off.

This sauce covers every layer, making the dish tasty without dairy. It feels indulgent while fitting my low-carb needs.

No-Cheese Zucchini Lasagna

I wanted to create a dish that’s both comforting and light. Choosing zucchini over pasta makes the meal both hearty and vibrant. By preparing it smartly, I get the delicious, low-carb lasagna texture. Plus, it tastes amazing on its own.

Key benefits: dairy-free, gluten-free friendly, and light on carbs

Dairy-free zucchini lasagna leaves me feeling great after eating—full but not heavy. Substituting zucchini for noodles also means it’s good for those avoiding gluten. And it’s light on carbs, so having a second helping is totally okay.

But missing the cheese doesn’t make it less tasty. I use protein, herbs, and a mushroom sauce for deep flavor. It’s a way to enjoy comfort food that’s both clean and balanced.

Texture tips: keeping the layers hearty and not watary

To keep the lasagna from getting soggy, I first salt the zucchini slices for 30 minutes. Then, I either grill them or broil them briefly. To remove extra water, I lay them on towels after cooking.

In a 9×13-inch dish, I layer the sauce and zucchini evenly, starting with the sauce. After baking, resting the lasagna for 10 to 20 minutes is key. This makes the slices come out perfect.

Flavor boosters: marinara quality, basil, garlic, and mushrooms

The right marinara is crucial. I use sugar-free Rao’s or its Arrabbiata version for a kick. This keeps the flavors sharp and clear.

To capture the essence of basil and garlic, I cook fresh garlic in a skillet, then add basil at the end. Sautéing mushrooms until they’re golden adds a rich, umami-packed mushroom sauce. These steps create a rich, savory taste that doesn’t need cheese.

Ingredients and Smart Substitutions for a Dairy-Free, Postpartum-Friendly Pantry

I make sure the pantry is simple, tasty, and light on carbs. It’s perfect for busy weeks and keeping energy steady. Everything is chosen for easy lasagna prep that fits a new mom’s tight schedule.

Zucchini “noodles”: how many to buy and why grilling or salting matters

To get enough zucchini noodles, I grab 1 large or 3–5 smaller ones, totaling 2 pounds. I cut them long and salt them for half an hour to remove water. Sometimes, I grill them or bake them high, then dry on towels to ensure they’re not wet.

Meat sauce base: ground beef or turkey thighs, garlic, and sugar-free marinara

I use 1 pound of ground beef or switch to turkey thighs for juicier lasagna. After browning the meat, I add garlic and mix in a jar of sugar-free marinara by Rao’s. The sauce thickens well, creating a solid layer that doesn’t make the lasagna soggy.

No-cheese creamy layer alternatives: dairy-free ricotta-style options and spinach

I mix dairy-free ricotta with thawed, squeezed dry spinach for a creamy, no-dairy layer. Tofu or almond-based creams are good choices. A bit of salt, lemon, and basil adds flavor without dairy.

Mushrooms for depth: finely chopped to boost umami and nutrition

I finely chop 8 ounces of cremini or white mushrooms and brown them post-meat. This adds a rich mushroom taste, boosts minerals, and keeps texture meaty minus the fat.

Make-ahead and freezer tips pulled from family-tested methods

I grill the zucchini a day before and layer them with paper towels, changing them as they get damp. I divide the meat sauce for easy layering later. Lasagna can be prepped ahead, chilled overnight, or frozen for three months. Reheat it in the oven at 350°F or microwave on 50% power.

Step-by-Step: How I Build a Structured, Not-Soggy Zucchini Lasagna

I plan each step to make sure the lasagna comes out right. My strategy tackles making a cheeseless zucchini lasagna, stopping sogginess, and keeping the taste strong. I use high heat to cook the zucchini, prepare a thick mushroom meat sauce, and layer everything carefully.

how to make zucchini lasagna no cheese

First, I get the zucchini ready. I cut it longways about 1/4 inch thick using a mandoline, salt the pieces, and let them sit for a bit. To keep the dish from being watery, I either grill, broil, or bake the zucchini. After cooking, I lay the pieces on towels to remove extra water.

Next, it’s time for the sauce. I chop up mushrooms and cook beef until it’s nicely browned. Then, I cook the mushrooms in the beef juices until they’re dry. I add onions, garlic, and sugar-free marinara sauce, then put the beef back in to simmer. This creates a rich mushroom and beef sauce.

Now we build the lasagna. I start with a thin layer of marinara in a baking pan. Then I layer zucchini slices, a dairy-free spinach mix, and mushroom meat sauce. I repeat these layers, alternating the zucchini’s direction. I keep the layers light so moisture can get out.

I bake it at 350°F until it’s hot and bubbling all through. If it was in the fridge, I make sure it hits 165°F inside before I take it out. I don’t brown the top since it has no cheese. Sometimes, I give it a quick broil to color the top without drying it.

After baking, I let the lasagna rest on a rack for a while. This helps it keep its shape when cut. The flavors remain strong thanks to my careful preparation.

Time-Saving, Make-Ahead, and Storage Methods I Rely On

I rely on meal prep after having a baby to keep dinners easy and peaceful. My zucchini lasagna recipe can be made ahead to save time and reduce stress. It’s perfect for freezing and fits into our busy lives well.

Batch-prepping zucchini slices the day before with paper towel layers

I cook the zucchini slices one day before I need them. Then I store them right to keep them dry. I layer them in a container with paper towels in between and change the towels once they’re wet. This makes putting the lasagna together quicker and keeps the zucchini from getting soggy.

Pre-cooking and portioning the meat sauce for faster assembly

I cook the meat with garlic, mushrooms, and onions. Then I mix in a no-sugar marinara sauce like Rao’s. I cool the sauce and put it in containers. This way, when it’s lasagna time, I just heat up the sauce I need. It makes the lasagna easier to assemble and cook.

Assemble-ahead technique and baking from chilled or frozen

I put the lasagna together, then keep it in the fridge overnight. When ready to bake, I let it sit out for 30 minutes and heat the oven to 350°F. If there’s extra liquid, I take it out with a turkey baster. I bake it until it’s hot in the middle, which takes about 30 minutes or more from the fridge.

If baking from frozen, I make sure it’s well wrapped and freeze it for up to 3 months. When baking, I add about 15–20 minutes to make sure it gets hot all the way through. This method makes sure we always have a tasty, low-carb meal ready.

Leftover storage, gentle reheating, and freezer tips for new-mom schedules

I keep leftovers in containers for 3–4 days. For reheating, I warm them in the oven at 350°F or in the microwave on low to keep them soft. If I have too much, I freeze the leftovers for later. This plan helps me manage meals after having a baby.

To complete a meal, I serve the lasagna with a salad or keto bread. Because I prep the zucchini and sauce ahead of time, dinner is quick. It’s a great way to eat well without the extra carbs.

Conclusion

This No-Cheese Zucchini Lasagna recipe offers a dairy-free, low-carb dinner that’s still comforting. I replace noodles with zucchini. To keep the slices firm, I salt them and use high heat—either by grilling, broiling, or baking at 500°F. The sauce is hearty with ground turkey or beef, mushrooms, and Rao’s Arrabbiata sauce for strong flavor.

For a creamy layer, I use a dairy-free ricotta-like alternative mixed with well-drained spinach. This keeps the lasagna rich without needing cheese.

To build the lasagna, I start with sauce in a 9×13-inch dish, add zucchini, the “ricotta” mixture, and meat sauce. Then repeat the layers and finish with sauce on top. I bake it until the middle reaches 165°F and let it cool for 10–20 minutes. This helps the layers firm up for easy slicing.

For postpartum meal planning, I grill zucchini ahead of time and store it with paper towels. I also make the meat sauce in big batches to save time. Assembling the dish a day before makes it even easier. This recipe can also be frozen for up to three months. Adding extra baking time when cooking from frozen keeps things simple.

With these steps, this dairy-free and low-carb dinner suits my lifestyle. It’s delicious, fits into a busy schedule, and helps maintain a simple kitchen routine.

Cauliflower Fried Rice with Shrimp

Cauliflower Fried Rice with Shrimp – Low-Carb 15-Minute Dinner for Postpartum Weight Loss

Whip up my quick Cauliflower Fried Rice with Shrimp – a delicious low-carb meal

I was looking for a quick, cozy meal that would help me with my post-baby weight loss goals. I didn’t want to eat a lot of carbs. So, I made this Cauliflower Fried Rice with Shrimp. It swaps regular rice for cauliflower rice and packs a punch with Thai flavors. It’s like healthy takeout you can whip up any night.

My shrimp dish is ready in just 15 minutes because it uses smart shortcuts. It features pre-riced cauliflower, fast-cooking shrimp, and easy sauces. It’s flavored with garlic, ginger, tamari, lime, and a bit of sriracha. I also add zucchini and bell pepper, use fewer carrots, and top it off with basil, scallions, and peanuts for extra crunch.

Many fellow cooks helped shape my approach. Some prefer using coconut aminos or low-sodium soy to make it gluten-free. The shrimp cooks quickly, making this meal perfect for any busy night. A similar Thai dish I tried was both light and satisfying. It shows that choosing the right ingredients can support post-baby weight loss.

Here’s my one-pan method: I start by softening veggies that are low in carbs. Then, I cook the flavorful ginger and garlic. Next, I add the cauliflower rice and scramble some eggs directly in the pan. The shrimp goes in last. Finished with lime and basil, this dish is a flavorful, healthy option you’ll want to make over and over.

Why this quick, low-carb shrimp fried “rice” works for postpartum weight loss

I always pick this dish when I want a tasty meal that helps with weight loss after having a baby. It’s a quick option that gives you energy without feeling too full. Plus, it’s loaded with flavors from Thailand but still easy to make on a busy night.

Light on carbs, big on flavor: swapping jasmine rice for riced cauliflower

Using cauliflower instead of jasmine rice helps keep the meal light. I add flavors using garlic, ginger, lime, and basil. This dish is low in carbs, perfect for a diet plan that focuses on lean eating.

The addition of bell pepper and zucchini brings crunch without too many carbs. A little bit of carrots and some tamari or coconut aminos give it a nice, savory touch.

Balanced macros for satiety: protein-packed shrimp and eggs

Shrimp and eggs in this dish ensure you get plenty of protein, helping you feel full. This balance is key for losing weight after a baby, without feeling weighed down. I find that this keeps me fuller for longer, a great benefit of low-carb meals.

Adding garlic, scallions, sesame oil, and lime makes the dish both hearty and refreshing.

One-pan, 15-minute cooking to fit new-mom schedules

I rely on quick, one-pan recipes to manage mealtime during hectic evenings. Using pre-riced or frozen cauliflower rice makes the cooking process faster. This means the meal is ready in about 15 minutes, and you only have one pan to clean afterwards.

Being able to cook quickly reduces stress and keeps weeknights simple.

Gentle flavors with optional heat to match changing taste preferences

After having my baby, I found I preferred gentler flavors. I use tamari or coconut aminos, sesame oil, and lime for a smooth taste. If I’m in the mood for something spicier, I’ll add a bit of sriracha or a Fresno chile.

This approach allows for flexibility, making the dish tasty while still taking advantage of its health benefits. It’s easy to adjust the recipe to what I’m feeling like, thanks to its low-carb approach and quick prep time.

Ingredients and smart substitutions for a keto-lean, nutrient-dense skillet

I keep things straightforward and clean in the pantry. My ingredients for keto cauliflower fried rice focus on fresh tastes, quick cooking, and healthy veggies. These choices deliver the bold flavors of Thai basil fried rice, minus the carbs. And they’re simple enough for any weeknight.

Base and aromatics: riced cauliflower, garlic, ginger, scallions

Riced cauliflower makes up the base with three cups. I mix in garlic, ginger, and scallions. These add a takeout-like aroma without the carbs. Plus, they keep the texture light.

Sauces and seasonings: tamari or coconut aminos, sesame oil, lime, sriracha

I choose between coconut aminos and tamari depending on my mood. Tamari gives a gluten-free soy depth; coconut aminos add a mild sweetness. To end, I mix toasted sesame oil, lime juice, and sriracha. This combo softens and brightens each bite.

Veggie add-ins with lower net carbs: bell pepper, zucchini; go light on carrots

Bell pepper and zucchini are my go-to low-carb veggies. I only use a little finely chopped carrots for color and mild sweetness. This keeps the dish crunchy without adding too many carbs.

Protein choices: shrimp as the hero, with eggs for extra fullness

Shrimp is quick to cook and stays tender. I add between 12 ounces and 1 pound. Then, I mix in two scrambled eggs for more texture. This combo grabs the sauce well and makes the meal more filling.

Toppings that add crunch and freshness: basil and chopped peanuts

I top it off with Thai basil and chopped peanuts. The basil brings out the dish’s flavors, while the peanuts add a nutty crunch. It’s a perfect finish to the sesame oil stir-fry.

This keto-friendly cauliflower fried rice, with smart ingredient swaps, creates a skillet full of fragrance and flavors. Plus, it’s speedy to make and keeps an eye on health and macros.

Cauliflower Fried Rice with Shrimp

I make this shrimp stir-fry in just one pan. It’s quick like takeout but healthier and cooks fast. My secret is in how to make cauliflower fried rice that isn’t soggy. This way, the shrimp cauliflower fried rice stays crisp and tasty.

Prep shortcuts I rely on: pre-riced cauliflower and a quick pulse for veggies

I use pre-riced cauliflower from Green Giant or Trader Joe’s, which can be fresh or frozen. For extra veggies, I chop bell pepper and zucchini in the food processor. This method keeps the veggies firm and makes the dish quick and easy.

Stir-fry sequence for perfect texture: soften veg, add aromatics, then cauliflower

I start by heating sesame oil in a big skillet. First, carrots, zucchini, and bell pepper cook for a bit. After that, I add garlic and ginger until they smell great. Next, I mix in the cauliflower rice, add tamari and lime, and let it steam. This keeps everything tasting fresh and crisp.

Egg-in-pan technique: scramble and fold for fluffy bites throughout

I move the rice to one side and add two eggs. After scrambling them, I mix them into the rice. This adds richness to the dish without making it heavy.

Finish and brighten: stir in shrimp, lime, scallions, basil, and a touch of heat

I cook the shrimp till they’re just right. Then, off the heat, I add basil, scallions, more lime, and sriracha. Chopped peanuts on top add crunch. This finish makes the dish bright and full of flavors from the first bite.

Step-by-step: my 15-minute skillet method

I start by heating a large skillet over medium-high heat and adding 1 tablespoon of sesame oil. Quickly, I put in a bit of finely chopped carrots, some chopped bell pepper, and diced zucchini. I cook them for 1–2 minutes until they’re just right, making a great start for our meal.

Next, I add in minced garlic and fresh ginger, cooking them for just a short moment. Then, in goes 3 cups of riced cauliflower, which can be fresh or frozen. I season it all with tamari or coconut aminos and fresh lime juice, stirring to remove any extra moisture.

I move the rice aside to crack 2 eggs into the pan. I scramble the eggs until they’re set, then mix them into the cauliflower. This makes our dish fluffy and completes our dinner.

Then, I add the shrimp, cooking it until it’s perfectly pink and opaque. Once off the heat, I mix in basil, scallions, and a bit of sriracha for heat. I adjust the taste with more tamari, coconut aminos, or lime. To finish, I sprinkle chopped peanuts on top for a nice crunch.

To save time, I use pre-riced or frozen cauliflower rice and cook everything in one pan. Quick-cooking shrimp helps too. Coconut aminos give a sweet touch without gluten or soy. This dish has about 127 calories per serving and is packed with nutrients, making it a healthy choice for any meal.

Flavor variations and meal-prep tips for busy weeknights

I make the base simple to change it up quickly. My shrimp and cauliflower rice recipes start with cooking off moisture in a dry, hot pan. Then I add sauces and herbs. This helps the cauliflower rice stay perfect even after reheating.

Thai-inspired basil-lime profile vs. classic takeout vibes

For Thai basil cauliflower fried rice, I use garlic, ginger, lime, and lots of Thai basil. I keep the sriracha mild for just the right amount of heat, without adding sugar. For a classic takeout taste, I use sesame oil, low-sodium soy or tamari, and a bit of heat. I also add some peas and carrots for color.

Sauce swaps: coconut aminos, fish sauce, or low-sodium soy

I choose coconut aminos for a gluten-free, soy-free option; Big Tree Farms Bali is my go-to brand because it’s slightly sweet. A little fish sauce in stir-fry gives Thai dishes more depth. Using low-sodium soy or tamari helps control the salt and goes well with toasted sesame oil.

Make-ahead and reheat: fridge storage that keeps texture

I cook cauliflower rice until it’s dry. This keeps it firm for several days. I then store it warm in containers. For reheating, I either add a little water on the stovetop or toss it in a skillet with some oil.

Add-ins to rotate: peas, broccoli, or a touch of hoisin for sweet-savory

Sometimes, I add broccoli, peas, or a bit of hoisin for different tastes. I use hoisin in small amounts because it’s sweet. My recipes usually include 12 ounces to 1 pound of shrimp, two eggs, and one bag of riced cauliflower. This makes it easy to adjust for different variations of shrimp cauliflower rice.

Conclusion

My Cauliflower Fried Rice with Shrimp brings you the joy of takeout without the extra carbs. I use cauliflower instead of jasmine rice, add shrimp and eggs, and top it off with lime, scallions, basil, and sriracha. This makes for a low-carb meal that’s both nourishing and quick to make any weeknight.

The recipe uses sesame oil, tamari or coconut aminos—Big Tree Farms Bali is my top choice—and healthy veggies like bell pepper and zucchini, keeping carrots to a minimum. It’s inspired by Thai basil flavors for a fresh taste. Depending on the shrimp and oil you use, a serving might have around 6 net carbs and 127 calories.

To keep it quick, I use frozen or pre-riced cauliflower and cook the egg right in the pan. It’s my favorite quick meal for a boost of energy. I switch up the flavors, sometimes adding broccoli or peas, and save some for lunch the next day.

In conclusion, this dish shows that you can enjoy delicious, low-carb meals after having a baby. It’s a simple recipe that’s both filling and easy to make. It gives you a tasty, energy-boosting meal without taking up too much time, perfect for anyone with a full schedule.

Oatmeal Chocolate Chip Lactation Cookies

Oatmeal Chocolate Chip Lactation Cookies – Freezer-Friendly Treat for Nursing Moms

Discover how to make Oatmeal Chocolate Chip Lactation Cookies that nourish nursing moms and

I make Oatmeal Chocolate Chip Lactation Cookies for those hungry moments between nursing. This guide helps you prep a batch ahead. You can keep some in the freezer and a few on the counter for quick snacks. The recipe is for lower-sugar lactation cookies. They are thick, oaty, and might help with milk supply.

I’ve combined advice from Julie at Bunsen Burner Bakery, Amy Palanjian, and How Sweet Eats. First, I blend butter with sugars. Then I mix brewer’s yeast evenly with the dry ingredients. I add in oats, ground flaxseed, and chocolate chips and bake them. They bake at 350°F. The cookies come out with a chewy middle and slightly crisp edges, perfect for after giving birth.

Remember, these are cookies, not a medicine or surefire solution. People’s experiences may vary, and there’s no prescribed “dose”. But, oats, flax, and brewer’s yeast are nutrient-rich and comforting. I share where to buy brewer’s yeast on Amazon, how to freeze them, and how to make them gluten- or dairy-free. If tasty, supportive, and energy-boosting lactation cookies are what you need, you’ve found the right recipe.

Why I Bake Lactation Cookies for Postpartum Nourishment

Right after giving birth, I look for easy snacks. I need something quick to grab and eat while holding my baby. These cookies are perfect. They’re easy to eat, tasty, and help with breastfeeding hunger. No hassle needed.

The reality of postpartum hunger and quick one-handed snacks

I get really hungry after feeding my baby. Waiting too long makes me feel weak. As Amy Palanjian pointed out, looking after a baby requires a lot of energy. Eating often helps stabilize my blood sugar. These cookies are my favorite for early morning hunger. They’re great with cold milk or coffee.

“May help” benefits and realistic expectations around supply

Lactation cookies give a little boost, but they’re not guaranteed to work wonders. They have ingredients like oats and flaxseed which might help. But many things affect milk supply. Taking advice from Julie at Bunsen Burner Bakery, I don’t expect miracles. I just enjoy a cookie or two and keep breastfeeding regularly.

Why these cookies are comforting, energizing, and giftable

These cookies provide steady energy and make me feel good. With whole grains, healthy fats, and a little protein, they’re perfect. They’re delicious yet healthy snacks for breastfeeding. Following How Sweet Eats, I love giving them as gifts to other new parents. It’s a caring and useful present, offering ready-to-eat treats for busy parents.

Main Ingredients That May Support Milk Production

I use simple ingredients found in many kitchens for lactation baking. These ingredients, known as galactagogues, are popular among parents. They help make a delicious cookie that feels like a treat. My aim is to use whole, natural ingredients and a method that’s easy to do, even on busy days.

Rolled oats for complex carbs, fiber, and possible supply support

I choose old-fashioned oats for lactation recipes, not the instant type. They provide complex carbohydrates, fiber, and B vitamins. This mix supports energy during long feeding sessions. Oats are also known to aid milk production, so they’re a key ingredient.

They help create cookies with a great texture and satisfying chewiness.

Ground flaxseed for omega-3s, phytoestrogens, and binding

In my baking, ground flaxseed is a must for its nutritional value. It’s rich in omega-3s and fiber and helps hold the dough together. I either purchase Spectrum Essentials Organic Ground Flaxseed or grind whole seeds myself. This ensures the nutrients are fresh and effective.

Brewer’s yeast vs. baker’s yeast and where I buy it

For lactation purposes, I only use brewer’s yeast, not the baker’s yeast. Brewer’s yeast is packed with iron, zinc, magnesium, and B vitamins. It’s one of the top-recommended galactagogues. I prefer debittered brewer’s yeast, like NOW Brewer’s Yeast Debittered, which I buy from Amazon or local health stores.

Nut or seed butter, coconut, and chocolate chips for energy and satisfaction

I add nut butters or sunflower seed butter to the mix. This makes the cookies richer in protein and fats. Adding coconut, in flakes or oil form, provides more calories. These ingredients keep me energized between nursing sessions.

I also include dark chocolate chips for a bit of happiness in every bite. Ghirardelli chips bring a rich flavor I love. Inspired by How Sweet Eats, I use a combo of butter, coconut oil, and dark chocolate chips. The cookies turn out delightful, supporting my daily routine easily.

Pantry and Equipment Checklist

I make sure my pantry is ready so I don’t have to rush to the store. I keep ingredients for lactation cookies like old-fashioned rolled oats (3 cups), all-purpose flour (1½ cups), sugars, ground flaxseed (3 tablespoons), and brewer’s yeast (⅓ cup). I also have baking powder, soda, fine salt, vanilla, cinnamon. And for added taste, there’s nut or seed butter, shredded coconut, and chocolate chips.

To complete my baking list, I use unsalted butter (1 cup), sometimes with coconut oil for flavor. I mostly need 2 large eggs, but sometimes just 1 egg plus a yolk. On days without eggs, ripe bananas are my go-to. Honey is great for nut-butter cookies. I also have gluten-free oats and Amazon-bought brewer’s yeast and flaxseed, for friends with dietary needs.

Having the right tools is key for cookie baking. I use either a stand or hand mixer, bowls, a whisk, and a spatula. A cookie scoop, or a tablespoon, helps keep cookies the same size. I use Nordic Ware sheets with parchment or silicone mats. I cool cookies on a wire rack. Then, I store them in airtight containers or freezer bags.

I note oven temps near my stove to save time when baking. I set the oven to 350°F for most recipes, and 375°F for banana-nut ones. This checklist and my trusted baking tools help me whip up cookies anytime, keeping my kitchen stress-free.

How I Make a Lower-Sugar, Still-Delicious Dough

I aim to keep the taste strong and the sweetness just right. That way, the cookies are enjoyable without too much sugar. I use a simple method that helps keep the cookies chewy and full of flavor.

How I Make a Lower-Sugar, Still-Delicious Dough

Creaming butter and sugars for the right texture

I learn from Julie to create cookies by mixing soft butter with sugars until they’re fluffy. This step takes about five minutes. It introduces air for a soft texture. I then mix in eggs one at a time and add some vanilla. How Sweet Eats sometimes includes coconut oil for better color and spread.

Whisking dry ingredients to evenly distribute brewer’s yeast and flax

In a different bowl, I mix flour, baking powder, salt, ground flaxseed, and brewer’s yeast until they blend well. Making sure the ingredients are mixed evenly is key. It ensures every cookie has the right balance of flavors and textures. This method is essential for creating chewy cookies without uneven bits of yeast or flax.

Bringing it together and folding in oats and chocolate

I then combine the dry and wet ingredients without overmixing to avoid hard dough. Next, I stir in some almond butter, oats, and chocolate chips. The dough becomes thick and strong, perfect for cookies that are lower in sugar but still soft and tasty.

Scooping, baking at 350°F, and cooling for best chew

I use 1.5-tablespoon scoops to place the dough on baking sheets and bake at 350°F for 10 to 12 minutes. When they’re golden with set centers, they’re done. To get a flatter look, I press down on the cookies as soon as they’re out of the oven. Cooling them on the sheet for 10 minutes and then on a rack ensures they stay chewy. Following Amy’s egg-free option involves bananas and higher heat, but I prefer baking at 350°F for even results.

Oatmeal Chocolate Chip Lactation Cookies

I make these cookies simple and quick, perfect for baby nap times. They have the classic lactation cookie ingredients for moisture and lift, with lots of oats. They taste cozy and expert-level delicious, with a scent that invites you for another.

My go-to ingredient ratios inspired by tested recipes

I follow recipes from Bunsen Burner Bakery and How Sweet Eats closely. They call for about 1 cup of butter, mixing in some coconut oil. There’s also 1 to 1½ cups sugars, with a preference for brown sugar for its softness. Two large eggs make the dough rich and tasty.

I use 1½ cups all-purpose flour, with some ground flaxseed and brewer’s yeast for the traditional lactation cookie mix. To get the right texture, I add a bit of baking powder. Sometimes, I include baking soda for extra rise. Rolled oats and chocolate chips turn it into wonderful, chewy cookies that are both sturdy and soft.

Flavor boosters: vanilla, cinnamon, and optional almond butter

I add vanilla and cinnamon to enhance the aroma. This combo hints at cinnamon vanilla cookies but doesn’t overpower the main flavors. For more depth, I sometimes add almond butter. It makes the flavor fuller and mixes well with sugar and oats.

To make them without dairy or eggs, I use Amy Palanjian’s idea: bananas, oats, coconut, and flaxseed. Plus, baking powder, some nut butter, honey, vanilla, and chocolate chips, baked hotter. This keeps the cookies cozy and delicious.

Texture tips: thick, oaty, and lightly crisp at the edges

I make the cookies big so they’re soft inside. A bit of coconut oil makes them slightly crisp on the edges. Using just butter makes them tender. I let them cool on the sheet to keep the middle perfect.

For more crunch, I chill the dough and bake it a bit longer. For lots of chew, I bake them less and let them cool on the pan. This way, they stay thick and remind you of cinnamon vanilla cookies.

Freezer-Friendly and Make-Ahead Tips

I rely on easy steps so a tasty treat is always ready. These snacks for after childbirth save time, cut down on waste, and keep things fresh. They’re perfect as presents for new parents needing quick snacks.

Freezer-friendly and make-ahead tips for lactation cookies

After they cool, I freeze lactation cookies in bags or containers that are safe for the freezer. Julie at Bunsen Burner Bakery and Amy Palanjian do the same. You can thaw them at room temperature or overnight in the fridge. Amy loves them cold with milk or coffee.

To have cookies like they’re fresh from the oven, I freeze dough as individual balls. I quickly freeze them on a tray for 2 hours, then keep them in a bag. You can bake them without thawing at 350°F, maybe adding an extra minute. How Sweet Eats shows how to do it, guaranteeing cookies that brown evenly.

When giving them as gifts, I half bake and half prepare dough balls for freezing. This way, families can choose when to bake them. It makes the gift last longer and is thoughtful for busy new parents. It also makes these snacks a considerate present without the pressure to eat them quickly.

I also note down any changes for allergies—like using gluten-free oats, sunflower seed butter instead of nuts, or making them without dairy and eggs. I include baking instructions. This makes it easy for anyone to bake and enjoy these snacks without having to guess anything.

Smart Swaps, Allergen Options, and Serving Ideas

I make sure this recipe can change to fit many diets while keeping its comforting, oaty flavor. I focus on making easy swaps, providing clear instructions, and ensuring the treats are still enjoyable during nursing.

Gluten-friendly approach with certified GF oats

To meet gluten-friendly needs, I use certified gluten-free oats from Bob’s Red Mill and stick with all-purpose flour as the base. If I’m looking for extra fiber, I’ll switch in some whole-wheat flour but not more than 1/2 cup. This keeps the cookies moist and chewy, avoiding the dry and gritty texture warned by How Sweet Eats.

Dairy-free and egg-free variations using nut/seed butters

For dairy-free and egg-free cookie options, I follow Amy Palanjian’s recipe. It uses ripe bananas, oats, and nut or seed butter for structure and moisture. To substitute butter, I can use coconut oil, but I’m careful not to add too much to prevent the dough from spreading. Without eggs, I use mashed banana and flaxseed meal to bind the ingredients. If I run out of flax, I follow Amy’s advice and use whole-wheat flour instead. To make them nut-free, I opt for sunflower seed butter. This keeps the cookies rich and safe for schools.

Mix-ins: dried fruit, nuts, or coconut in place of chocolate

I like adding healthy mix-ins to keep the taste exciting. Depending on what I’m in the mood for, I add chopped dried cherries, cranberries, blueberries, or raisins. This idea from Julie adds a nice variety. For a bit of crunch, I mix in chopped almonds or shredded unsweetened coconut. Sometimes, I follow How Sweet Eats and add dark chocolate chips, coconut flakes, and cinnamon. This way, the oats remain the highlight of the cookie.

Pairings that fuel: water, milk, smoothies, and yogurt

I’m careful about choosing the right drink to go with these snacks while nursing. I always start with water to stay hydrated. Then, I might add a glass of milk, a protein-packed smoothie, or some drinkable yogurt. Amy’s advice on keeping protein and healthy fats in my diet, resting often, and understanding that feeding the baby is most important helps a lot. Julie suggests frequent nursing or pumping and bonding skin-to-skin. These tips are great to remember while enjoying a warm cookie and a glass of water.

Conclusion

I like oatmeal chocolate chip cookies for nursing moms. They’re handy, comforting, and easy to keep around. My recipe takes tips from Bunsen Burner Bakery, Yummy Toddler Food, and How Sweet Eats. But, it’s simpler for those hectic days. It includes rolled oats, ground flaxseed, and brewer’s yeast for support. Plus, it has nut or seed butter, coconut, and chocolate chips for energy and happiness. They come out as the perfect lactation cookies: easy, fulfilling, and there when you need a boost.

How you make them is key. I mix butter and sugars together, then blend the dry stuff so brewer’s yeast and flax are mixed well. They bake at 350°F for 10–12 minutes for standard dough. For doughs with banana or nut butter, I bake them at 375°F and keep an eye on them. Letting them cool properly gives them the chewiness I adore. Following these steps, my homemade lactation cookies turn out great every time. They’re also simple to share with others.

Having cookies ready ahead of time is my back-up plan. I freeze the baked cookies for when I need something fast. And I freeze dough balls too. This way, I can bake a few during the baby’s nap. It also makes it easy to give them to new parents who could use a treat without any fuss. Plus, with options for gluten-friendly oats, dairy-free or egg-free alternatives, and nut-free choices, I can make them for anyone in the United States.

I stay realistic about them. Cookies might help, but many things affect milk supply like drinking water, nursing often, rest, and having support. Yet, these oatmeal chocolate chip cookies for nursing moms are ideal for real life. They’re delicious, can be frozen, and easy to make your own. This way, I take care of myself while taking care of my baby.

High-Protein Recipes

High-Protein Recipes for Postpartum Recovery and Strength

Discover nourishing high-protein recipes perfect for postpartum recovery, designed to restore your strength and

I created this guide to ease the first weeks after having a baby. It focuses on high-protein recipes. These recipes help with healing, support breastfeeding, and maintain energy on little sleep. They are based on balanced meals, lots of fluids, and easy meal ideas.

Starting out, I target three meals and some snacks daily, aiming for about 2.6 liters of water. New parents may need about 500 extra calories a day during the first six months of exclusive breastfeeding. Protein is crucial for repairing tissues after birth, whether it was vaginal or a C-section. I combine protein with essential nutrients like iron and calcium to support recovery.

I favor traditional “warming” meals like bone-broth soups and slow-cooked stews. These dishes provide important amino acids and steady energy. This approach includes protein-rich recipes and dinners that are quick to make. Plus, I prepare meals like chili and curries in advance. They’re easy to reheat.

For daily meals, I alternate between Greek yogurt parfaits, egg muffins, and chia pudding for breakfast. Lunches are simple with tuna or salmon salads and wraps. Dinner includes easy one-pan dishes and slow-cooker meals. These choices keep me nourished with minimal kitchen work.

Here, you’ll find useful tips, meal ideas, and recipes high in protein. They are meant for those pumping, nursing, or just regaining strength. This plan offers comfort, taste, and energy for your meals.

Why Protein Matters for Postpartum Recovery and Breastfeeding

After giving birth, my body needs constant energy and repair. Protein helps with breastfeeding, rebuilding tissues, and keeping energy up. It’s crucial for recovering and dealing with the new demands of motherhood.

How protein supports tissue repair, milk production, and stable energy

Our bodies need amino acids to heal properly. Glycine and proline are key for making collagen, important for skin and muscle recovery. I boost these by adding collagen and bone broth to my diet. This not only helps my tissues heal but also aids my milk production.

Combining protein with carbs and fats helps avoid energy lows. This mix keeps me sharp for feedings and tames sudden hunger swings.

Evidence-based nutrient needs postpartum, including increased calories for breastfeeding

When breastfeeding, I need about 500 more calories daily. I focus on eating enough and choosing balanced meals. This way, I support both my milk supply and my mood.

Staying hydrated is also key. Warm meals that are easy to digest help me stay nourished without discomfort.

Key micronutrients that pair with protein: iron, choline, calcium, iodine, omega-3s

I focus on important nutrients for new moms. Foods rich in iron like beef, salmon, and leafy greens are staples. I also get DHA and choline from eggs and fish.

For healthy bones and nerves, I include calcium-rich foods and get vitamin D from the sun and eggs. Seafood and iodized salt support my thyroid health while I’m nursing.

Traditional “warming” foods and bone-broth-based meals for healing

Cultures around the world use warming foods to comfort and heal after birth. I love easy meals like soups and stews that are rich in spices. They provide hydration, electrolytes, and nutrients for tissue repair.

In my kitchen, I often make bone broth-based meals. Favorites include chicken soup, seaweed soup, and a Mexican chicken broth. These meals are packed with protein and easy on the stomach.

Smart Strategies to Eat Well with a Newborn

I keep meals simple and gentle after giving birth. I eat when hungry and drink when thirsty, especially since breastfeeding increases these needs. I aim for three meals and two to three snacks daily. I also set reminders so I don’t forget to eat during long feedings or naps.

Listen to hunger and thirst cues and avoid restriction while healing

First, I treat thirst as a prompt to drink water, then I might have milk, herbal tea, or seltzer. Water is my main choice. I keep a big bottle by the bed and sofa to stay hydrated. I skip strict rules and eat freely so my body can heal and my mood remains balanced.

Simple meal frameworks: protein + carbs + healthy fats for steady energy

I balance my plate with protein, carbs, and fats. Protein aids in recovery and supports milk production. Carbs provide steady energy. And fats add flavor and help me feel full. This simple plan helps when I’m exhausted.

Make-ahead, freezer-friendly, and one-pan options to cut prep and cleanup

I rely on my slow cooker or Instant Pot for easy soups and stews. Sheet pans are great for simple one-pan dinners. I prepare egg muffins and baked oatmeal for quick breakfasts. I make extra chili, meatballs, lasagna, and dhal for freezing. When I’m really busy, I grab bone broth jars from FOND.

Outsource meals and stock snacks to prevent under-eating

I have family bring complete meals like pulled pork with sides, or breakfast casseroles. I suggest easy dishes like salmon cakes or chicken thighs to help them. Near my nursing chair, I keep snacks ready: yogurt, nut butter, roasted chickpeas, eggs, crackers with cheese, smoothies, and trail mix. These steps keep me eating well day after day.

High-Protein Recipes

I look for simple, satisfying meals that keep me going through the day. A high-protein breakfast after giving birth sets the day’s tone. For lunch and dinner, protein-filled meals help me stay full easily. I also use freezer meals after giving birth, so I can rest more.

High-Protein Recipes

Breakfast ideas: Greek yogurt parfaits, egg muffins, chia pudding, baked oatmeal

Greek yogurt parfaits with granola and berries quickly give me protein and calcium. I make egg muffins with spinach and cheddar in batches. They are easy to heat and take with me.

Overnight, I prepare chia pudding with milk and vanilla, then add nuts for crunch and omega-3s in the morning. Baked oatmeal with blueberries has slow-release carbs. It’s perfect for a lasting, high-protein breakfast after birth.

Lunch bowls and soups: lentil soup, quinoa salads, chicken wraps, tuna or salmon salads

I mix up protein-rich lunch bowls to keep lunch exciting. Lentil soup is easy to make, offering plant protein and fiber. Quinoa salads are filled with iron and magnesium, thanks to roasted veggies.

Chicken wraps on whole-grain tortillas with avocado and cheese are quick to make. Warm rice or quinoa topped with tuna or salmon salads are filling. When it’s cold, I enjoy chicken noodle soup made with bone broth for extra minerals.

Dinner mains: sheet-pan chicken, beef stew, salmon-quinoa bakes, slow-cooker dhal

Sheet-pan chicken thighs with sweet potatoes and broccoli are easy and only need one pan. Beef stew is comforting, tender, and great for freezing and eating later.

A salmon quinoa bake with asparagus provides DHA and protein. For a hands-off dinner, I use a lentil dhal slow cooker recipe. It leaves the kitchen smelling of warm spices and makes great leftovers.

Freezer-friendly wins: chili, meatballs, lasagna, curries, bone-broth soups

I start my freezer meal list with chili and grass-fed beef meatballs that reheat quickly. I also freeze lasagna, sometimes using zucchini noodles for when I’m low on energy.

Curries, pulled pork, and shepherd’s pie freeze well too. Bone broth soups like chicken-vegetable or tomato are always ready. This way, a nutritious meal is always within reach.

Nutrient-Dense Postpartum Foods I Rely On

I make sure my kitchen is full of good foods for after childbirth. Eggs are a must for me every day because they have protein, B12, and choline. I use them in everything from muffins and omelets to breakfast burritos and egg salad with Greek yogurt.

Iron is key, so I eat lean meats and poultry like beef, bison, turkey, and chicken. They help me get back my iron and zinc. Dishes like slow-cooked pot roast, pulled pork, and tender meatloaf with a bit of liver are soft and easy on my stomach.

Fish like salmon, mackerel, and sardines are packed with omega-3 DHA and iodine, which are great for nursing. I make quick meals like salmon-quinoa bakes and crispy salmon cakes. Using canned salmon and sardines helps me get enough calcium and vitamin D, especially when I can’t get enough sunlight or don’t feel like eating much.

Dairy is great for protein and minerals. Greek yogurt and cheese give me calcium and vitamin D, and they taste great with fruit or whole-grain toast. When I avoid dairy, I use fortified soy, almond, or oat milk in smoothies and oatmeal.

I always have iodized salt ready and eat nori sheets for iodine. Adding a piece of kombu to bone broth brings in more minerals. This broth, whether homemade in the Instant Pot or bought, is full of good stuff like electrolytes and collagen. It’s great to sip between nursing sessions.

I eat a lot of plant-based foods, like lentils, chickpeas, and beans, in my soups, stews, and salads. Whole grains and starches like oats, brown rice, quinoa, and sweet potatoes keep my energy up. They also help stabilize my blood sugar when eaten with fats and protein.

I add leafy greens like spinach and kale to my meals for antioxidants and fiber. Spreads like peanut butter, almond butter, and tahini are great on toast, in smoothies, or as dips. In the first weeks, soft-cooked meals and hearty stews feel comforting. I try more variety as I start feeling more like myself.

Protein-Packed Listicles for Quick Wins

I focus on easy U.S. postpartum meals that work for everyday life. My kitchen is always stocked for quick fuel grabs. These meals and snacks are high in protein and easy to make, helping me stay nourished effortlessly.

Breakfasts I can assemble fast

Greek yogurt parfaits with granola and berries keep me full and happy. I make overnight oats with milk, Greek yogurt, chia seeds, and maple syrup. Egg muffins are my quick reheat option. Peanut butter on whole-grain toast saves me when I’m out of time.

Baked oatmeal squares and freezer breakfast burritos are lifesavers on busy mornings. I also have hard-boiled eggs, fruit, and whole-grain crackers ready to go. These breakfast options are perfect when I need sleep and nourishment.

Grab-and-go lunches that actually fill me up

I make 1-pot lentil or split pea soup and store them for later. Quinoa bowls with roasted veggies and chicken are filling and easy to grab. Wraps with chicken or turkey, avocado, and greens are perfect for lunch on the go.

I enjoy canned tuna or salmon salads on leftover rice or quinoa. Homemade chicken noodle soup with bone broth is a favorite. Avocado egg salad sandwiches and baked sweet potatoes with toppings make fulfilling midday meals.

Comforting dinners that reheat beautifully

Sheet-pan chicken with sweet potatoes and broccoli is a regular dish. Beef stew with root vegetables improves in flavor overnight. I always have salmon-quinoa bake ready for reheating. Slow-cooker red lentil dhal is comforting and soothing.

Chili with liver, meatballs in marinara, and lasagna keep well in the fridge. Coconut chicken curry and pulled pork with sides are my go-to reheatable dinners. They are perfect for busy evenings.

Smoothies and snacks to stash by the nursing chair

A peanut butter banana smoothie with Greek yogurt and chia is great for hands-free sipping. I make a gentle kale smoothie with frozen fruit and applesauce. Having Greek yogurt cups and cheese sticks close is handy.

Trail mix, roasted chickpeas, and nut butter packets are my favorite snacks. I also snack on whole-grain crackers, fruit, and veggie sticks with hummus. I keep my freezer stocked with soups, stews, and pre-marinated meats for real meals any time.

Conclusion

I’ve made a promise to myself: focus on nutrition first. My daily plan includes high-protein recipes that are easy and quick to make. They’re also mild on my stomach and convenient to warm up again. I pay attention to my body’s needs, especially for breastfeeding. I make sure to drink plenty of water and eat balanced meals with protein, carbs, and fats. This helps keep my energy up while I heal and get used to life with a new baby.

I choose healing foods like bone broth dishes, stews, curries, and porridges after giving birth. They help repair my body with their nutrients like amino acids, sodium, and potassium. I include iron-rich meats, organ meats in sauces, and eggs for their benefits. For calcium, I eat dairy and canned salmon with bones, and I get vitamin D from the sun and food. I also use iodized salt and enjoy seafood for iodine. Foods like salmon, sardines, and walnuts provide me with omega-3 fatty acids.

When it comes to meal prep, I keep it simple with one-pan meals and a freezer full of food like chili and lasagna. I find ways to make cooking easier, like having ready-to-eat protein meals available. This includes Greek yogurt, egg muffins, and tuna salads. It makes my life easier, cuts down on cleaning, and ensures I eat well without feeling overwhelmed.

These diet tips for breastfeeding have me feeling ready to take care of both me and my baby. My approach to cooking is straightforward and focused on wholesome foods. By sticking to high-protein meals and healthy habits, recovering feels manageable. This way, I can build back my strength and enjoy precious moments more fully.

Healthy Desserts for Postpartum

Healthy Desserts for Postpartum Moms: 8 Guilt-Free Treats to Satisfy Cravings

Indulge in 8 guilt-free healthy desserts for postpartum that'll satisfy your sweet tooth without

The fourth trimester was tough, but small, sweet moments helped. I found that mindful treats were key to my care. Healthy Desserts for Postpartum boosted my mood, energy, and recovery without the sugar crash.

At 2 a.m., simple desserts are my go-to. A little ice cream or dark chocolate feels like a warm hug. For balance, I choose low-sugar options and snacks that keep me steady. Things like Greek yogurt with berries or cottage cheese with fruit.

I focus on high-protein snacks that are easy to make one-handed. Protein keeps me full longer, and staying hydrated is crucial. This guide is filled with tasty, guilt-free postpartum desserts. They’re perfect for new moms and fit fourth trimester nutrition needs.

Why I Lean Into Treats During the Fourth Trimester

The first weeks after giving birth are a mix of noise and silence, sweetness and rawness. During this time, simple pleasures like a soft cookie or a cold smoothie helped me through. These weren’t just treats but a way of being kind to myself after giving birth.

I believe in enjoying healthy desserts that suit my lifestyle. If I crave something sweet, I combine protein with another food group. Options like Greek yogurt with berries or peanut butter on a banana keep me balanced. It’s about finding a middle ground, allowing for a piece of dark chocolate without feeling guilty.

Staying hydrated is key, especially when breastfeeding increases thirst. A smoothie with milk, frozen fruit, and chia seeds is my go-to. It quenches my thirst and satisfies cravings without too much sugar. Plus, it helps clear the fog in a new mom’s mind by reducing stress.

On days when I want something sweet without sugar, I have a few choices. No-sugar applesauce, plain yogurt with cinnamon, or dates with almond butter work great. These snacks are about enjoying treats while keeping my health in mind. Friends and fellow moms encourage me, reminding me it’s about balance.

Choosing treats wisely during the fourth trimester celebrates my body’s achievements. It allows me to take care of my health while still indulging in desserts. This approach is kind, realistic, and achievable, even one small victory at a time.

Healthy Desserts for Postpartum

I look for treats that boost my energy and taste delicious. They must also fit into a hectic schedule of feeding and caring for a newborn. I choose postpartum protein desserts and treats with low sugar. This way, I stay balanced between naps, feeds, and walks. My goal is to focus on sweets that include protein, hydration, and guilt-free enjoyment for everyday life.

Healthy Desserts for Postpartum

Protein-first sweet bites to keep me full longer

Protein keeps me full, which is great since I snack often throughout the day. I enjoy high-protein yogurt desserts, like Greek yogurt topped with berries and granola. Another favorite is cottage cheese with fruit for a sweet and savory mix. When I’m out, peanut butter with apple or banana is perfect, and hard-boiled eggs with a bit of chocolate milk satisfy like a dessert.

These options also work well as protein-rich postpartum desserts. They provide lasting energy. Even hummus with whole-grain crackers, grapes, or sliced pears can satisfy my sweet tooth.

Low-sugar swaps that still taste like a reward

I choose sugar-free desserts that still give me the creamy or crunchy taste I want. Strawberries dipped in dark chocolate or pomegranate seeds are luxuriously rich without the sugar rush. A no-sugar-added chocolate hazelnut spread, like GOOD GOOD Choco Haze, makes toast or rice cakes a treat. For a quick fix, a Larabar or a KIND Bar fills in while I focus on making low-sugar treats at home.

These desserts fit into my daily life and keep dessert time light and fun. They’re great with fruit on the side for a gentle sweetness.

Hydration-forward desserts and why they matter for nursing

Fluids are crucial while nursing. I turn smoothies into hydration snacks by mixing milk or yogurt with frozen fruit and oats. I always have fruit-flavored water ready, adding a splash of lemonade or iced tea for extra flavor.

Frozen grapes, smoothie bowls, and chilled melon are refreshing and support my breastfeeding needs. These hydrating treats are both satisfying and beneficial.

What “guilt-free” means to me: balance, not deprivation

Guilt-free desserts mean enjoying what I love without feeling bad afterward. I combine protein with another food group and choose high-protein yogurts and sugar-free swaps. This way, sweetness fits into my day naturally.

Sometimes, it’s ice cream; other times, it’s low-sugar snacks I can manage with one hand. Maintaining this balance keeps me content and on track.

Guilt-Free Dessert Ideas I Can Make One-Handed

I look for easy desserts that are fun and aid in recovery. These treats are made from stuff in the fridge and pantry. So, I can eat while holding my baby and keep my energy level up.

Guilt-Free Dessert Ideas I Can Make One-Handed

Greek yogurt parfaits with berries, granola, and a drizzle of honey

To make a yogurt parfait, I just use plain Greek yogurt, berries, and granola. Then I add a little honey on top. It’s full of protein, simple to make, and a favorite snack of mine.

Dark chocolate–dipped frozen fruit (strawberries, pomegranate arils)

I melt dark chocolate and dip frozen strawberries or pomegranate arils in it. The chocolate snap with the fruit is great. And just a few pieces help with any sweet cravings.

High-protein cottage cheese bowls with fruit or salsa for sweet-meets-savory

For a sweet treat, I mix cottage cheese with pineapple or blueberries. If I want something savory, I add salsa to it. Both options are easy to eat with one hand and keep me satisfied for longer.

Blender smoothies that double as dessert

My favorite smoothie mix starts with banana, milk, and Greek yogurt. I sometimes add peanut butter or cocoa. I drink it from a tumbler, like a milkshake. It’s perfect for staying hydrated and fits my snack needs perfectly.

No-Added-Sugar Sweet Fixes for Late-Night Cravings

When late-night cravings hit after having a baby, I look for snacks that are delicious but won’t make my sugar levels spike. I choose desserts with no added sugar. They are rich in flavor and have a satisfying texture. A cold, fruity water keeps me hydrated while I enjoy these treats.

Sugar-free snack inspirations: creamy, crunchy, and satisfying

I prepare a small plate with a variety of sugar-free snacks. They include Greek yogurt with cinnamon, peanut butter on apple slices, and some roasted almonds. Spreading some no-sugar chocolate on banana slices feels like a luxury while still meeting my health goals. For quick snacks, KIND Bar minis or Larabar fruit-and-nut bars are perfect.

Two-ingredient freezer fudge and fruit-forward pops

In my freezer, you’ll find sugar-free fudge made from nut butter and cocoa. It only needs a pinch of salt. I also make pops from yogurt and berry purée for a quick, sweet treat without added sugar. And I always have dark chocolate–dipped frozen strawberries. They’re great for a quick and controlled snack.

Store-bought shortcuts with no added sugar (yogurts, chocolate spreads, brownies)

On nights when I’m too busy, I go for healthy, store-bought desserts with no added sugar. I choose plain or zero-sugar yogurts and no-sugar chocolate spreads like GOOD GOOD Choco Hazel. It’s great in oatmeal. For a taste of the bakery without the guilt, I get brownie bites sweetened with dates. They satisfy my craving without messing up my eating plan.

Breastfeeding-Friendly Dessert Snacks to Fuel My Day

I look for easy, delightful snacks that also give me a boost. These treats keep up my energy, are easy to eat with one hand, and are so tasty I can’t wait to have them again.

Hard-boiled eggs with a chocolate milk chaser for protein and satisfaction

I always have hard-boiled eggs ready in the fridge. Then, I pour a glass of cold chocolate milk. This mix offers me protein, healthy fats, and the sweetness I’m looking for. It’s a quick and satisfying snack I love.

Mini muffins from the freezer with a glass of milk

I make batches of cinnamon applesauce or peanut butter mini muffins and freeze them. Heating them up and having them with milk feels comforting. This snack gives me the energy I need until the next feeding time.

Hummus with whole-grain crackers for a sweet-and-savory plate

Grazing on hummus with crackers feels just right. I toss in some grape tomatoes or sliced cucumbers for extra crunch. Sometimes, I add a few dried apricots for sweetness. It’s a great way to get some plant-based nutrition and still feel like I’m having a treat.

Peanut butter with apples, bananas, or celery for staying power

I rely on peanut butter with fruit for a quick snack. Chopping up some apples or bananas and adding peanut butter gives me both protein and fiber. If I’m really busy, celery sticks work great and are less messy.

Hydration helpers: fruit-flavored water that feels like a treat

I keep a large water bottle close and switch up the flavors like cucumber-lemon or lime-mint. This way, I drink enough water and it tastes great. Drinking small sips between snacks helps me stay hydrated throughout the day.

These snack ideas fit easily into my day and go well with things I already have. They’re quick to prepare, delicious, and help me stay energized for feeding and recovering.

Conclusion

The fourth trimester is a challenging time, and I’ve found being gentle with myself about cravings really helps. I aim for balance, not strict rules, when it comes to healthy desserts. By combining protein with another food group, like Greek yogurt and berries, I stay satisfied and relaxed.

For fast, breastfeeding-friendly snacks, I have a go-to list: hard-boiled eggs and chocolate milk, mini muffins with milk, hummus with crackers, and peanut butter with fruit. I also keep easy options like Larabars, KIND Bars, cheese and crackers, or a quick trail mix ready. And I don’t forget to stay hydrated with fruit water or indulge in a smoothie or ice cream for comfort.

To avoid sugar crashes, I mix in sugar-free and no-added-sugar treats that still feel indulgent. Options like dark chocolate-dipped frozen fruit, creamy parfaits, smoothies, and fruit pops offer variety. These treats prove that you can enjoy dessert without a lot of sugar, and they fit into my day perfectly.

Most importantly, I allow myself to enjoy food. By combining protein, making simple swaps, and keeping easy snacks ready, I tackle hunger, support breastfeeding, and boost my mood. Healthy desserts in the fourth trimester are about more than just eating; they’re a way to feel well-nourished, rested, and prepared for everything that’s to come.

Easy Postpartum Dinner Ideas

10 Easy Postpartum Dinner Ideas for Weight Loss and Recovery

Discover nourishing and delicious easy postpartum dinner ideas that aid in weight loss and

I wrote this guide to quickly make dinner while healing. In the first weeks, I follow two simple rules: Keep prep under 15 minutes using simple ingredients and view food as fuel, especially when sleep is hard to come by. These dinners are warm, fulfilling, and fit into a healthy diet for postpartum recovery, helping with gentle weight loss.

I focus on eating regular meals and snacks filled with protein, carbs, and fats. Foods rich in choline, calcium, iron, iodine, vitamin D, and omega-3s are key for recovery. When I’m breastfeeding, I add about 500 extra calories and more drinks. I still pick meals that are quick and healthy, even on a busy night.

I’ve found dinners that are simple and save energy using slow cookers, sheet pans, and one-pot methods. Each meal is balanced: half the plate with veggies, a quarter with whole grains, and a quarter with protein. This way, nutrition for breastfeeding is a priority, and dinner is calming and easy to repeat.

Below, I’m sharing my favorite meals and tips from the United States, fitted for a healthy postpartum diet and real schedules. Let’s make recovery both enjoyable and simple.

Why Postpartum Nutrition Matters for Weight Loss and Recovery

I see postpartum nutrition as the foundation of my healing. It helps me stay balanced during the busy days and sleepless nights. This way, losing the baby weight feels manageable and gentle, not drastic.

Fueling recovery with protein, complex carbs, and healthy fats

I focus on protein from chicken, eggs, yogurt, tofu, and beans for healing. Next, I add complex carbs from whole grains and veggies for energy. This keeps my energy levels steady. Then, I include healthy fats like olive oil and nuts. They help absorb important nutrients and keep me full.

Breastfeeding needs: about 500 extra calories and more fluids

When breastfeeding, I add around 500 calories a day and drink about nine cups of water. I also pay attention to my hunger. If I need more energy, I grab a snack rich in protein and fiber.

Key micronutrients: choline, iron, iodine, calcium, vitamin D, omega-3s

I carefully choose foods for their micronutrients. For choline, I eat eggs and beans; for iron, I go for red meat and leafy greens. I also include seafood for iodine, and dairy for calcium. Foods rich in vitamin D and omega-3s, like salmon and walnuts, are also on my list. They’re great for my brain and eyes.

Gentle weight loss: plate method and consistency over restriction

To lose weight gently, I follow the plate method. I fill half my plate with veggies, a quarter with whole grains, and a quarter with protein. Small steps, like eating regular meals and going for walks, help me lose weight. I don’t follow strict diets.

Time-Saving Dinner Strategies for New Moms

I make dinner simple. This lets me focus on my baby and still enjoy good meals. By planning ahead, I use strategies like meal prep to cut down on dishes and time. My go-to’s are slow cooker meals, one-pan dishes, and one-pot recipes. These fit perfectly into a busy week filled with feedings and naps.

Slow cooker, sheet pan, and one-pot methods to cut prep and cleanup

I use the slow cooker for meals like taco meat or teriyaki chicken. This allows me to set it and forget it for hours. On nights when things are hectic, I roast chicken and veggies on a tray. It cooks while I’m putting the baby to bed. For meals like pasta or chili, I go for one-pot recipes. Everything cooks together, making cleanup a breeze.

Batch-cook, freeze, and repurpose leftovers for multiple nights

I love batch cooking right after having a baby. It fills my freezer with soups, chili, and more. These meals are great for reheating quickly on tough days. I also find new ways to use leftovers. For example, taco meat makes great bowls or salads, and roasted veggies can be added to grain bowls.

Keep it simple: 15 minutes of prep with minimal ingredients

My key to dinner is keeping the prep under 15 minutes. I choose recipes with few ingredients. Usually, a protein, some veggies, and a simple sauce do the trick. This means I have more time to rest.

Smart shortcuts: pre-cut produce, rotisserie chicken, frozen grains

I keep my kitchen stocked with time-savers like pre-cut veggies and frozen rice. And I love using rotisserie chicken. These help throw together meals like bowls, wraps, and soups quickly. They make meal prep after having a baby much easier and keep me stress-free.

Easy Postpartum Dinner Ideas

I depend on simple dinners that match the chaos of new parenthood. Favorites include Crockpot Taco Meat, Vegetarian Chili, and Slow Cooker Teriyaki Chicken. They’re quick, packed with protein, and have flavors everyone loves. Plus, they’re great the next day too.

Then, I add dishes like sheet pan chicken with sweet potatoes and broccoli. There’s also beef and vegetable stew, and a tasty one-pan salmon quinoa bake. Foods like red lentil dhal, tacos, and enchiladas offer comfort. They also provide the nutrients needed for those demanding days and sleepless nights.

On my list too are slow cooker chicken tortilla soup and stuffed pepper casserole. And don’t forget grilled turkey burgers. I complete meals with baked sweet potato fries or roasted broccoli. Quick options like one-pot chicken spinach pasta and sheet pan lemon-garlic chicken keep dinners simple yet healthy.

These meals follow my “food is fuel” principle. I focus on dishes with protein, complex carbs, and lots of veggies. A bit of healthy fat from olive oil or nuts adds to the nutrition. This way, I have a variety of easy, nutritious meals for busy new mom life. They’re all about making cooking manageable, even when time is short.

Easy Postpartum Dinner Ideas

Protein-Packed Dinners to Support Healing and Satiation

I plan my dinners with simple tastes and lasting energy. I use lots of protein to heal tissues and keep hunger away. My plates have half veggies, a quarter grains, and a quarter lean meat. When breastfeeding, I listen to my body’s hunger signals and drink plenty of fluids. This way, the meals help with muscle repair and keep me full.

Slow Cooker Teriyaki Chicken with brown rice and steamed greens

I start with an easy teriyaki in the slow cooker. It has low-sodium soy sauce, garlic, ginger, and honey. It’s served over brown rice and with steamed greens for minerals. This chicken dish is a favorite after having a baby. It’s a mainstay for healing muscles.

Sheet Pan Lemon-Garlic Chicken with sweet potatoes and broccoli

On hectic nights, I roast chicken with lemon, garlic, and oil. Then, I throw sweet potatoes and broccoli on the same pan. It’s a no-fuss meal that’s also balanced. It matches my meal plan and makes postpartum dinners easier without extra dishes to clean.

Grilled Turkey Burgers with baked sweet potato fries and roasted broccoli

I make lean turkey patties and grill them until they’re juicy. Alongside, I serve baked sweet potato fries and roasted broccoli. The fries bring fiber, and the broccoli has vitamin C for iron uptake. These burgers are a tasty, healthy choice that keep me energized.

Salmon Quinoa Bake for omega-3s and complete protein

I bake salmon with cooked quinoa, dill, lemon, and olive oil until the fish is tender. This dish is packed with omega-3s from the salmon and complete protein from quinoa. It’s a great part of my post-birth diet and helps my muscles heal. It also supports brain health.

Fiber-Rich, Comforting Meals for Energy and Gut Health

I lean on high-fiber meals after having a baby to keep my energy stable and digestion smooth. Warm bowls make me take my time eating, which helps with mindfulness and gut health. These meals are made from easy, whole ingredients that I can cook in big batches and freeze.

Vegetarian Chili with three beans and veggie medley

I make a three-bean vegetarian chili with black, kidney, and pinto beans. I add onions, bell peppers, and corn to the mix. This chili is packed with plant protein, fiber, and antioxidants. It’s really comforting, rich in iron, and reheats well, which is perfect for busy nights.

Red Lentil Dhal with spinach and brown rice

My red lentil dhal cooks quickly and gets creamy without any cream. I add fresh spinach for folate and vitamin K, and serve it over brown rice. This makes a comfort bowl that boosts gut health while keeping me satisfied.

Stuffed Pepper Casserole with ground turkey, brown rice, and veggies

I make a casserole inspired by stuffed peppers with lean ground turkey, brown rice, tomatoes, zucchini, and mushrooms. A bit of cheese on top adds calcium and flavor. This dish freezes and reheats well, offering a comforting and iron-rich meal.

Chicken Tortilla Soup topped with avocado and shredded cheese

I let chicken tortilla soup cook slowly in a slow cooker for an easy dinner. I top each serving with avocado for healthy fats and a bit of shredded cheese for added protein and calcium. The broth is not only gentle on the stomach but also very satisfying. It’s a great addition to my high-fiber meals after having a baby.

Quick, Balanced Tex-Mex and Bowl Ideas

On busy nights, I go for quick meals without losing quality. I make simple bowls, focusing on Tex-Mex flavors. I use ready proteins and pantry grains. This keeps dinner quick, around 15 minutes. These bowls are full of protein, fiber, and healthy fats. They keep me feeling full and energized.

I use a slow cooker for taco meat. It takes three ingredients and three minutes to prepare. Hours later, it’s ready for tacos, salads, or burrito bowls. I add black beans, brown rice, salsa, and cabbage. It’s delicious, nutritious, and easy to clean up after.

For a quick meal, I make a Sausage and Veggie Bowl. I heat up pre-cooked chicken sausage and mix it with veggies and greens. I finish it with a little olive oil for flavor. It’s a flexible recipe. Sometimes, I use frozen brown rice to save time.

I love making avocado egg salad for a simple dinner. I mash avocado with hard-boiled eggs, lemon, and salt. Then, I serve it on whole-grain toast. It’s rich in protein and choline. For extra texture, I add tomato or arugula.

If I don’t want to cook, I make a tuna grain bowl. I mix canned tuna with lemon and herbs. Then, I put it on quinoa or rice with cucumbers and greens. If I have it, I make a salmon bowl with quinoa. It adds omega-3s and great taste.

I plan meals ahead and use kitchen shortcuts. Pre-cut veggies, frozen grains, and rotisserie chicken save time. I alternate between tuna grain and Tex-Mex bowls during the week. This way, dinners are always interesting, quick, and filling.

Conclusion

My guide for postpartum dinners is straightforward: focus on nutritious, easy-to-make, and repeatable dishes. I make sure each meal has protein to help with recovery, whole-grain carbs for energy, and healthy fats to keep me full. I also include important nutrients like choline, iron, iodine, calcium, vitamin D, and omega-3s regularly.

If I’m breastfeeding, I plan for an extra 500 calories and more fluids. Plus, I keep taking a prenatal vitamin for at least six weeks, as my doctor recommends.

To lose weight after having a baby, I stay away from crash diets and use the plate method instead. I know lack of sleep and skipping meals can make losing weight harder. So, I try to eat consistently healthy meals.

Repeating my favorite meals and using a few ingredients help me stay on track.

For easier meal prep after having a baby, I use slow cookers, sheet pans, and one-pot recipes. I also cook in big batches and freeze meals. Using pre-cut veggies, frozen grains, and a store-bought rotisserie chicken saves time.

Some of my favorites include slow cooker teriyaki chicken, lemon-garlic chicken, grilled turkey burgers, and a quinoa salmon bake. Vegetarian chili, lentil dhal, stuffed pepper casserole, chicken soup, taco bowls, avocado egg salad, and grain bowls with tuna or salmon are also great for quick and nourishing dinners.

Ultimately, my plan is both stable and adaptable. I shop and prep just once a week and choose satisfying meals that help me recover. This strategy for postpartum dinners offers a realistic way to enjoy balanced meals and lose weight gently. It’s all about making smart choices, creating good habits, and following helpful tips for meal prep.

Energy-Boosting Breakfasts

7 Energy-Boosting Breakfasts for New Moms on the Go

Discover quick, nutritious Energy-Boosting Breakfasts perfect for busy new moms needing a healthy kickstart

Postpartum mornings often start at a full sprint. I’ve created a list of breakfasts that can be made ahead, frozen, and reheated quickly. My go-tos include baked oatmeal, peanut butter breakfast bars, and a filling kefir smoothie. These options are not just healthy but also perfect for busy mornings of feeds and errands.

Breakfast meal prep is my secret to never missing a meal. My week revolves around EatingWell’s Baked Oatmeal and Peanut Butter Breakfast Bars. I also prepare sheet-pan eggs with smoked salmon and capers for a protein-packed, one-handed meal. When I need something super quick, I go for coffee overnight oats or nut-and-seed granola over Greek yogurt.

Lindsay Taylor, from The Food Doula Cookbook, suggests these make-ahead breakfasts to reduce stress and boost mood. She recommends freezer-friendly choices like egg bites and granola that stay good for months. Inspired by BBC Good Food, I keep overnight oats and snack bars ready to go.

The following list offers seven quick options, including a PB–banana kefir smoothie and easy-to-reheat baked oatmeal. Each option is designed to be delicious, easy, and to keep you powered through the morning.

Why a nourishing grab-and-go breakfast matters in the postpartum rush

In the newborn days, I rely on simple choices. These choices cover protein, healthy fats, whole grains, and staying hydrated. Good nutrition keeps my mood and energy up when sleep is scarce. Having a grab-and-go breakfast means I can eat, care for my baby, and stay on the move easily.

How protein, healthy fats, and whole grains steady my energy and mood

Starting my day with protein from eggs, yogurt, or cottage cheese helps me stay full and focused. Healthy fats from items like egg yolks and nuts slow down digestion. This helps prevent energy crashes. Whole grains such as oats provide steady carbs and fiber. They keep my mood and energy levels up.

Lindsay Taylor says postpartum nutrition also needs calories and key nutrients. I add colorful veggies and fruits for their antioxidants. Sometimes, I drink bone broth for extra hydration. A bowl of Greek yogurt with berries and granola gives me everything I need.

The postpartum advantage of make-ahead meals I can eat one-handed

Meals I can make in advance are lifesavers. They allow me to eat without hassle when the baby sleeps on me. Options like baked oatmeal and peanut butter bars reheat quickly. They still taste great when I’m busy with baby care tasks.

Kefir smoothies are easy to drink and digest, thanks to the probiotics and protein they provide. Overnight oats are a perfect grab-and-go choice. They last a while, are easy to take with me, and mix whole grains with healthy fats from chia or walnuts.

Key nutrients I prioritize: eggs, oats, yogurt, kefir, nuts, seeds, and colorful produce

I keep eggs, oats, and yogurt or kefir on hand for their vital nutrients. Nuts and seeds bring in healthy fats and minerals that help me recover. Spinach, berries, and peppers add vitamin C and color to my meals.

On busy mornings, I often choose a Greek yogurt breakfast, make a kefir smoothie, or pick a pre-made meal from the fridge. These habits help turn breakfast into a dependable source of energy. This is crucial when I have lots to do and a baby to care for.

Energy-Boosting Breakfasts

I start my mornings with easy-to-make breakfasts that are great both cold or hot. I make a few batches upfront for steady energy, quick protein, and snacks I can eat with one hand.

Energy-Boosting Breakfasts

Make-ahead baked oats and oatmeal ideas for steady fuel

Oats are the start of my breakfast routine. I alternate between baked oatmeal with pears for a cozy start and blueberry baked oats for a fridge-friendly option. On Sundays, I cook steel-cut oats with cinnamon and maple syrup, adding toppings like berries or nuts.

For days when I’m in a hurry, I prepare coffee-flavored overnight oats with cacao and walnuts. I also make a big batch of granola filled with seeds, nuts, and dried fruit. It lasts for days and is perfect with yogurt or milk.

High-protein egg options that reheat in minutes

Baking sheet-pan eggs with smoked salmon and goat cheese gives me protein-rich meals. I cut them up and pop them into warm rolls for an easy breakfast. I also make egg bites using a muffin tin, which are quick to bake and easy to freeze.

If I want something more filling, I make breakfast burritos. They’re packed with scrambled eggs, veggies, and cheese. I quickly reheat them after defrosting overnight and they’re ready to go. They’re one of my go-to freezer meals.

Smoothies and overnight oats for true grab-and-go mornings

For the busiest mornings, a PB-banana kefir smoothie is my go-to. It’s full of probiotics and protein. I also prep overnight oats with chia and almond butter, adding fruits for extra taste and texture.

I keep jarred portions ready for those rush-out-the-door days. I switch up the flavors, from coffee to vanilla-cinnamon, keeping breakfast exciting.

Bars and bites I batch-prep and freeze for fast snacks

I bake peanut butter bars with oats and dried fruit, along with granola bars that freeze well. In my freezer, I also keep PB+J energy balls for quick snacking.

Lindsay Taylor’s granola recipe is filled with nuts and seeds. It stays fresh for up to three months. I enjoy it over Greek yogurt or cottage cheese. These freezer-friendly recipes help me through my week and keep me ready for the road.

My 7 quick picks for busy mornings (inspired by make-ahead favorites)

I like healthy breakfasts that are easy to grab on busy mornings. Each one can be made ahead of time, tastes great, and is perfect for new moms. They’re full of protein and keep me sane when things get hectic.

My 7 quick picks for busy mornings inspired by make-ahead favorites

Baked Oatmeal with Pears for fiber-rich, cozy fuel

EatingWell’s baked oatmeal is a favorite of mine. I mix in ripe pears and maple syrup, bake it, and then let it chill. In the morning, I just warm a piece and top it with walnuts for extra crunch.

It’s great as a freezer meal. Plus, it tastes like a treat but fills you up for a long walk with the stroller.

Peanut Butter Breakfast Bars I stash in the freezer

I combine oats, peanut butter, maple syrup, and a little salt to make chewy bars. This idea was inspired by EatingWell’s recipes for balanced nutrition.

These bars freeze well and thaw quickly. They’re easy to eat with one hand, making them perfect for busy mornings.

Overnight Oats with Coffee, Cacao, and Maple for an energy kick

I make coffee-and-cacao flavored oats for a mild energy boost. I also add walnuts and cacao nibs for texture. They’re ready to go whenever I am, either cold or heated up.

This recipe is a fun addition to my breakfast routine. It’s especially good for new moms looking for something tasty.

Egg Bites or Sheet-Pan Eggs I reheat and tuck into a sandwich

I make Lindsay Taylor’s egg bites with spinach, peppers, and cheese. After baking, I freeze them and reheat as needed. They’re perfect for a portable breakfast.

On weekends, I prepare sheet-pan eggs with fancy additions. I use them to make quick sandwiches with whole-grain English muffins.

PB–Banana Kefir Smoothie with spinach for protein and probiotics

My go-to smoothie includes kefir, banana, peanut butter, and spinach. It’s great for sipping on the go.

I also prepare smoothie packs for the freezer. In just two minutes, I get a creamy and satisfying drink.

Whole-Grain Waffle PB&J Stack with berries

I make a quick meal with toasted whole-grain waffles, peanut butter, and berries. Heating the berries briefly creates an easy, jammy topping.

This breakfast is both nostalgic and nutritious. It’s a hit with kids and a part of my healthy morning routine.

Nut-and-Seed Granola over Greek yogurt or cottage cheese

I make a batch of Lindsay Taylor’s granola or an easy version from EatingWell. Then I add it to yogurt or cottage cheese in the mornings.

Topped with lemon zest and berries, it’s a fresh start to the day. This granola is a staple in my breakfast lineup.

Time-saving strategies I rely on (meal prep, freezer wins, and smart swaps)

I prepare breakfasts on weekends, using ideas from Lindsay Taylor and EatingWell. This approach includes batch cooking for the freezer. It helps me quickly find healthy meals that taste good and meet my nutrition goals.

I make breakfast burritos with eggs, veggies, cheese, and salsa. After assembling, I freeze them. They’re baked for 10 minutes at 400°F after thawing overnight.

Egg muffins and blueberry baked oats are other favorites. Along with these, I make a big batch of granola.

Everything is cooled and appropriately stored to keep fresh. Burritos are wrapped in parchment before freezing. For reheating, I ensure eggs are warmed just right and let egg muffins sit after microwaving.

I like to add special ingredients to boost nutrition. Chia seeds and walnuts add omega-3s. Maple syrup sweetens things up a bit. Berries and cacao nibs make everything more exciting.

Different recipes keep my meals interesting. Sheet-pan eggs work great in wraps or sandwiches. Granola can be a snack or breakfast topping. Sometimes, I turn overnight oats into fancy parfaits. Freezer waffles turn into delicious PB&J stacks.

Conclusion

Changing my breakfasts to Energy-Boosting options changed my mornings. I mix it up with baked oats, granola, egg bites, and more. These meals let me eat sooner, maintain my energy, and reduce stress.

EatingWell recipes help me use ingredients like peanut butter and oats. Lindsay Taylor gives tips for easy, one-handed meals for new moms. It makes dealing with nutrition and sleep easier, even boosting milk supply.

On weekends, I prepare meals that can be frozen or stored. I make granola in bulk, freeze PB bars, and have oats ready to go. Adding chia, walnuts, and berries makes meals more fulfilling.

Healthy, quick breakfast habits keep me ready and satisfied. My meals are balanced, my mornings are smooth, and I stay energized. This routine, with its make-ahead meals, helps me thrive during busy days.

Protein-Packed Postpartum Dinner

One-Pan Chicken & Quinoa Power Bowl – Protein-Packed Postpartum Dinner for Weight Loss

Discover how to whip up a One-Pan Chicken & Quinoa Power Bowl, your go-to

I crafted this tasty one-pan chicken and quinoa dish for easy postpartum meals. It’s packed with protein and quick to make, perfect for busy nights. You can enjoy it warm or chilled any day of the week.

This meal is all about quinoa and tender chicken combined with kale, cherry tomatoes, and slivers of almonds. I use olive oil, paprika, turmeric, coriander, onion powder, salt, and pepper for seasoning. It’s simple to make and great for busy parents, also keeping breastfeeding nutrition in mind.

To make it, I follow a few key steps: I use a 1 1/2 cups of quinoa to 2 1/4 cups of water for perfect quinoa. I also season the chicken for flavor, and cook veggies in the same pan. This dish is delicious, filling, and boosts energy.

This quinoa bowl is great for packing lunches or having dinner ready in no time. It keeps well in the fridge, making my meal planning easy. This dish helps me eat healthily without any hassle.

Why I Love This One-Pan Chicken & Quinoa Power Bowl for Postpartum Weight Loss


I choose this bowl because it’s full of flavor and easy to make. Quinoa is a great source of protein. Plus, lean chicken adds strength. Kale, cherry tomatoes, and almonds make it a crave-worthy postpartum meal.

High-protein, high-fiber combo that keeps me full

This bowl blends tender chicken with slow-digesting quinoa. It gives me the benefits of protein and fiber. And healthy fats. It keeps me feeling full without feeling tired afterward.

Easy weeknight meal I can meal-prep and reheat

I prepare quinoa on Sunday for the week. Skillet chicken cooks quickly and is juicy. Having these ready lets me put together a meal fast on busy nights.

Balanced macros for steady energy while breastfeeding

Chicken and quinoa provide protein, while greens and almonds offer fiber and fats. A splash of lemon and some herbs add flavor without heaviness. This gives me the energy I need for breastfeeding, feeling light and refreshed.

Ingredients You’ll Need and Smart Substitutions

I keep my chicken quinoa recipe easy so you can make it quickly. These ingredients are also great for making big batches for meal prep.

Core ingredients: My recipe includes 1 1/2 cups quinoa and 1 pound of chicken tenders. For veggies, I use 6 cups of chopped kale and a pint of cherry tomatoes. I top it off with 1/2 cup of toasted almonds and some chopped parsley. This mix offers crunch, color, and lots of protein.

Seasoning blend: A tasty seasoning blend brings the dish to life. I mix 1 tablespoon olive oil with several spices to flavor the chicken. This includes paprika, turmeric, coriander, onion powder, salt, and black pepper. Another tablespoon of olive oil is for cooking. These spices create a warm and bright flavor.

Protein swaps and options: Sometimes, I use chicken breasts or thighs instead of tenders. If you prefer, you can use ground or sliced turkey for a change. The seasoning works well with any of these options.

Carb base alternatives: I usually use quinoa, but sometimes I choose brown rice. For a lighter option, cauliflower rice is great. All these bases pair well with the toppings.

Add-in veggies: I like to add different veggies to keep it interesting. Quickly adding spinach, red bell pepper, or mushrooms makes it tasty. Cucumber or red onion are great for extra crunch.

Flavor boosters: I add lemon juice and more parsley for extra flavor. Cooking grains in low-sodium chicken broth makes it even better. Chives are a nice touch if you have them. These tips help make a simple dish taste amazing.

How I Cook Fluffy Quinoa Every Time

I always follow the same steps to make my quinoa perfect. It’s great for a meal after working out or for meal prep. The method is quick, easy to do, and you can make a lot at once.

Rinse, toast, then simmer ratio: 1 1/2 cups quinoa to 2 1/4 cups water

First, I rinse the quinoa until it’s clean. Next, I toast it in a pan for 2 minutes until it smells nice. Then, I add water, boil it, lower the heat, cover, and let it cook for 15 minutes.

After turning off the heat, I let it sit covered for 5 minutes. This makes it super fluffy. A fork is all you need to fluff it up and get it ready to eat.

Boost flavor: cook in chicken broth, rest covered, fluff with a fork

Cooking quinoa in broth makes it taste better. I use low-sodium chicken broth for a good base. Adding lemon, salt, pepper, and herbs at the end makes it even more delicious. Remember, letting it sit and then fluffing it is crucial.

This way, the quinoa stays fluffy. It’s great for days when you need to reheat it or eat it cold.

Meal-prep tip: make 2 cups cooked quinoa for the week or use pre-cooked packs

Every Sunday, I prepare my quinoa for the week. I make sure to cook at least 2 cups to have enough for meals. If I’m in a hurry, I use pre-cooked quinoa from stores and just add some broth to make it taste fresh.

Whichever way I choose, it ensures I have tasty quinoa ready quickly. It helps me keep my meals healthy and delicious all week.

Skillet Chicken That’s Juicy and Perfect for Bowls

I like to keep dinner easy with skillet-cooked chicken tenders. They’re golden on the outside and tender inside. A quick mix of spices makes the chicken perfect for bowls with quinoa and greens. This method is a great fit for busy weeknight meals.

Quick marinade with pantry spices and 30-minute rest

I mix olive oil with spices like paprika and turmeric, then coat the chicken in it. This 30-minute marinade makes the chicken colorful and tasty while I get the veggies ready. For thinner chicken cuts, I just adjust the marinating time.

Cook in olive oil, 3–4 minutes per side; rest before slicing

In a skillet, I cook the chicken in olive oil for 3–4 minutes each side until it’s done. If I’m using an air fryer, I cook at 380°F first for 7 minutes, flip, then cook 3-4 more minutes. Letting it rest makes sure it stays juicy for the bowls.

Don’t overcook: aim for 165°F on an instant-read thermometer

I make sure the chicken reaches 165°F with a thermometer for safety and juiciness. Thighs might need a bit more time, but tenders cook quickly. This way, my chicken comes out looking and tasting great, even on busy nights.

One-Pan Veggies for Color, Crunch, and Nutrients

After searing the chicken, I keep using the same pan. This method saves time and adds flavor. It also creates vibrant, nutritious toppings for bowls without using more dishes.

I begin by sautéing kale over medium-high heat. The chopped kale softens in minutes, getting a light char. I then take it out and keep the pan hot for what comes next.

Then, I add cherry tomatoes to the pan. They cook until their skins burst and they become soft. This adds a sweet balance to the greens and makes every mouthful juicier.

For toppings, I choose based on my mood. I enjoy the combination of feta, avocado, and cucumber for creaminess and crunch. Adding lemon brings out the flavors without needing salt.

If I’m in the mood for something special, I add tahini tzatziki sauce. This adds sesame flavor and creamy yogurt. It brings together the kale and tomatoes beautifully.

To put the bowl together, I start with quinoa and sliced chicken. Then I add the kale and tomatoes, with almonds and parsley on top. This way, everything stays fresh and tastes great, all from one pan.

Protein-Packed Postpartum Dinner Benefits

I reach for this bowl when I need energy and structure. It’s perfect for busy evenings. Plus, it’s great for recovery and breastfeeding, offering a fresh taste. With protein, fiber, and healthy fats, my meals are balanced and fuss-free.

This meal packs a ton of postpartum nutrition into one pan. It has lean chicken for strength and quinoa for energy. The veggies add important micronutrients. Almonds and olive oil make it filling yet light.

Complete protein: quinoa contains all 9 essential amino acids

Quinoa is a star here. It has all the amino acids we need. Paired with chicken, it helps repair muscles post-pregnancy. This mix makes my dinner rich in protein. It aids in recovery and supports a healthy weight without being too strict.

Satiety and weight-loss support from protein, fiber, and healthy fats

Quinoa and kale provide fiber, while olive oil and almonds add healthy fats. These ingredients help me stay full longer. I like how the meals are tasty yet within a smart calorie range. It helps me maintain balance during my hectic weeks.

Meal-prep friendly: cook quinoa up to 5 days ahead, chicken up to 3 days

I cook in bulk on Sundays to ease my weeknights. I prepare quinoa and chicken, then add fresh veggies and toppings like avocado. This meal stays fresh for days. Making a breastfeeding-friendly dinner becomes quick and easy.

Step-by-Step: Assemble, Store, and Reheat

I make this power bowl simple for easy weeknights. I think about tasty grain bowl meals in layers. Each layer keeps the textures crisp and flavors shining.

I start by splitting cooked quinoa into four bowls. Then, I layer on sliced chicken. After that, I add sautéed kale and top it off with blistered cherry tomatoes. Lastly, toasted slivered almonds go on the very top. This order keeps everything moist and crunchy and makes reheating simple.

For extra flavor, I sprinkle chopped parsley, a bit of lemon zest, and a few sesame seeds on top. Herbs, citrus, and sesame add freshness, zest, and a gentle crunch. Even when I switch to brown rice or cauliflower rice, I use the same toppings to keep it exciting.

To store, I put servings in airtight containers and refrigerate them for 3–4 days. I try to keep quinoa and chicken separate. For reheating, I gently warm it, adding kale and tomatoes last. Cold quinoa bowls feel fresher than rice ones.

I watch my portions to help with weight loss. I use a palm-size amount of chicken, a hand of quinoa, and a sprinkle of almonds. I only add extras like feta or avocado if I have space, keeping protein high and calories in check.

Conclusion

I enjoy making this chicken quinoa recipe because it’s quick to prepare and always tastes delicious. The quinoa is cooked with a bit of water for 15 minutes, then it’s left to sit. After that, I fluff it up. I cook the chicken in hot olive oil until it’s done, then let it cool. The same pan is used to cook kale and tomatoes, making cleaning up easier.

This recipe is also great for meal prep after having a baby. Quinoa stays fresh for up to 5 days, and chicken remains juicy for 3 days. This allows for easy meal assembly. I like to add almonds and parsley for extra flavor. Sometimes, I use different meats or grains, like brown rice, to keep meals interesting.

It’s the small changes that can really enhance a dish. Adding chicken broth to grains gives them more flavor. Also, adding lemon or herbs at the end makes the dish taste fresh. This meal has everything you need: protein, fiber, and a bit of healthy fat. It’s great for keeping energy levels up, especially on busy evenings or for new moms.

In essence, this dish is perfect for my everyday life: it requires only one pan, uses simple steps, and allows for ingredient substitutions. Its strong flavors make it a go-to meal for healthy eating, whether I’m looking to lose weight or need a reliable meal prep option. Plus, it’s based on quinoa, a complete protein source.