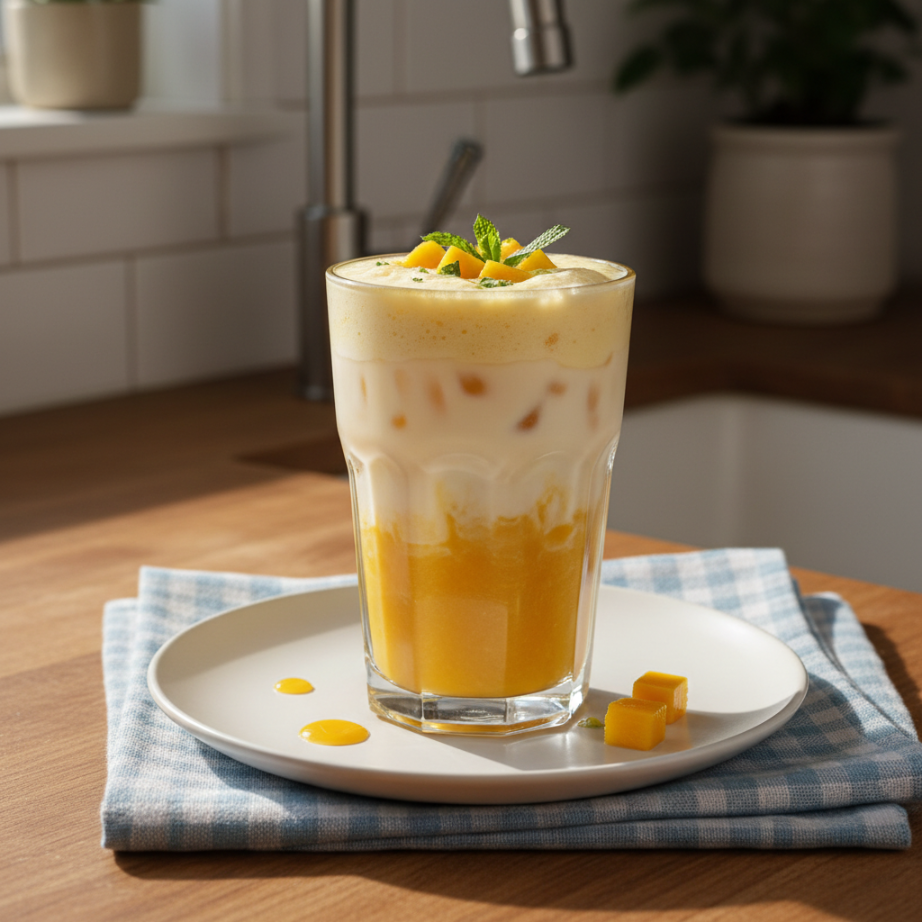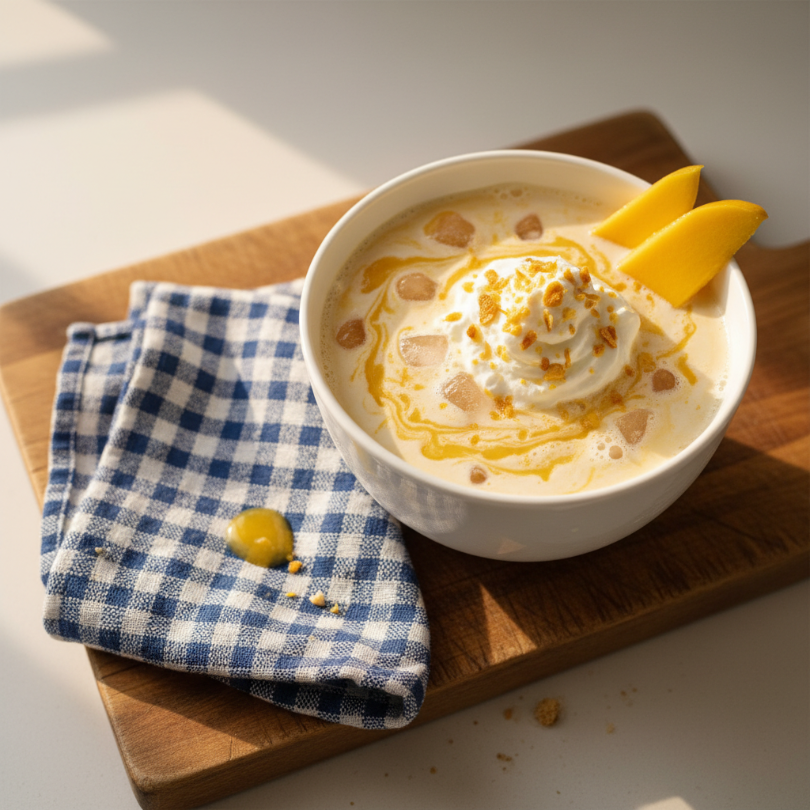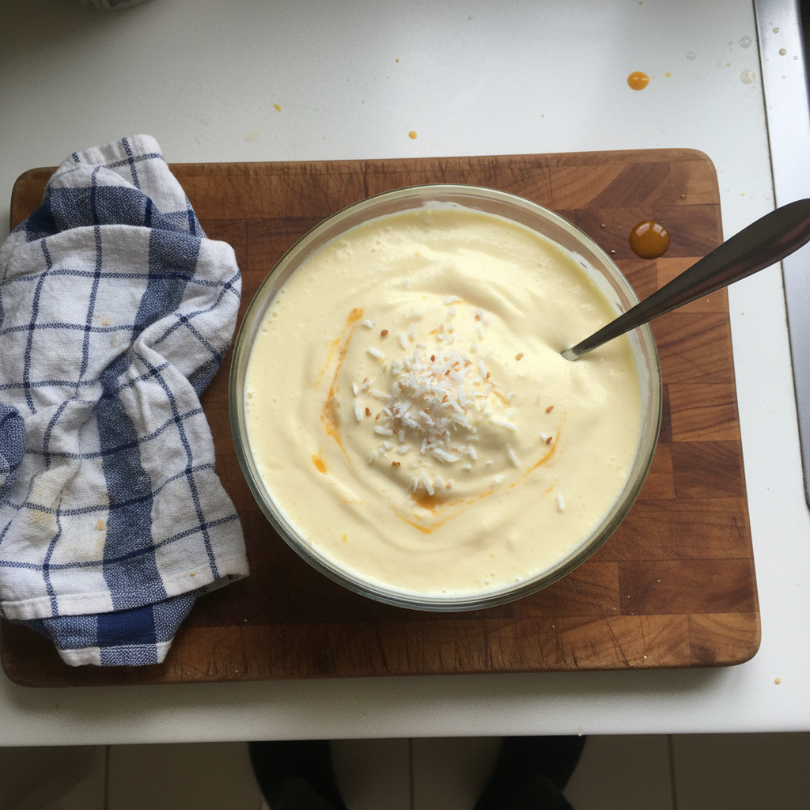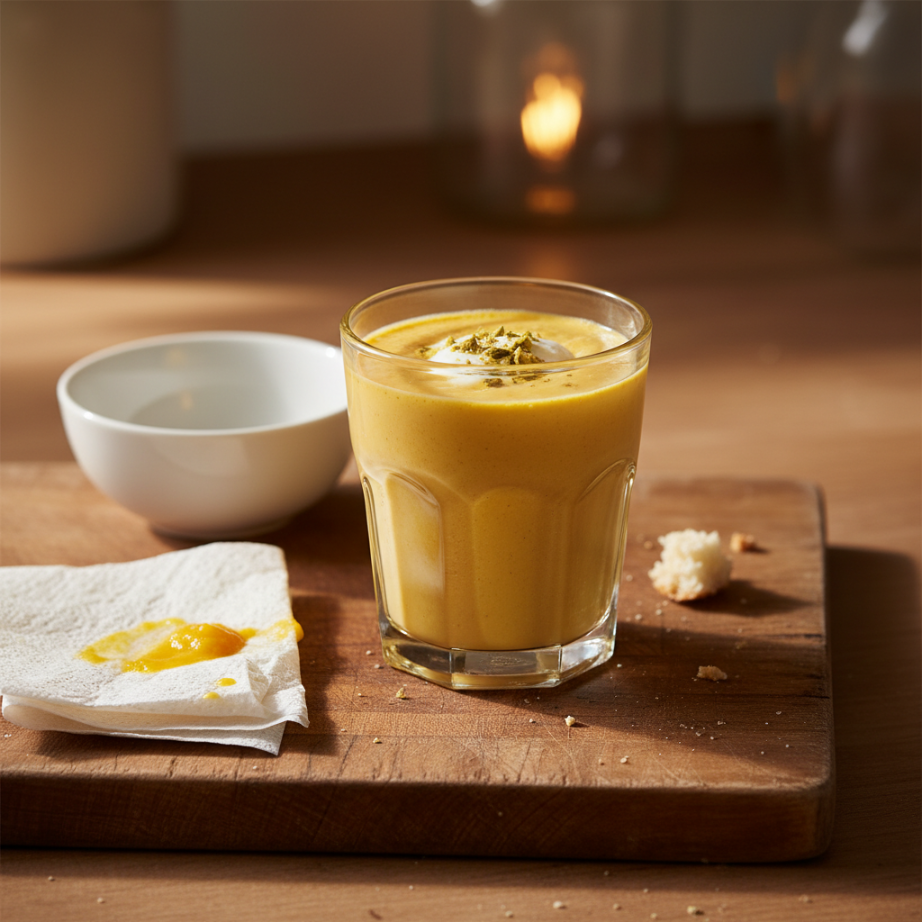
Blogs
3 High Protein Low Carb Dinners for Busy Families

3 High Protein Low Carb Dinners for Busy Families

Sizzling pans, melty cheese, and happy sighs. These dinners prove low carb doesn’t mean

Sizzling pans, melty cheese, and happy sighs. These dinners prove low carb doesn’t mean boring or bland. Your family won’t even miss the pasta.

I used to be the queen of the “side-dish struggle.” You know the one—where you make a healthy grilled chicken for yourself and a separate mountain of mac and cheese for the kids. Honestly, it was exhausting. One Tuesday night, after staring at a sink full of double the dishes, I just snapped. I decided everyone was eating the same thing. I started experimenting with meals that felt indulgent but were actually packed with lean protein and veggies. This collection is the result of those “mom-is-too-tired” kitchen experiments that actually worked.

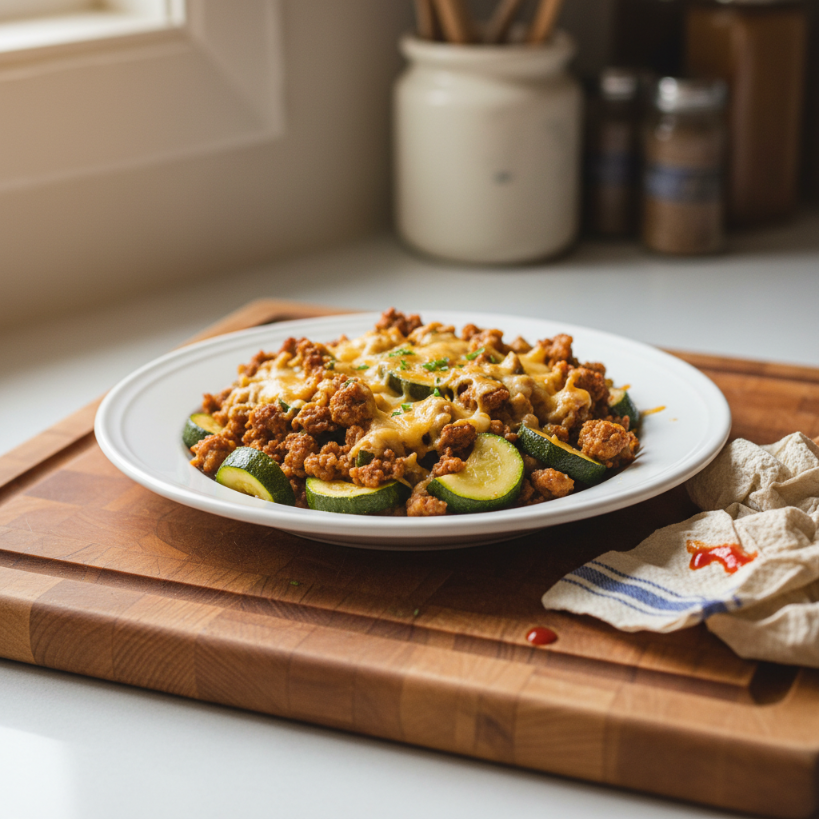
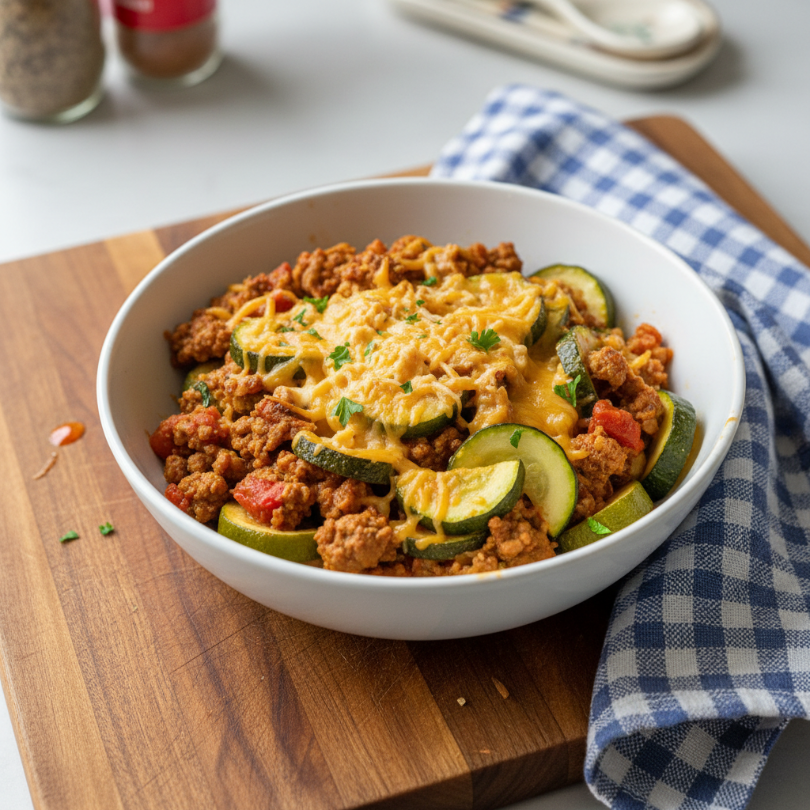
One-Pan Cheesy Ground Turkey & Zucchini Skillet
One-Pan Cheesy Ground Turkey & Zucchini Skillet

This skillet is a literal lifesaver when the clock is ticking. It tastes like the inside of a stuffed pepper but without all the tedious chopping and baking time. We’ve got lean ground turkey browned until it’s got those crispy edges, mixed with tender zucchini and a blanket of gooey shredded cheddar. It’s comforting, savory, and incredibly filling. My toddler calls it “the cheesy meat,” and hey, I’ll take the win.

Ingredients

– 1 lb lean ground turkey — 93% lean is my go-to for flavor
– 2 large zucchinis — sliced into half-moons
– 1/2 medium yellow onion — finely diced
– 2 cloves garlic — minced
– 1 tsp smoked paprika — adds a lovely depth
– 1/2 tsp dried oregano
– 1 cup shredded sharp cheddar cheese
– 1 tbsp olive oil
– Salt and black pepper — to taste

Instructions

1. Heat the olive oil in a large skillet over medium-high heat.
2. Add the ground turkey and onion. Break the meat apart with a wooden spoon and cook until browned, about 6-8 minutes.
3. Stir in the minced garlic, paprika, and oregano. Cook for just a minute until you can smell that garlic hitting the pan.
4. Toss in the zucchini half-moons. Sauté for 5-7 minutes. You want them tender but not mushy.
5. Sprinkle the cheddar cheese over the top. Cover the pan with a lid for 1-2 minutes until the cheese is a bubbly, melted dream.
6. Season with salt and pepper and serve immediately.

Tips

– Get the browning right — Don’t move the turkey too much at first. Let it sit for 2 minutes to get that golden crust.
– Vegetable swap — If your kids hate zucchini, try bell peppers or even cauliflower rice.

I’m obsessed with this because it happens in one pan. Less cleaning, more living.

The first time I made this, I was worried the zucchini would be a dealbreaker. But the cheese really acts like a bridge for picky eaters. It’s a staple in our house now because it’s so fast.

📋 Recipe Card

Recipe 1: One-Pan Cheesy Ground Turkey & Zucchini Skillet

⏱️ Prep: 10 minutes🍳 Cook: 15 minutes👥 Serves: 4🔥 Calories: 320
⏱️ Total Time: 25 minutes

🥗 Ingredients

  • 1 lb lean ground turkey
  • 2 large zucchinis, sliced into half-moons
  • 1/2 medium yellow onion, diced
  • 2 cloves garlic, minced
  • 1 tsp smoked paprika
  • 1/2 tsp dried oregano
  • 1 cup shredded sharp cheddar cheese
  • 1 tbsp olive oil
  • Salt and black pepper to taste

📋 Instructions

  1. 1Heat olive oil in a large skillet over medium-high heat.
  2. 2Add ground turkey and onion, cooking until meat is browned and onions are translucent.
  3. 3Stir in minced garlic, paprika, and oregano; cook for 1 minute.
  4. 4Add zucchini slices and sauté for 5-7 minutes until tender-crisp.
  5. 5Sprinkle cheddar cheese over the top, cover with a lid, and melt for 1-2 minutes.
  6. 6Season with salt and pepper before serving.

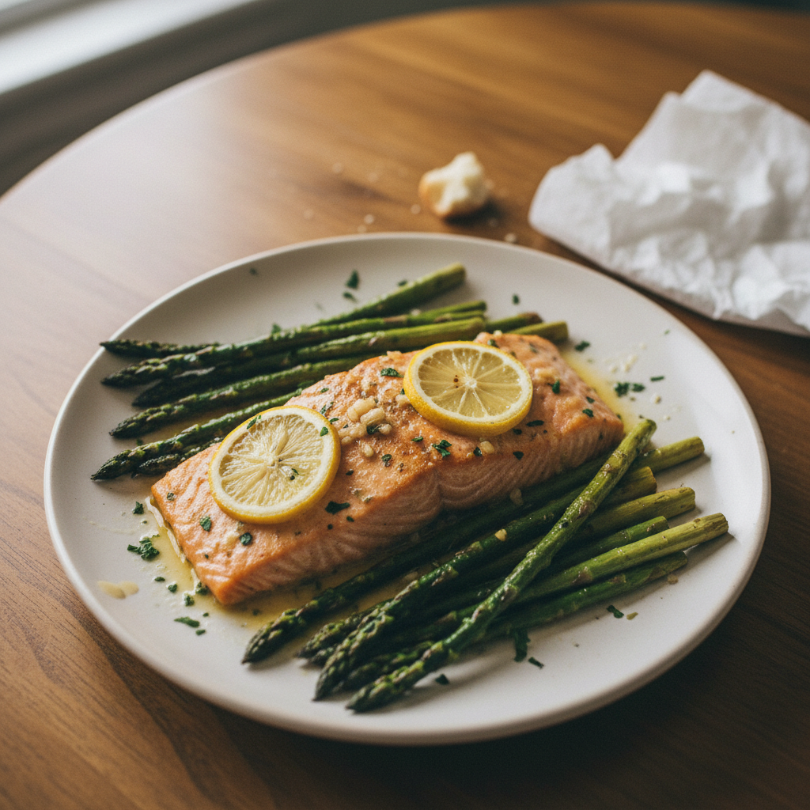
Garlic Butter Lemon Baked Salmon & Asparagus
Garlic Butter Lemon Baked Salmon & Asparagus

If you want a dinner that looks fancy but requires zero effort, this is it. We’re talking flaky Atlantic salmon fillets bathed in a simple garlic butter sauce, roasted right alongside snappy asparagus. The lemon brightens everything up, making it feel light but satisfying. It’s high in Omega-3s and protein, making it a total powerhouse meal for a weeknight.

Ingredients

– 4 salmon fillets — about 6 oz each
– 1 lb asparagus — woody ends trimmed off
– 3 tbsp butter — melted
– 3 cloves garlic — minced
– 1 tbsp fresh lemon juice
– 1/2 tsp lemon zest
– 1 tsp dried parsley
– Salt and pepper — to taste
– Lemon slices — for garnish

Instructions

1. Preheat your oven to 400°F (200°C) and line a large sheet pan with parchment paper.
2. Place the salmon fillets and the asparagus on the pan. Don’t crowd them too much.
3. In a small bowl, whisk together the melted butter, garlic, lemon juice, zest, and parsley.
4. Drizzle that liquid gold over the fish and the veggies. Use a brush or your hands to make sure everything is coated.
5. Roast for 12-15 minutes. The salmon should flake easily with a fork, and the asparagus should be tender-crisp.
6. Top with extra lemon slices for a hit of freshness.

Tips

– Check for thickness — Thicker salmon fillets might need an extra 2-3 minutes. Just keep an eye on them.
– Salmon swap — This works beautifully with chicken tenders too, just increase the cook time to 20 minutes.

My husband actually asks for this for his birthday dinner. It’s that good.

I love how the butter and lemon juice mingle on the pan to create a natural sauce. I usually just pour those extra pan juices right back over my portion. It feels like a restaurant meal, but I’m wearing sweatpants.

📋 Recipe Card

Recipe 2: Garlic Butter Lemon Baked Salmon & Asparagus

⏱️ Prep: 10 minutes🍳 Cook: 15 minutes👥 Serves: 4🔥 Calories: 380
⏱️ Total Time: 25 minutes

🥗 Ingredients

  • 4 salmon fillets (6 oz each)
  • 1 lb asparagus, ends trimmed
  • 3 tbsp butter, melted
  • 3 cloves garlic, minced
  • 1 tbsp fresh lemon juice
  • 1/2 tsp lemon zest
  • 1 tsp dried parsley
  • Salt and pepper to taste
  • Lemon slices for garnish

📋 Instructions

  1. 1Preheat oven to 400°F (200°C) and line a sheet pan with parchment.
  2. 2Place salmon and asparagus on the prepared pan.
  3. 3Whisk together melted butter, garlic, lemon juice, zest, and parsley.
  4. 4Drizzle the butter mixture over the salmon and asparagus evenly.
  5. 5Bake for 12-15 minutes until salmon flakes with a fork.
  6. 6Top with lemon slices and serve.

Creamy Pesto Chicken “Zoodles”
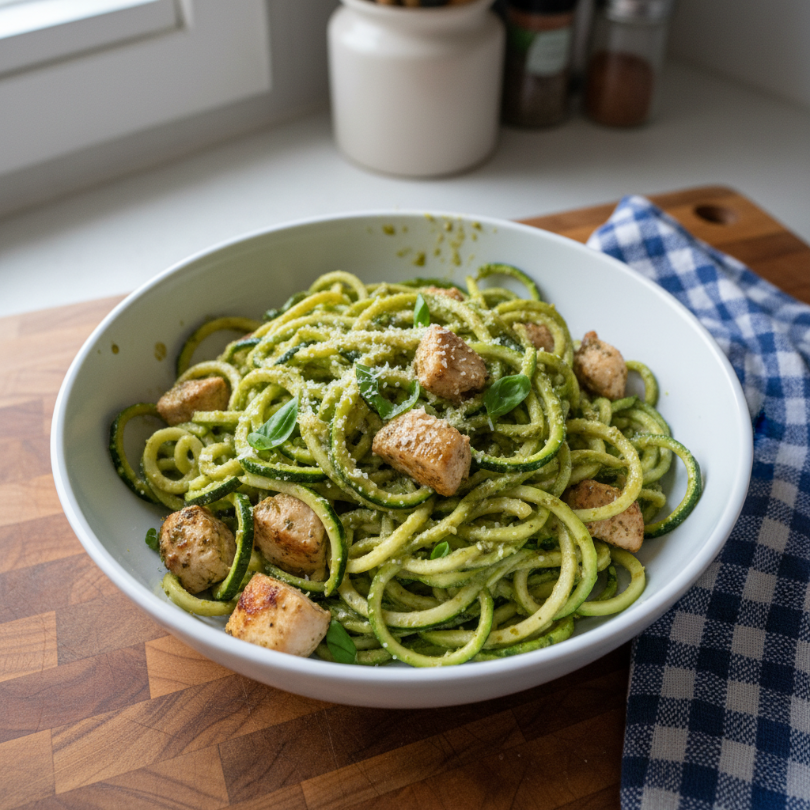
Creamy Pesto Chicken

This is the ultimate answer to common pasta cravings. We swap out the carb-heavy noodles for zucchini noodles (zoodles) and toss them with juicy chicken breast and a rich, creamy pesto sauce. It’s savory, herbal, and seriously decadent. By using a little heavy cream or cream cheese, the sauce clings to the zoodles perfectly, so you don’t end up with a watery mess.

Ingredients

– 1.5 lbs chicken breast — cut into bite-sized chunks
– 3 medium zucchinis — spiralized into noodles
– 1/2 cup basil pesto — store-bought is totally fine!
– 1/4 cup heavy cream — or plain Greek yogurt for a tangier kick
– 1/4 cup grated parmesan cheese
– 2 tbsp olive oil
– Salt and pepper — be generous here

Instructions

1. Season your chicken chunks with salt and pepper.
2. Heat olive oil in a large skillet over medium-high heat. Cook the chicken until golden and cooked through (about 8-10 minutes). Remove chicken from the pan and set aside.
3. In the same skillet, turn the heat to medium-low. Add the pesto and heavy cream. Whisk until it starts to simmer.
4. Add the zucchini noodles to the sauce. Let them cook for only 2-3 minutes. You want them to soften slightly but keep a “bite.”
5. Toss the chicken back into the pan along with the parman cheese.
6. Mix everything until the sauce is thick and glossy. Serve warm.

Tips

– Dry your zoodles — After spiralizing, let them sit on a paper towel for 10 minutes to soak up excess moisture.
– Add crunch — Sprinkle some toasted pine nuts or sunflower seeds on top before serving.

I was a total skeptic about zoodles until I tried them with this pesto sauce.

Honestly, the sauce is the star here. It’s so rich that you really don’t miss the grain-based pasta. My kids like to help spiralize the zucchini—it’s the only way I can get them interested in green vegetables some days!

📋 Recipe Card

Recipe 3: Creamy Pesto Chicken Zoodles

⏱️ Prep: 15 minutes🍳 Cook: 15 minutes👥 Serves: 4🔥 Calories: 410
⏱️ Total Time: 30 minutes

🥗 Ingredients

  • 1.5 lbs chicken breast, cubed
  • 3 medium zucchinis, spiralized
  • 1/2 cup basil pesto
  • 1/4 cup heavy cream
  • 1/4 cup grated parmesan cheese
  • 2 tbsp olive oil
  • Salt and pepper to taste

📋 Instructions

  1. 1Season chicken with salt and pepper. Brown in olive oil over medium-high heat until cooked through.
  2. 2Remove chicken from the pan and set aside.
  3. 3Lower heat to medium-low and add pesto and heavy cream to the skillet, whisking to combine.
  4. 4Add zucchini noodles to the sauce and toss for 2-3 minutes until slightly softened.
  5. 5Stir the chicken and parmesan cheese back into the pan.
  6. 6Toss until the sauce thickens and coats everything evenly.

General Tips & Tricks

To keep prep fast, buy pre-spiralized veggies or pre-washed greens. Batch cook your protein on Sundays so you can just toss it into these recipes. Always keep a jar of high-quality pesto and a block of parmesan in the fridge. These items add instant flavor without adding carbs.

Conclusion

Eating well doesn’t have to be a chore or a separate meal for everyone. These recipes bring everyone to the table. They’re fast, filling, and incredibly delicious. Give one a try tonight and watch how fast the plates get cleared!
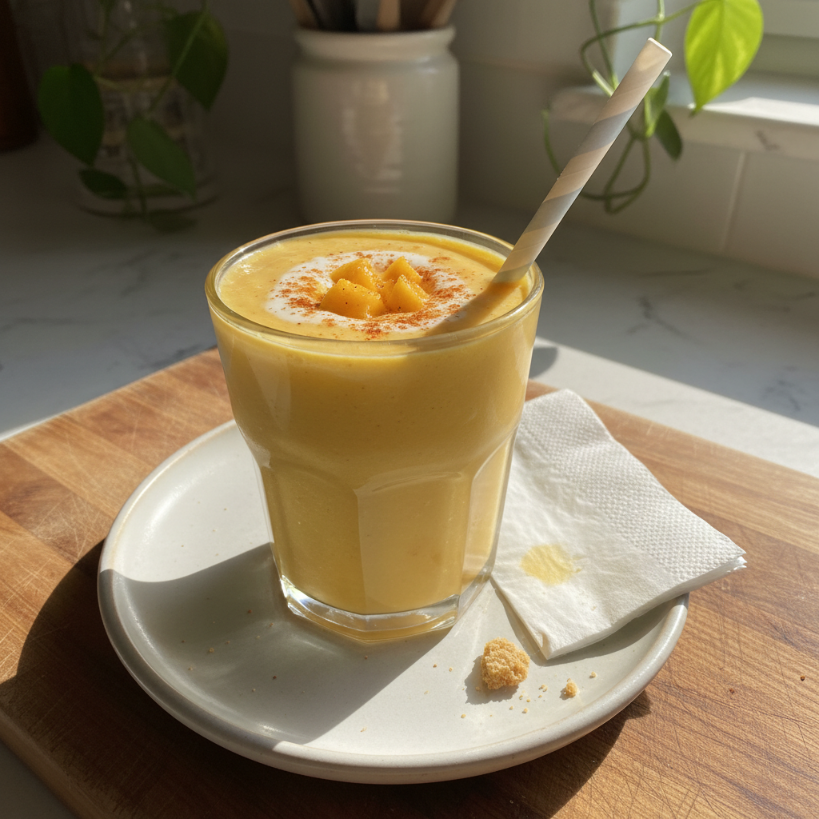
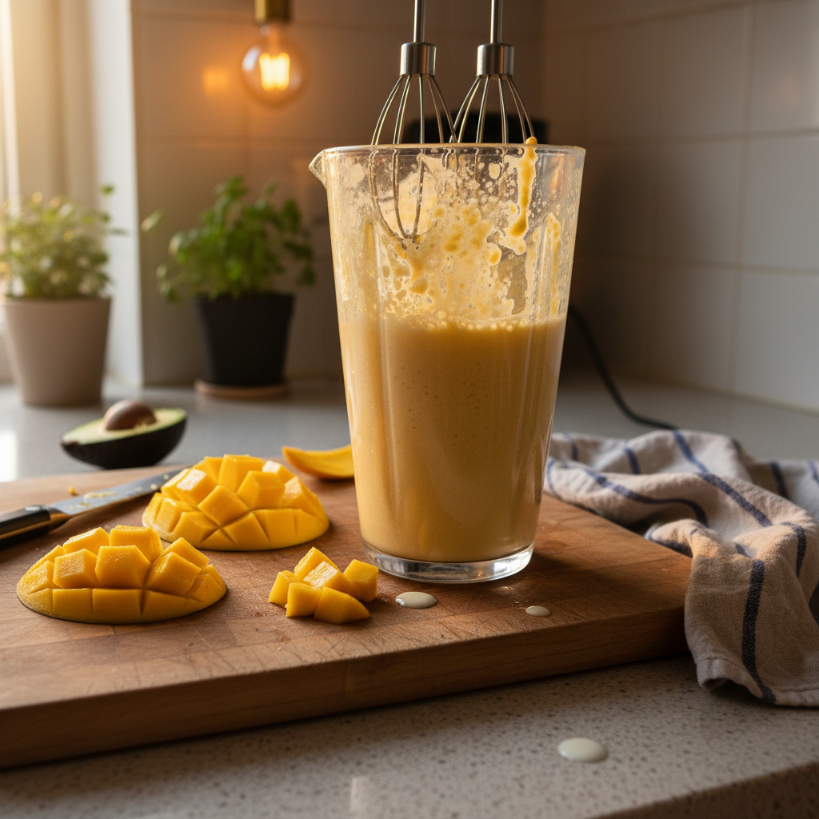
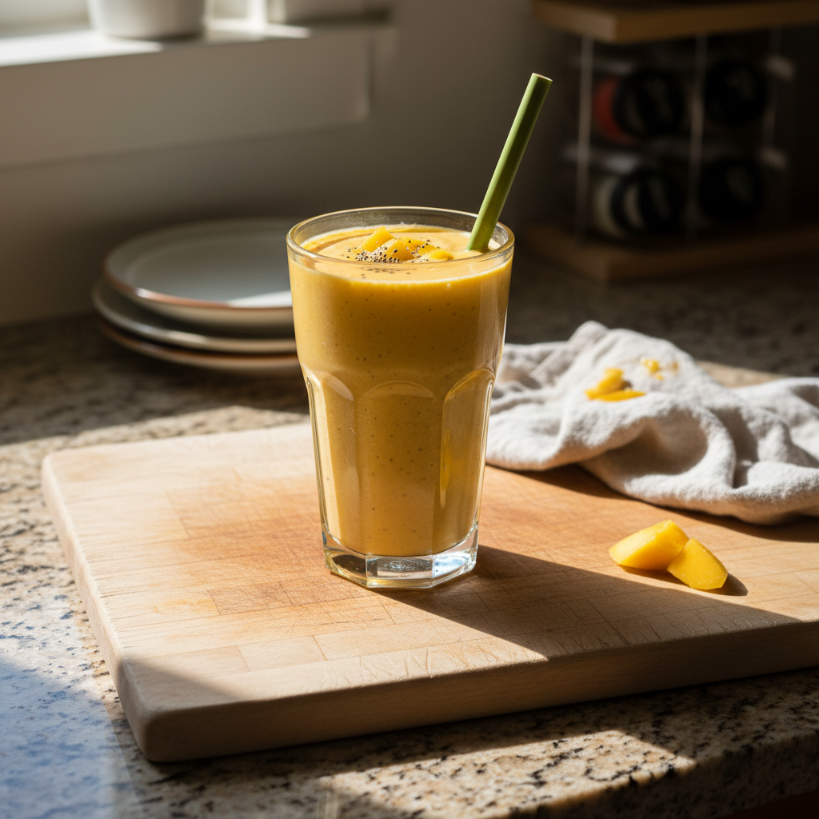
The Best 5-Minute Creamy Mango Smoothie

The Best 5-Minute Creamy Mango Smoothie

Sun-drenched, velvety, and ice-cold. One sip of this golden smoothie sends you straight to

Sun-drenched, velvety, and ice-cold. One sip of this golden smoothie sends you straight to a tropical beach. It’s thick like soft-serve.

Why I Can’t Get Enough of This Smoothie

I’ll be honest with you. Mornings at my house are usually a disaster. Between hunting for missing shoes and trying to convince my toddler that socks aren’t the enemy, breakfast often gets forgotten. I first whipped this up three years ago during a heatwave when the stove felt like a personal insult.

The kids called it “ice cream soup.” I didn’t correct them.

Now, it’s our Tuesday staple. It’s vibrant, cold, and actually keeps them full until lunch. My neighbor, Sarah, even keeps pre-chopped mango bags in her freezer now because her girls begged for “the yellow drink” after a playdate. It’s just that good.

Why You’ll Love This Recipe

  • Ready in 5 minutes — Genuinely. Just throw everything in and hit the button.
  • Naturally sweet — No refined sugars here, just the natural sugars from the fruit.
  • Super creamy — Using frozen fruit creates a thick, milkshake-like texture kids adore.
  • Immune boosting — It’s packed with Vitamin C and healthy fats from the yogurt.

Essential Ingredients

  • Frozen mango chunks — These are the star. I prefer buying the big bags at Costco to save money. Frozen is better than fresh here because it makes the drink frosty without needing ice.
  • Greek yogurt — This adds a massive punch of protein. I usually go for plain whole milk yogurt for the extra creaminess, but vanilla works too.
  • Milk of choice — I use unsweetened almond milk, but dairy or oat milk are perfect swaps.
  • Honey or Maple Syrup — Only if your mangoes aren’t super ripe. Totally optional.
  • A squeeze of lime — My secret weapon. It cuts through the sweetness and makes the mango flavor pop.

How to Make It

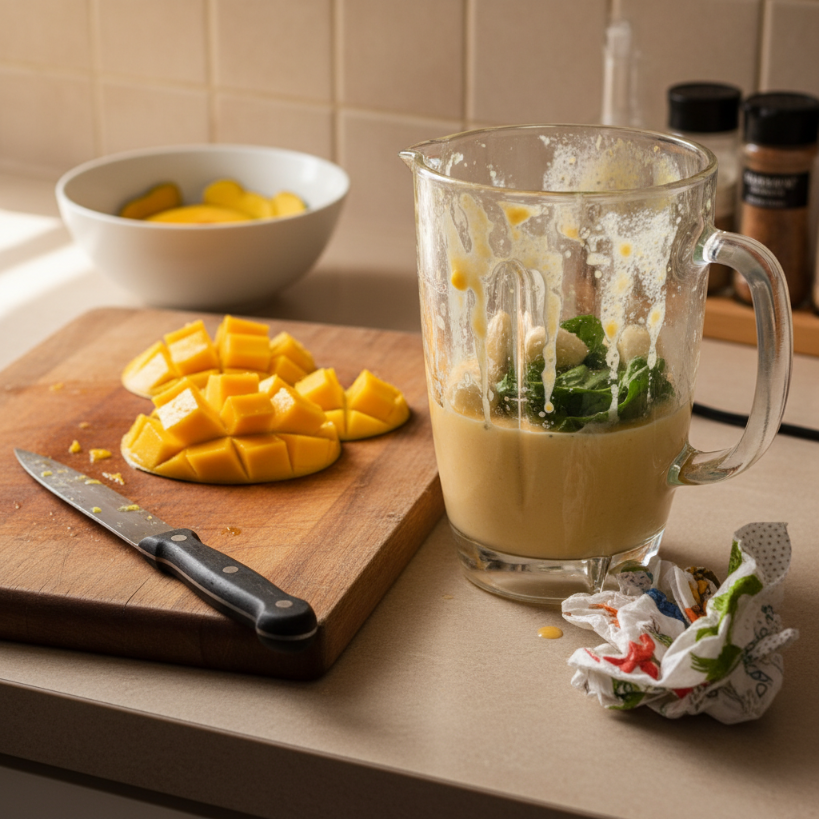
Start by pouring your milk into the blender first. This is a pro move—it prevents the frozen fruit from getting stuck in the blades and causing that annoying motor whine.

Next, pile in your frozen mango and the Greek yogurt. If you want a little extra zing, squeeze in a bit of lime juice.

Secure the lid. Pulse it a few times to break up the big fruit chunks, then flip it to high. Blend for about 45 to 60 seconds. You’re looking for a smooth, pale orange swirl with zero lumps. If it’s too thick, don’t panic. Just splash in a little more milk and give it another quick whirl. I like it thick enough to eat with a spoon!

Variations & Substitutions

  • Make it vegan — Use coconut yogurt and a splash of coconut milk for a tropical vibe.
  • Add greens — A handful of baby spinach won’t change the flavor, though it will turn the color a funky green.
  • Tropical Twist — Swap half the mango for frozen pineapple or a half-banana.
  • Boost the protein — Add a tablespoon of hemp seeds or chia seeds for extra nutrients.
The Best 5-Minute Creamy Mango Smoothie preparation

Serving Suggestions

Serve this in a tall glass with a reusable straw. For the kids, I sometimes add a few shredded coconut flakes or a single blueberry on top to make it feel “fancy.” It also makes a killer smoothie bowl topped with granola.

How to Store & Reheat

Smoothies are definitely best fresh. However, if you have leftovers, pour them into silicone popsicle molds. Freeze them for a healthy afternoon snack later! If you keep it in the fridge, it will turn into juice within a few hours. Just give it a quick shake before drinking.

FAQ

Can I use fresh mango instead of frozen?
Yes, but the texture will be much thinner. If you use fresh, add a cup of ice to get that chilly, thick consistency.

What if my blender isn’t very strong?
Thaw the mango for about 10 minutes on the counter before blending. This helps the blades catch the fruit easily.

Is this smoothie actually filling?
Because of the protein in the Greek yogurt, it’s much more satiating than just fruit and water.

Time to Blend!

Go grab your blender. This is the easiest win you’ll have all week. Your kids will think it’s a treat, and you’ll know they’re getting the good stuff.

📋 Recipe Card

Quick Creamy Mango Smoothie

⏱️ Prep: 5 mins🍳 Cook: 0 mins👥 Serves: 2🔥 Calories: 210
⏱️ Total Time: 5 mins

🥗 Ingredients

  • 2 cups frozen mango chunks
  • 1 cup Greek yogurt (plain or vanilla)
  • 1/2 cup almond milk (or milk of choice)
  • 1 tsp honey (optional)
  • 1 tsp lime juice (optional)

📋 Instructions

  1. 1Pour the milk into the base of the blender.
  2. 2Add the frozen mango chunks and Greek yogurt on top of the liquid.
  3. 3Add honey and lime juice if using.
  4. 4Pulse 3-4 times to break down the large chunks of fruit.
  5. 5Blend on high for 45-60 seconds until completely smooth and creamy.
  6. 6Pour into glasses and serve immediately while ice-cold.
3 Cool & Zesty Summer Pasta Salad Recipes

3 Cool & Zesty Summer Pasta Salad Recipes

Cold noodles. Tangy dressing. Sun-warmed tomatoes. That’s the sound of summer on a plate.

Cold noodles. Tangy dressing. Sun-warmed tomatoes.

That’s the sound of summer on a plate.

I’ll be real: my first “signature” pasta salad was a disaster. It was 2014, and I brought a soggy, mayo-clogged bowl of rotini to a backyard lake party. Nobody ate it. It sat there, sweating in the sun, until I quietly dumped it behind a hibiscus bush. I learned the hard way that a great summer salad needs acid, crunch, and high-quality olive oil. Since then, I’ve perfected the art of the cold noodle. These three recipes are my heavy hitters—the ones guests actually ask for recipes of before they even finish their first serving.

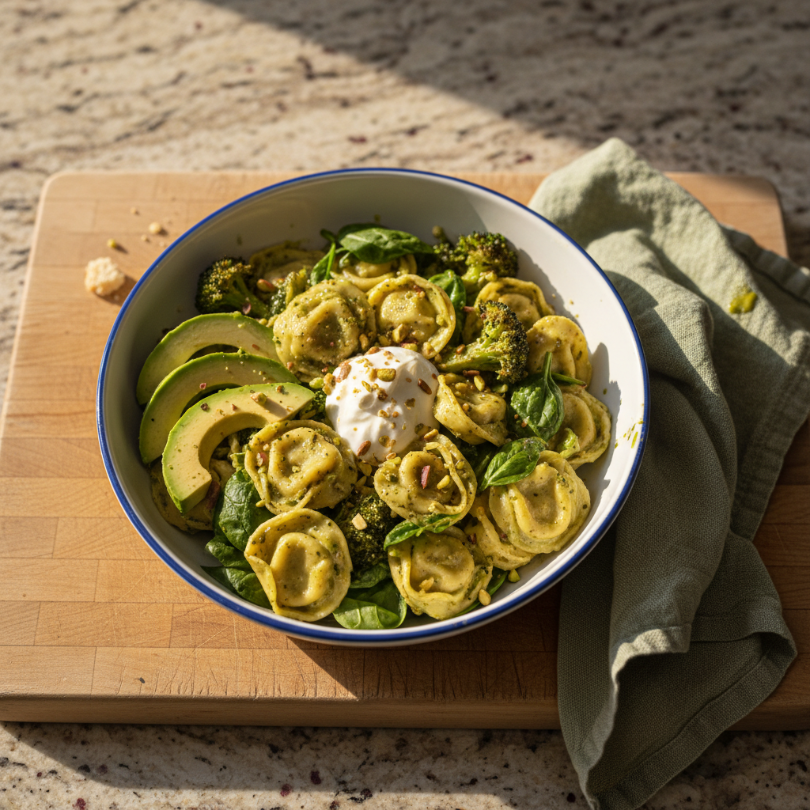
The Green Goddess Tortellini Bowl

The Green Goddess Tortellini Bowl

Imagine a bowl that tastes like a high-end spa day. It’s light, herbal, and uses cheese tortellini instead of plain pasta to feel a bit more like a “real” meal. The star is a dressing made with an entire bunch of fresh basil and a dollop of Greek yogurt for creaminess without the weight of heavy mayo. Every bite has a bit of snap from the sugar snap peas and a salty kick from the crumbled goat cheese. It’s essentially summer in a bowl.

Ingredients

– 20 oz cheese tortellini — fresh or frozen (not dried)
– 1 cup sugar snap peas — thinly sliced on a diagonal
– 1 large English cucumber — diced small
– 1/2 cup crumbled goat cheese — keep it cold until serving
– 1/2 cup pumpkin seeds (pepitas) — toasted for crunch
– 1/2 cup Greek yogurt — plain and full-fat
– 1 cup fresh basil leaves — packed tight
– 1/2 cup fresh parsley — stems removed
– 2 garlic cloves — smashed
– 3 tbsp lemon juice — juice of one large lemon
– 1/4 cup extra virgin olive oil — the good stuff
– 1/2 tsp sea salt — plus more for the pasta water

Instructions

1. Boil the tortellini in salted water according to the package directions, but pull them out 1 minute early. They should be “al dente” so they don’t fall apart when tossed.
2. Drain the pasta and immediately rinse with cold water. This stops the cooking and washes off the excess starch so they don’t stick.
3. Blend the yogurt, basil, parsley, garlic, lemon juice, salt, and olive oil in a food processor until it looks like a bright green, creamy sauce.
4. Toss the cooled tortellini in a large bowl with the sliced snap peas and cucumbers.
5. Pour that green goddess dressing over everything and fold gently. Avoid smashing the pasta.
6. Top with the crumbled goat cheese and toasted pepitas right before you walk out the door.

Tips

– Keep it green — If you’re making this a day early, wait to add the dressing. The acid in the lemon can dull the bright green color over 24 hours.
– Tortellini trick — Don’t overcook them! A mushy tortellini is a sad tortellini.

Honestly, this is the salad I make when I’m feeling a little “extra.” I first made it for a girl’s weekend at the beach, and we ended up eating it straight out of the Tupperware while sitting on the sand.

It’s surprisingly filling because of the cheese-stuffed pasta. My favorite part is the way the goat cheese melts slightly into the dressing, making every bite tangy and rich.

📋 Recipe Card

Recipe 1: The Green Goddess Tortellini Bowl

⏱️ Prep: 20 mins🍳 Cook: 10 mins👥 Serves: 6🔥 Calories: 410
⏱️ Total Time: 30 mins

🥗 Ingredients

  • 20 oz cheese tortellini (fresh or frozen)
  • 1 cup sugar snap peas, thinly sliced
  • 1 English cucumber, diced
  • 1/2 cup crumbled goat cheese
  • 1/2 cup toasted pumpkin seeds
  • 1/2 cup plain Greek yogurt
  • 1 cup fresh basil leaves
  • 1/2 cup fresh parsley
  • 2 garlic cloves, smashed
  • 3 tbsp lemon juice
  • 1/4 cup extra virgin olive oil
  • 1/2 tsp sea salt

📋 Instructions

  1. 1Cook tortellini in salted boiling water, removing 1 minute before package instructions for al dente texture.
  2. 2Drain and rinse with cold water immediately to stop the cooking.
  3. 3Place yogurt, basil, parsley, garlic, lemon juice, salt, and olive oil in a food processor; blend until smooth and bright green.
  4. 4In a large bowl, combine the cold pasta with cucumbers and snap peas.
  5. 5Fold in the dressing gently until every piece is coated.
  6. 6Top with goat cheese and pumpkin seeds just before serving.

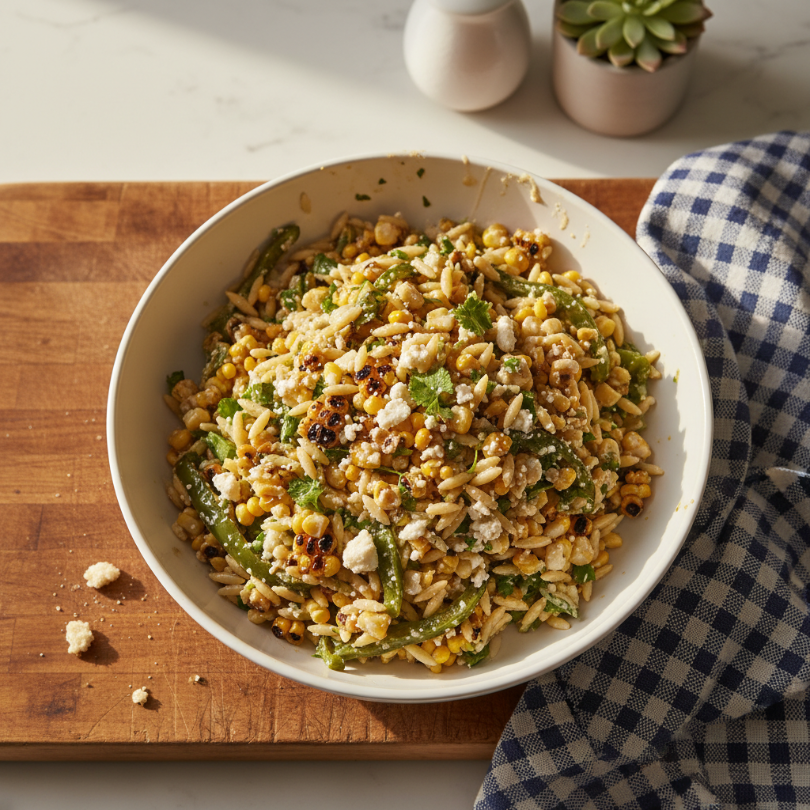
Grilled Corn & Poblano Orzo Salad

Grilled Corn & Poblano Orzo Salad

This one is for the backyard BBQ purists. It brings a smoky, charred energy that regular pasta salads just don’t have. We use orzo, which is small and rice-shaped, so it catches all the little bits of corn and lime dressing. Charring the corn and the poblanos on the grill (or even over a gas stove burner) adds a depth of flavor that is honestly addictive. It’s sweet, slightly spicy, and very refreshing.

Ingredients

– 1 lb orzo pasta — cooked and cooled
– 3 ears of corn — husks removed
– 2 poblano peppers — whole for charring
– 1 pint cherry tomatoes — halved
– 1/2 red onion — very finely diced
– 1/2 cup fresh cilantro — chopped
– 1/2 cup cotija cheese — crumbled
– 1/4 cup lime juice — fresh squeezed
– 1/3 cup avocado oil — or any neutral oil
– 1 tsp smoked paprika — for extra depth
– 1/2 tsp cumin — ground
– 1 tsp honey — to balance the lime

Instructions

1. Grill the corn and poblano peppers over high heat until they have beautiful black char marks all over.
2. Steam the charred poblanos in a sealed bag for 5 minutes, then peel off the skin, remove the seeds, and chop the flesh.
3. Cut the corn kernels off the cob once they are cool enough to handle. I do this inside a large bowl to catch the flying bits.
4. Whisk the lime juice, avocado oil, honey, cumin, and smoked paprika in a small jar. Give it a good shake.
5. Combine the orzo, corn, poblanos, tomatoes, onion, and cilantro in your biggest salad bowl.
6. Drizzle the dressing over the mix and toss well.
7. Sprinkle the cotija cheese over the top. It adds that perfect salty, dry-cheese finish.

Tips

– No grill? — No problem. Use a heavy cast-iron skillet to char the corn kernels and the peppers on the stovetop.
– Rinse the onion — After dicing the red onion, rinse it under cold water. It removes that harsh “bite” that lingers for hours.

This salad is my “secret weapon” for potlucks. People usually assume it’s a grain salad or corn salsa, and then they’re delighted to realize it’s actually pasta.

The smoky poblano isn’t “hot” spicy—it’s just flavorful. My husband usually eats the leftovers for breakfast with a fried egg on top. Don’t knock it until you’ve tried it.

📋 Recipe Card

Recipe 2: Grilled Corn & Poblano Orzo Salad

⏱️ Prep: 25 mins🍳 Cook: 15 mins👥 Serves: 8🔥 Calories: 320
⏱️ Total Time: 40 mins

🥗 Ingredients

  • 1 lb orzo pasta
  • 3 ears of fresh corn
  • 2 poblano peppers
  • 1 pint cherry tomatoes, halved
  • 1/2 red onion, finely diced
  • 1/2 cup fresh cilantro, chopped
  • 1/2 cup cotija cheese, crumbled
  • 1/4 cup fresh lime juice
  • 1/3 cup avocado oil
  • 1 tsp smoked paprika
  • 1/2 tsp cumin
  • 1 tsp honey

📋 Instructions

  1. 1Cook orzo in salted water until tender; drain and cool completely.
  2. 2Grill corn and whole poblanos over high heat until charred. Steam poblanos in a bag for 5 mins, then peel, seed, and dice.
  3. 3Cut the corn kernels off the cob.
  4. 4Whisk lime juice, oil, honey, and spices in a small jar to emulsify.
  5. 5In a large bowl, mix orzo, corn, peppers, tomatoes, onions, and cilantro.
  6. 6Toss with the dressing until well combined.
  7. 7Garnish with crumbled cotija cheese before serving.

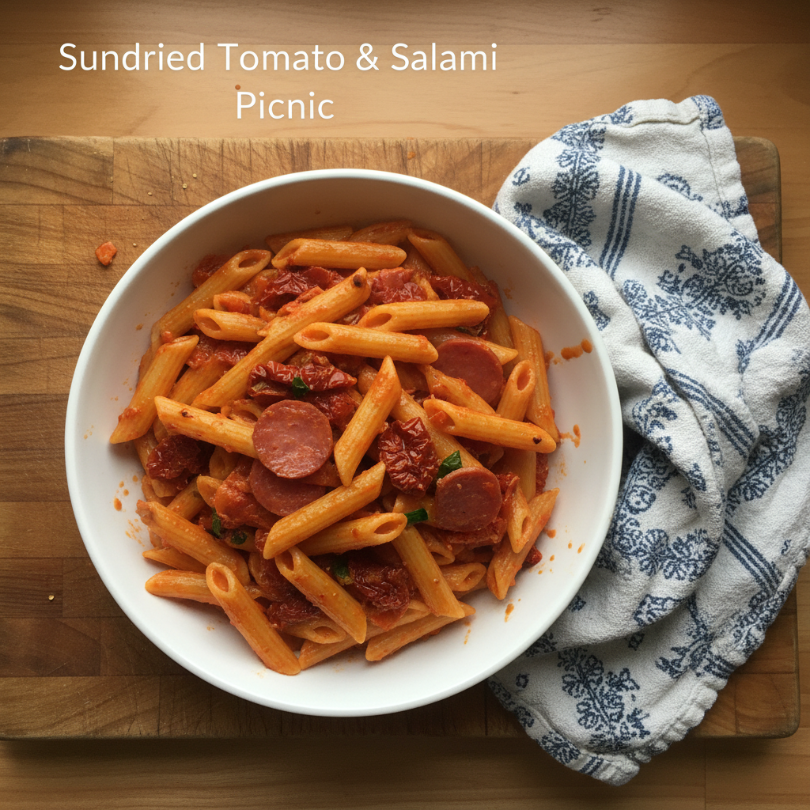
Sundried Tomato & Salami Picnic Penne

Sundried Tomato & Salami Picnic Penne

This is the ultimate classic Italian-inspired picnic food. It’s rugged. It’s sturdy. It actually tastes better after sitting in the fridge for six hours. We use penne rigate (the kind with ridges) because those little grooves hold onto the vinaigrette like a dream. With salty salami, chewy sundried tomatoes, and tiny pearls of mozzarella, it feels like a deconstructed charcuterie board in bowl form.

Ingredients

– 1 lb penne rigate — don’t use smooth penne!
– 1 cup sundried tomatoes — julienne cut, packed in oil
– 4 oz hard salami — cut into matchsticks or small cubes
– 8 oz fresh mozzarella pearls — drained
– 1/2 cup kalamata olives — pitted and halved
– 1/4 cup capers — drained and rinsed
– 1/2 cup red wine vinegar — the base of your punchy dressing
– 2/3 cup extra virgin olive oil — use the oil from the tomato jar for extra flavor
– 1 tbsp dried oregano — rub it between your palms to wake up the oils
– 1/2 tsp red pepper flakes — for a tiny hint of heat
– 1 cup fresh arugula — folded in right before serving

Instructions

1. Cook the penne in very salty water until it’s just past al dente. Cold pasta firms up, so you want it slightly softer than usual.
2. Drain and toss with a splash of olive oil so it doesn’t clump while it cools.
3. Whisk the red wine vinegar, olive oil, oregano, and red pepper flakes in a bowl until emulsified.
4. Mix the cooled pasta with the salami, mozzarella, olives, capers, and those chewy sundried tomatoes.
5. Pour about 3/4 of the dressing over the salad and toss. Let it sit for at least 30 minutes.
6. Add the remaining dressing and the fresh arugula right when you’re ready to serve.
7. Season with a final crack of black pepper.

Tips

– The Tomato Oil — That oil in the sundried tomato jar is liquid gold. Use it in the dressing! It’s infused with tomato goodness.
– Cheese Choice — If you can’t find mozzarella pearls, just tear a big ball of fresh mozzarella into bite-sized “shreds.”

This is the recipe I make most often for lake trips. It’s indestructible. While other salads might wilt or get watery, this one just marinates.

I remember making a double batch of this for a 4th of July hike. We carried it in a cooler bag to the top of a ridge, and honestly, eating these salty olives and pasta while looking at the view was better than any restaurant meal I’ve ever had.

📋 Recipe Card

Recipe 3: Sundried Tomato & Salami Picnic Penne

⏱️ Prep: 15 mins🍳 Cook: 12 mins👥 Serves: 10🔥 Calories: 445
⏱️ Total Time: 27 mins

🥗 Ingredients

  • 1 lb penne rigate
  • 1 cup julienned sundried tomatoes in oil
  • 4 oz hard salami, cubed or sliced into strips
  • 8 oz fresh mozzarella pearls
  • 1/2 cup pitted kalamata olives, halved
  • 1/4 cup capers, rinsed
  • 1/2 cup red wine vinegar
  • 2/3 cup extra virgin olive oil (or mix with tomato oil)
  • 1 tbsp dried oregano
  • 1/2 tsp red pepper flakes
  • 1 cup fresh arugula

📋 Instructions

  1. 1Boil penne in heavily salted water until just slightly past al dente; drain and toss with a little oil to cool.
  2. 2Make the dressing by whisking vinegar, olive oil, oregano, and red pepper flakes.
  3. 3In a massive bowl, combine pasta, salami, mozzarella, tomatoes, olives, and capers.
  4. 4Pour 75% of the dressing over the salad and toss well. Let rest for 30 minutes.
  5. 5Just before serving, toss in the fresh arugula and the remaining dressing for a fresh finish.

General Tips & Tricks

For any pasta salad, always salt your water like the sea. Since the pasta is served cold, it needs that internal seasoning to shine. Also, don’t be afraid to over-dress! Starch absorbs liquid as it sits, so a salad that looks “perfect” at 10:00 AM might be dry by a 1:00 PM lunch.

Conclusion

Summer is too short for boring sides. Whether you go for the creamy Green Goddess, the smoky Orzo, or the punchy Picnic Penne, you’re going to be the hero of the cookout. Grab your favorite bowl and get boiling. You’ve got this!

5 Nourishing Postpartum Freeze-Ahead Meals

5 Nourishing Postpartum Freeze-Ahead Meals

Sizzling ginger, creamy coconut, and slow-simmered oats. These meals wrap you in a warm

Sizzling ginger, creamy coconut, and slow-simmered oats. These meals wrap you in a warm hug from the inside out. They’re exactly what your healing body craves.

I remember my first week home with my daughter, Maya. The hazy, sleep-deprived blur was real. I’d be staring at the fridge at 3 AM, starving but too tired to even toast bread. Thankfully, my past self had spent a Saturday stocking the freezer with iron-rich stews and easy-to-grab snacks. Those pre-made meals saved my sanity. They weren’t just food; they were a lifeline when I didn’t have the bandwidth to chop a single onion. These five recipes are my absolute favorites for that “fourth trimester” recovery phase.

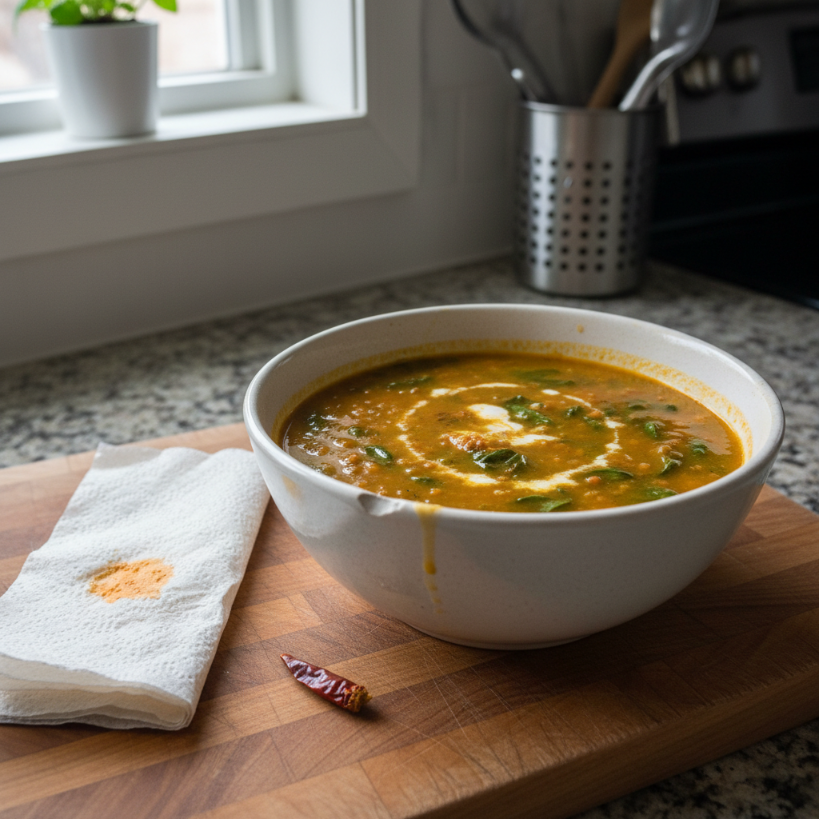
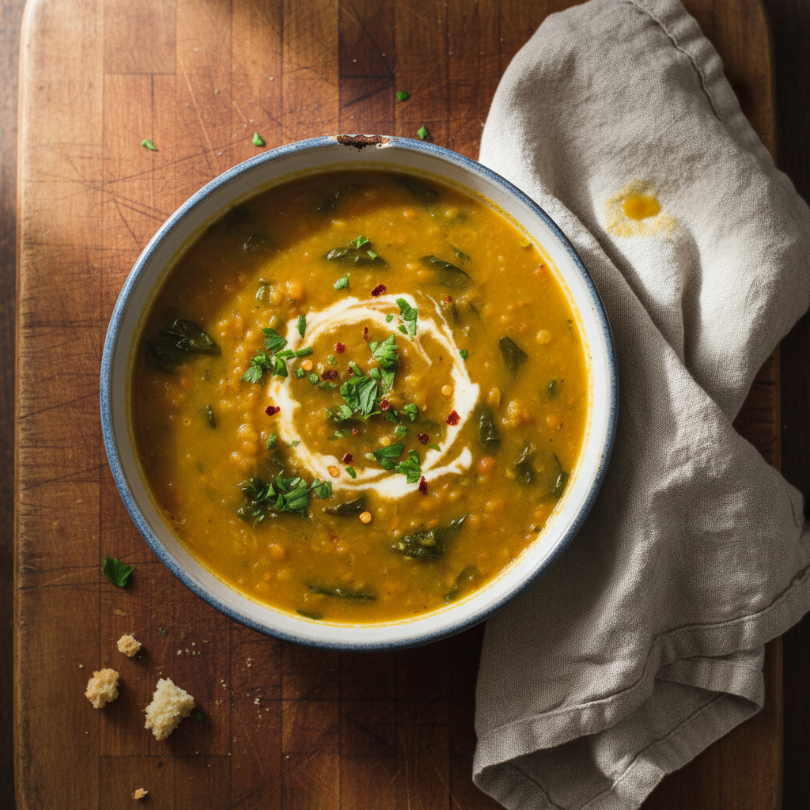
Golden Red Lentil & Spinach Soup

Golden Red Lentil & Spinach Soup

This soup is literally liquid gold for recovery. Red lentils break down into a thick, comforting base that’s super easy on the digestion—crucial for those first few days. I pack it with turmeric and ginger to help with inflammation. It’s light yet filling, and the bright colors actually make you feel a bit more human when you’re running on two hours of sleep.

Ingredients

* 2 cups red lentils — rinsed thoroughly
* 1 large yellow onion — diced small
* 3 large carrots — peeled and sliced into rounds
* 4 cloves garlic — minced
* 2 tablespoons fresh ginger — grated fine
* 1 tablespoon ground turmeric
* 1 can (14oz) full-fat coconut milk — for creaminess
* 6 cups vegetable broth
* 3 cups fresh baby spinach
* 1 lemon — juiced
* 2 tablespoons olive oil
* 1 teaspoon sea salt — plus more to taste

Instructions

1. Heat the olive oil in a large pot over medium heat and sauté the onion and carrots until they start to soften, about 6 minutes.
2. Stir in the garlic, ginger, and turmeric. Cook for just a minute until your kitchen smells spicy and incredible.
3. Add the red lentils, broth, and salt. Bring it all to a boil, then turn the heat down to low.
4. Cover and simmer for about 20 minutes. You want the lentils to be soft and starting to fall apart.
5. Stir in the coconut milk and spinach. Let the heat from the soup wilt the greens for about 2 minutes.
6. Squeeze in the fresh lemon juice at the very end to brighten all those earthy flavors.
7. Let it cool completely. Ladle into freezer-safe bags and lay them flat to save space.

Tips

* Flat freezing — Store the soup in gallon Ziploc bags. Freeze them flat on a baking sheet so they stack like books later.
* Gentle reheat — Thaw overnight in the fridge and warm it on the stove with a tiny splash of water if it got too thick.

Honestly, this soup is a staple in my house even when we don’t have a newborn. It’s so creamy without being heavy. My husband usually grabs a bowl too, so I always double the batch because it disappears fast.

📋 Recipe Card

Recipe 1: Golden Red Lentil & Spinach Soup

⏱️ Prep: 15 mins🍳 Cook: 30 mins👥 Serves: 6🔥 Calories: 310
⏱️ Total Time: 45 mins

🥗 Ingredients

  • 2 cups red lentils, rinsed
  • 1 large yellow onion, diced
  • 3 large carrots, sliced
  • 4 cloves garlic, minced
  • 2 tbsp fresh ginger, grated
  • 1 tbsp ground turmeric
  • 1 can (14oz) full-fat coconut milk
  • 6 cups vegetable broth
  • 3 cups fresh baby spinach
  • 1 lemon, juiced
  • 2 tbsp olive oil
  • 1 tsp sea salt

📋 Instructions

  1. 1Sauté onion and carrots in olive oil in a large pot for 6 minutes.
  2. 2Add garlic, ginger, and turmeric; cook for 1 minute.
  3. 3Stir in red lentils, broth, and salt. Bring to a boil, then simmer for 20 minutes.
  4. 4Stir in coconut milk and spinach until wilted.
  5. 5Add lemon juice and adjust salt to taste.
  6. 6Cool completely before bagging and freezing flat.

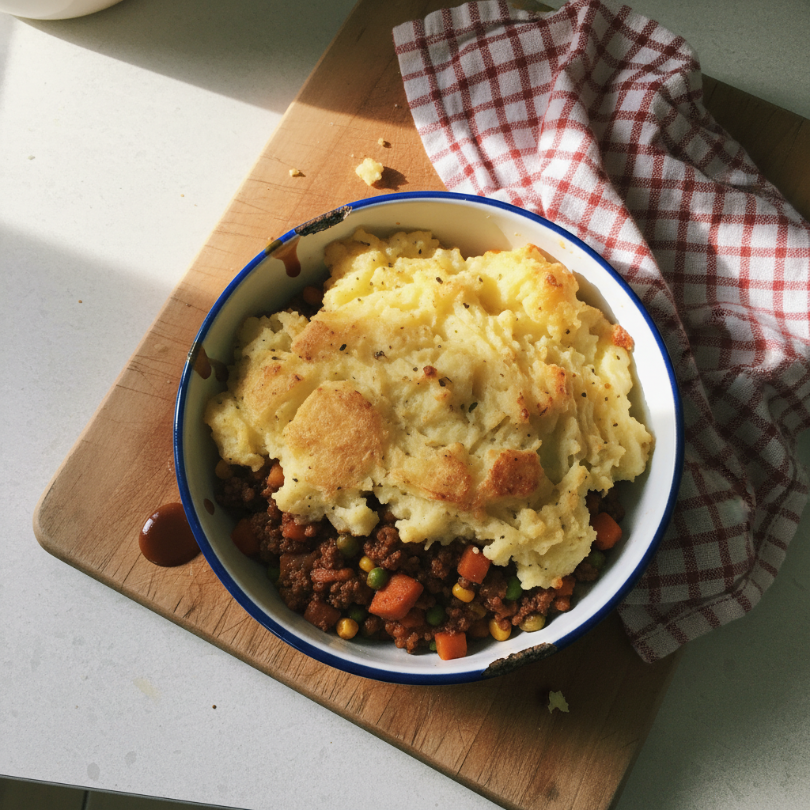
Freezer-Friendly Beef & Veggie Shepherd’s Pie

Freezer-Friendly Beef & Veggie Shepherd’s Pie

Iron is your best friend after giving birth. This shepherd’s pie is loaded with ground beef and hidden veggies, topped with a thick layer of buttery mashed potatoes. It’s the ultimate comfort food for when you’re feeling depleted. It reheats beautifully in the oven safely tucked under its potato blanket.

Ingredients

* 1 lb lean ground beef — or ground lamb for tradition
* 1 large onion — chopped
* 2 cups frozen peas and carrots
* 2 tablespoons tomato paste
* 1 cup beef bone broth — for extra nutrients
* 1 teaspoon dried thyme
* 4 large Russet potatoes — peeled and cubed
* 1/4 cup butter
* 1/2 cup whole milk
* 1/2 cup shredded cheddar cheese — optional

Instructions

1. Boil the potatoes in salted water until they’re fork-tender. Drain them and mash with the butter and milk until smooth. Set aside.
2. In a big skillet, brown the ground beef and onion until no pink remains. Drain any excess grease.
3. Stir in the tomato paste, thyme, and frozen veggies.
4. Pour in the bone broth and let it simmer for about 5 minutes until the liquid thickens into a light gravy.
5. Spread the meat mixture into a freezer-to-oven safe casserole dish.
6. Spread the mashed potatoes over the top. Make little peaks with a fork so they get crispy later.
7. Sprinkle with cheese if you’re feeling fancy.
8. Wrap the dish tightly with plastic wrap and then a layer of foil.

Tips

* Individual portions — Use small foil tins to make single-serving pies for quick lunches.
* Potato topping — Let the potatoes cool a bit before spreading over the meat to keep the layers distinct.

My mom made this for me when I was struggling with low iron. It’s savory and grounding. I usually eat it straight out of the bowl while nursing—one-handed eating is a skill you’ll master quickly!

📋 Recipe Card

Recipe 2: Freezer-Friendly Beef & Veggie Shepherd’s Pie

⏱️ Prep: 25 mins🍳 Cook: 20 mins👥 Serves: 8🔥 Calories: 420
⏱️ Total Time: 45 mins

🥗 Ingredients

  • 1 lb lean ground beef
  • 1 onion, chopped
  • 2 cups frozen peas and carrots
  • 2 tbsp tomato paste
  • 1 cup beef bone broth
  • 1 tsp dried thyme
  • 4 large Russet potatoes, peeled and cubed
  • 1/4 cup butter
  • 1/2 cup whole milk
  • 1/2 cup shredded cheddar cheese

📋 Instructions

  1. 1Boil potatoes until tender, then mash with butter and milk.
  2. 2Brown ground beef and onion in a skillet; drain fat.
  3. 3Stir in tomato paste, frozen veggies, thyme, and broth. Simmer for 5 minutes.
  4. 4Transfer meat mixture to a casserole dish.
  5. 5Spread mashed potatoes over the meat and top with cheese.
  6. 6Cool, wrap in plastic and foil, and freeze.

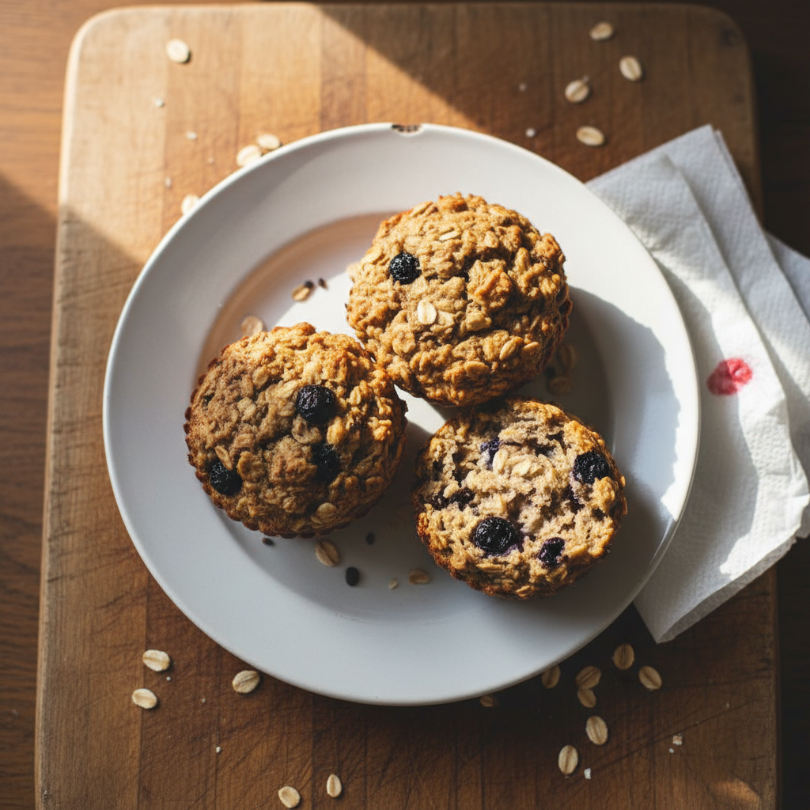
Lactation-Booster Oatmeal Muffins

Lactation-Booster Oatmeal Muffins

You need snacks that you can eat with one hand. These muffins are packed with rolled oats and flaxseed, which many moms swear by for milk supply. They aren’t overly sweet, making them a great breakfast or a midnight snack during those long nursing sessions.

Ingredients

* 2 1/2 cups rolled oats — divided
* 2 ripe bananas — mashed
* 2 large eggs
* 1/2 cup Greek yogurt — plain or vanilla
* 1/3 cup maple syrup
* 2 tablespoons ground flaxseed
* 1 teaspoon baking powder
* 1 cup blueberries — fresh or frozen
* 1 teaspoon cinnamon

Instructions

1. Preheat your oven to 350°F and grease a muffin tin.
2. Pulse 2 cups of the oats in a blender until they look like coarse flour.
3. In a large bowl, whisk the mashed bananas, eggs, yogurt, and maple syrup until well combined.
4. Fold in the oat flour, the remaining 1/2 cup of whole oats, flaxseed, baking powder, and cinnamon.
5. Gently stir in the blueberries.
6. Fill each muffin cup about 3/4 full. Bake for 18-22 minutes until a toothpick comes out clean.
7. Let them cool on a wire rack before popping them into a freezer bag.

Tips

* Microwave trick — Zap a frozen muffin for 30 seconds for a “fresh from the oven” feel.
* Add-ins — Swap blueberries for dark chocolate chips if you need a little treat.

I lived on these. Seriously. I kept a bag in the freezer and would grab one every time I went to the kitchen for water. They’re dense and chewy in the best way possible.

📋 Recipe Card

Recipe 3: Lactation-Booster Oatmeal Muffins

⏱️ Prep: 15 mins🍳 Cook: 20 mins👥 Serves: 12🔥 Calories: 185
⏱️ Total Time: 35 mins

🥗 Ingredients

  • 2 1/2 cups rolled oats
  • 2 ripe bananas, mashed
  • 2 large eggs
  • 1/2 cup Greek yogurt
  • 1/3 cup maple syrup
  • 2 tbsp ground flaxseed
  • 1 tsp baking powder
  • 1 cup blueberries
  • 1 tsp cinnamon

📋 Instructions

  1. 1Preheat oven to 350°F. Pulse 2 cups of oats in a blender to make flour.
  2. 2Whisk wet ingredients (bananas, eggs, yogurt, syrup) in a bowl.
  3. 3Fold in oat flour, whole oats, flaxseed, baking powder, and cinnamon.
  4. 4Gently stir in blueberries.
  5. 5Fill muffin tins 3/4 full and bake for 18-22 minutes.
  6. 6Cool before freezing in a zip-top bag.

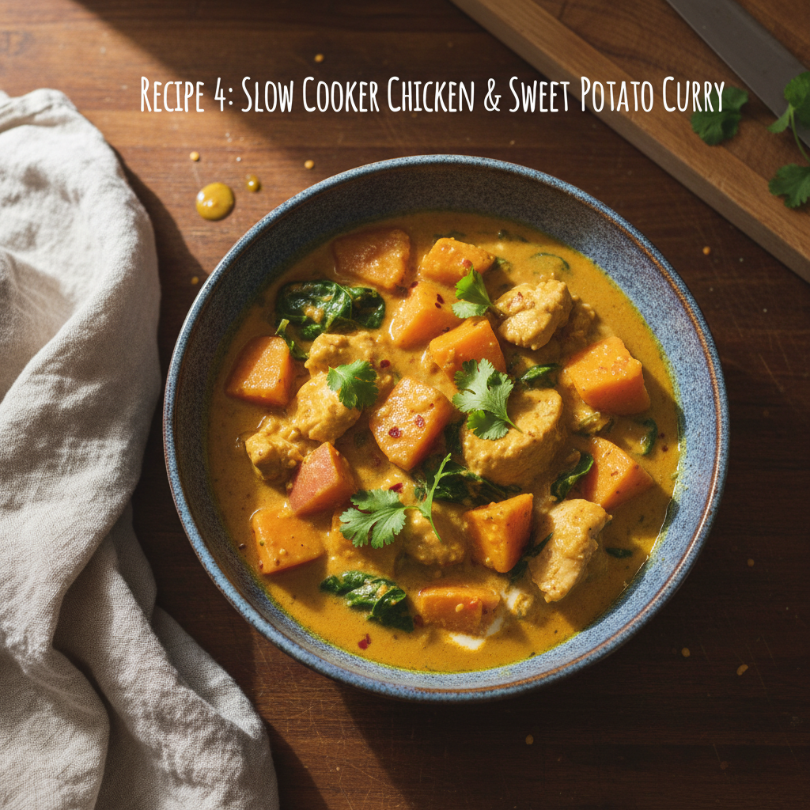
Slow Cooker Chicken & Sweet Potato Curry

Slow Cooker Chicken & Sweet Potato Curry

Warm spices and healthy fats are the goal here. This curry features sweet potatoes which are great for energy and chicken thighs that stay juicy even after freezing. It’s a “dump and go” meal that you can prep in bulk without much effort.

Ingredients

* 1.5 lbs boneless chicken thighs — cut into bite-sized pieces
* 2 large sweet potatoes — peeled and cubed
* 1 can (14oz) coconut milk
* 1 jar (4oz) mild red curry paste
* 1 red bell pepper — sliced
* 1 tablespoon fish sauce — for depth
* 1 cup frozen peas
* Fresh cilantro — for serving

Instructions

1. In a large freezer bag, combine the chicken, sweet potatoes, curry paste, coconut milk, and fish sauce.
2. Squeeze the air out and seal. Shake the bag to coat everything in the sauce. Freeze flat.
3. When ready to cook, thaw overnight in the fridge.
4. Dump the contents into a slow cooker. Cook on low for 6 hours or high for 3-4 hours.
5. Stir in the red bell pepper and frozen peas during the last 30 minutes of cooking.
6. Serve over rice or quinoa.

Tips

* Spice level — Use a “mild” paste unless you know your stomach is ready for heat post-delivery.
* Vary the veg — You can throw in cauliflower or green beans too.

The smell of this cooking is so nostalgic for me. It makes the whole house feel cozy. It’s the kind of meal that feels like you spent hours in the kitchen, but you really just opened a few containers.

📋 Recipe Card

Recipe 4: Slow Cooker Chicken & Sweet Potato Curry

⏱️ Prep: 15 mins🍳 Cook: 6 hours👥 Serves: 4🔥 Calories: 380
⏱️ Total Time: 6 hours 15 mins

🥗 Ingredients

  • 1.5 lbs boneless chicken thighs, cubed
  • 2 large sweet potatoes, cubed
  • 1 can (14oz) coconut milk
  • 4 oz mild red curry paste
  • 1 red bell pepper, sliced
  • 1 tbsp fish sauce
  • 1 cup frozen peas

📋 Instructions

  1. 1Combine chicken, potatoes, curry paste, coconut milk, and fish sauce in a freezer bag.
  2. 2Freeze flat. Thaw in the fridge before cooking.
  3. 3Transfer contents to a slow cooker; cook on low for 6 hours.
  4. 4Stir in bell pepper and peas during the last 30 minutes.
  5. 5Serve hot over rice.

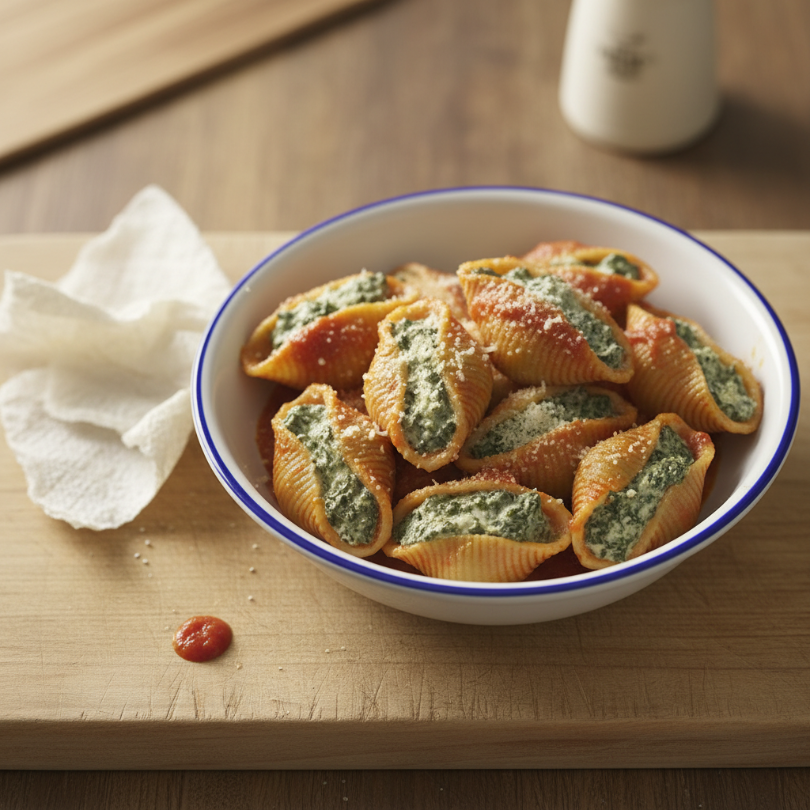
Spinach & Ricotta Stuffed Shells

Spinach & Ricotta Stuffed Shells

Pasta is the ultimate “I need calories now” food. These shells are stuffed with a mix of ricotta, mozzarella, and a mountain of spinach. It’s basically a lasagna but much easier to portion out. Plus, it’s vegetarian-friendly for a lighter dinner option.

Ingredients

* 1 box (12oz) jumbo pasta shells
* 15 oz ricotta cheese
* 1 bag (10oz) frozen spinach — thawed and squeezed dry
* 2 cups shredded mozzarella — divided
* 1/2 cup grated parmesan
* 1 egg — beaten
* 24 oz marinara sauce — your favorite brand
* 1 teaspoon dried oregano

Instructions

1. Cook the pasta shells according to the package, but stop 2 minutes early so they stay firm. Drain and cool.
2. In a bowl, mix the ricotta, squeezed spinach, 1 cup of mozzarella, parmesan, egg, and oregano.
3. Spread about 1 cup of marinara sauce in the bottom of a 9×13 baking dish.
4. Stuff each shell generously with the cheese mixture and place them in the dish.
5. Top with the remaining sauce and the rest of the mozzarella.
6. Cover tightly with foil. Label with baking instructions: “Bake at 375°F for 45 mins.”

Tips

* Dry that spinach — Squeeze the spinach in a clean kitchen towel until no more water comes out. This prevents soggy shells.
* Dual dishes — Split this into two 8×8 squares instead of one big 9×13 for smaller meals.

Cheese and carbs. Need I say more? This was my go-to “I’m exhausted and it’s raining” dinner. It’s salty, gooey, and hits the spot every single time.

📋 Recipe Card

Recipe 5: Spinach & Ricotta Stuffed Shells

⏱️ Prep: 30 mins🍳 Cook: 45 mins👥 Serves: 6🔥 Calories: 350
⏱️ Total Time: 1 hour 15 mins

🥗 Ingredients

  • 12 oz jumbo pasta shells
  • 15 oz ricotta cheese
  • 10 oz frozen spinach, thawed and drained
  • 2 cups shredded mozzarella
  • 1/2 cup grated parmesan
  • 1 egg, beaten
  • 24 oz marinara sauce
  • 1 tsp dried oregano

📋 Instructions

  1. 1Cook shells slightly under al dente; drain and cool.
  2. 2Mix ricotta, spinach, 1 cup mozzarella, parmesan, egg, and oregano.
  3. 3Spread 1 cup sauce in a baking dish.
  4. 4Stuff shells and place in dish; top with remaining sauce and mozzarella.
  5. 5Cover with foil and freeze.
  6. 6To bake: Preheat at 375°F and cook for 45-50 minutes from thawed.

General Tips & Tricks

Invest in a good permanent marker and masking tape. Label everything with the date and reheating instructions. You think you’ll remember how long to bake the shells, but “mom brain” is real! Also, try to freeze things in portions that actually make sense for your household size to avoid waste.

Conclusion

Prepping these meals is the best gift you can give yourself. You deserve to be nourished while you care for your new little one. Pick one or two to make this weekend. You’ve got this, mama!

The Best Ever Healthy Mango Smoothie (Dairy Free)

The Best Ever Healthy Mango Smoothie (Dairy Free)

Cold, thick, and liquid gold. This smoothie tastes like a tropical vacation in a

Cold, thick, and liquid gold. This smoothie tastes like a tropical vacation in a glass. Pure sunshine.

Last August, I was stuck in a tiny Airbnb in Florida with a broken air conditioner and a fridge full of overripe fruit. I had to get creative. I tossed some frozen mango chunks into a lackluster blender with a splash of coconut milk and a squeeze of lime I found rolling around the crisper drawer. My toddler, who usually turns her nose up at anything green or “different,” actually tried to steal the whole glass. It was a total accident, but that creamy, tangy blend became the blueprint for what I officially call the best mango smoothie on the planet. I make it at least three times a week now.

Why You’ll Love This Recipe

  • Naturally sweet — No added sugars or funky syrups needed here. 100% fruit power.
  • Five ingredients — You probably have everything in your kitchen right now.
  • Ultra-creamy texture — Using frozen fruit gives it that soft-serve consistency without the dairy.
  • Energy booster — Packed with Vitamin C to keep you glowing and focused all morning.

Essential Ingredients

  • Frozen mango — The star of the show. Using frozen is non-negotiable if you want that thick, frosty texture.
  • Unsweetened almond or coconut milk — Provides the liquid base. Coconut milk makes it taste like a piña colada, while almond milk keeps it light.
  • Dairy-free yogurt — I love using a spoonful of cashew yogurt for extra tang and probiotics.
  • Fresh lime juice — This is the secret. It cuts through the sweetness and makes the mango flavor pop.
  • Hemp seeds — An optional but “brainy” addition for healthy fats and a bit of plant-based protein.

How to Make It

Start by pouring your liquid base into the blender first. This protects the blades and ensures a smooth ride. Next, pile in your frozen mango and a dollop of your favorite plant-based yogurt. Squeeze in that fresh lime—don’t skip it!

Turn the blender on low then ramp it up to high. You’ll hear the motor hum change as the frozen chunks break down into a velvety swirl. If it’s too thick, add an extra splash of milk. If you want it thicker (smoothie bowl style!), keep the liquid minimal. Blend until it looks like molten gold. Pour it into a chilled glass and watch it disappear.

Variations & Substitutions

  • Make it “Green” — Toss in a handful of baby spinach. It’ll change the color, but you won’t taste it at all.
  • Protein Punch — Add a scoop of vanilla protein powder or two tablespoons of almond butter.
  • Swap the fruit — Replace half the mango with frozen pineapple or peaches for a different twist.
The Best Ever Healthy Mango Smoothie (Dairy Free) preparation

Serving Suggestions

I love topping mine with a sprinkle of toasted shredded coconut or a few fresh mint leaves. If I’m feeling fancy, I’ll add a handful of granola on top for a crunch that hits different. It’s also great served alongside a slice of toasted sourdough with avocado.

How to Store & Reheat

Smoothies are best fresh. Period. However, if you have leftovers, pour them into silicone ice cube trays and freeze. When you’re ready for another, just pop the cubes back into the blender with a tiny bit of liquid. Good as new!

FAQ

Can I use fresh mango instead of frozen?
You can, but the smoothie will be thin and lukewarm. If you use fresh, add at least a cup of ice cubes to get that frosty chill.

How do I make it even thicker?
Use less milk and add a few chunks of frozen banana. It creates an almost ice-cream-like consistency.

Is this smoothie kid-friendly?
Absolutely. It’s like a healthy version of an Orange Julius. My kids call it “yellow juice.”

This is the ultimate low-effort, high-reward breakfast. It’s bright, it’s fast, and it’s genuinely good for you. Grab your blender and give it a whirl. You’re going to obsessed.

📋 Recipe Card

The Best Ever Healthy Mango Smoothie (Dairy Free)

⏱️ Prep: 5 minutes🍳 Cook: 0 minutes👥 Serves: 1🔥 Calories: 210
⏱️ Total Time: 5 minutes

🥗 Ingredients

  • 1 1/2 cups frozen mango chunks
  • 1 cup unsweetened coconut milk (or almond milk)
  • 1/4 cup dairy-free plain yogurt
  • 1 tablespoon fresh lime juice
  • 1 tablespoon hemp seeds (optional)
  • A pinch of turmeric for extra color (optional)

📋 Instructions

  1. 1Add the coconut milk and lime juice to a high-speed blender first.
  2. 2Add the frozen mango chunks, dairy-free yogurt, and hemp seeds.
  3. 3Start blending on a low speed, then gradually move to high speed.
  4. 4Blend for 45-60 seconds until the mixture is completely smooth and creamy.
  5. 5If the smoothie is too thick, add another splash of milk and blend again briefly.
  6. 6Pour into a glass and top with shredded coconut or fresh mint if desired.
3 Aesthetic Tropical Mango Drinks You Can Make at Home

3 Aesthetic Tropical Mango Drinks You Can Make at Home

The cold condensation drips down a glass filled with golden mango nectar and creamy

The cold condensation drips down a glass filled with golden mango nectar and creamy coconut. That first sip is pure sunshine—bright, tangy, and impossibly refreshing. Summer is finally here.

I first fell in love with these layered drinks at a tiny cafe in Bangkok back in 2018. It was sweltering, my feet were tired, and then this woman handed me a glass with vibrant orange puree tucked under a pillow of foamy milk. It was the most beautiful thing I’d ever seen. Since then, I’ve been obsessed with recreating that “cafe aesthetic” in my own kitchen without the $9 price tag.

Honestly, it’s easier than you think. You don’t need fancy equipment, just some ripe fruit and a little patience for layering. Let’s get into these.

Creamy Mango Iced Latte

Creamy Mango Iced Latte

This is the ultimate morning treat when you want something caffeinated but tropical. It features a thick, honey-sweet mango base topped with ice and your favorite milk. The way the white milk swirls into the orange fruit at the bottom is hypnotic. It tastes like a mango creamsicle but better.

Ingredients

* 1/2 cup fresh mango puree — blended from very ripe Kensington Pride or Ataulfo mangos
* 1 cup whole milk — or oat milk for a nuttier finish
* 1 shot of espresso — cooled to room temperature (optional)
* 1 tablespoon honey — adjust based on how sweet your mango is
* Handful of ice cubes
* Fresh mint — for the garnish

Instructions

1. Peel and dice your mango, then blitz it in a blender with the honey until it’s silky smooth.
2. Spoon the puree into the bottom of a tall glass, pressing it against the sides slightly for that “streaked” look.
3. Fill the glass to the brim with ice cubes.
4. Slowly pour the milk over the back of a spoon onto the ice. This helps keep the layers separate.
5. Add the espresso shot last if you’re using it, and watch the colors bleed together.
6. Garnish with a sprig of mint and serve immediately.

Tips

* Freeze the puree — If you want it extra thick, chill the puree for 20 minutes before assembling.
* Choose the right mango — Avoid stringy, fibrous mangos. You want the buttery ones.

The first time I made this for my sister, she thought I’d ordered it from the new boutique spot downtown. She didn’t believe it was just my blender and a carton of milk!

It’s the kind of drink that makes a regular Tuesday feel like a Saturday morning on the coast. I love how the flavors change as you stir the layers together.

📋 Recipe Card

Recipe 1: Creamy Mango Iced Latte

⏱️ Prep: 10 minutes🍳 Cook: 0 minutes👥 Serves: 1🔥 Calories: 185
⏱️ Total Time: 10 minutes

🥗 Ingredients

  • 1/2 cup fresh mango puree
  • 1 cup whole milk or oat milk
  • 1 shot espresso (optional)
  • 1 tbsp honey
  • Handful of ice cubes
  • Fresh mint for garnish

📋 Instructions

  1. 1Blend fresh mango and honey until completely smooth.
  2. 2Pour the puree into a tall glass.
  3. 3Fill the glass to the top with ice.
  4. 4Slowly pour the milk over the ice to create a layered effect.
  5. 5Top with the espresso shot if desired.
  6. 6Garnish with mint and serve.

Sparkling Mango Chili Lime Soda

Sparkling Mango Chili Lime Soda

If you prefer something zesty and light, this is your winner. It’s a sophisticated take on a mango mocktail. It’s bubbly, slightly spicy, and incredibly refreshing on a humid afternoon. The chili-lime rim provides a salty kick that balances the natural sugar of the fruit perfectly.

Ingredients

* 1/4 cup mango nectar — store-bought or fresh
* 1 cup sparkling mineral water — like Topo Chico for big bubbles
* 1/2 lime — juiced
* 1 teaspoon Tajin seasoning — for the rim
* 1 thin slice of jalapeño — optional, for a kick
* Fresh mango cubes — for garnish

Instructions

1. Rub a lime wedge around the rim of your glass and dip it into a small plate of Tajin seasoning.
2. Pour the mango nectar and lime juice into the glass.
3. Add the jalapeño slice and muddle it gently if you want more heat.
4. Drop in plenty of ice to keep the carbonation sharp.
5. Top off with the sparkling water, pouring slowly to avoid a bubble-over.
6. Skewer a few mango cubes and rest them across the top of the glass.

Tips

* Super cold water — Always use chilled sparkling water so the ice doesn’t melt too fast and dilute the flavor.
* Crushed ice — This drink looks incredible with crushed ice rather than big blocks.

I’m a sucker for anything with Tajin. That salty, sour combo against the sweet mango is just addictive. I served these at a backyard BBQ last July and they were gone in minutes.

People always ask “what’s in this?” because the flavor profile is so complex for such a simple mocktail. It’s my go-to “fancy” drink when I’m not drinking alcohol but still want to feel festive.

📋 Recipe Card

Recipe 2: Sparkling Mango Chili Lime Soda

⏱️ Prep: 5 minutes🍳 Cook: 0 minutes👥 Serves: 1🔥 Calories: 95
⏱️ Total Time: 5 minutes

🥗 Ingredients

  • 1/4 cup mango nectar
  • 1 cup sparkling mineral water
  • 1/2 lime, juiced
  • 1 tsp Tajin seasoning
  • 1 slice jalapeño (optional)
  • Fresh mango cubes for garnish
  • Ice cubes

📋 Instructions

  1. 1Rim a glass with lime juice and dip in Tajin seasoning.
  2. 2Add mango nectar, lime juice, and jalapeño to the glass.
  3. 3Fill the glass with ice.
  4. 4Top with chilled sparkling water.
  5. 5Stir very gently once to combine.
  6. 6Garnish with fresh mango cubes.

Whipped Mango Coconut Shake

Whipped Mango Coconut Shake

Think of this as a lighter, more aesthetic version of a Mango Lassi. It’s thick, frosty, and uses full-fat coconut milk for a velvety mouthfeel. It looks like a sunset in a glass if you layer the mango and coconut cream correctly. It’s basically a healthy dessert you can sip through a straw.

Ingredients

* 1.5 cups frozen mango chunks — gives it that “frosty” texture
* 1/2 cup coconut milk — from a can, shaken well
* 1/4 cup Greek yogurt — for a slight tang
* 2 tablespoons maple syrup — optional
* Toasted coconut flakes — for the topping

Instructions

1. Blend the frozen mango, yogurt, and maple syrup until it reaches a soft-serve consistency.
2. Whisk the coconut milk in a separate bowl until it’s slightly frothy and aerated.
3. Alternate scoops of the mango mixture and the coconut milk into a glass.
4. Swirl a long spoon through the layers once to create a marble effect.
5. Sprinkle generously with toasted coconut flakes for a crunch.

Tips

* Don’t over-mix — You want to see those distinct white and orange swirls, so don’t stir it too much once it’s in the glass.
* Adjust thickness — Add a splash of coconut water if your blender is struggling with the frozen fruit.

This shake is thick enough that you almost need a spoon. My kids call it “the yellow cloud” because the coconut milk makes it so airy and light.

I honestly find this more satisfying than ice cream. It’s my favorite way to use up those bags of frozen mango I always buy on sale. Plus, the toasted coconut on top makes it feel so professional.

📋 Recipe Card

Recipe 3: Whipped Mango Coconut Shake

⏱️ Prep: 8 minutes🍳 Cook: 0 minutes👥 Serves: 1🔥 Calories: 240
⏱️ Total Time: 8 minutes

🥗 Ingredients

  • 1.5 cups frozen mango chunks
  • 1/2 cup canned coconut milk
  • 1/4 cup Greek yogurt
  • 2 tbsp maple syrup
  • 1 tbsp toasted coconut flakes

📋 Instructions

  1. 1In a blender, combine frozen mango, yogurt, and maple syrup.
  2. 2Blend until thick and smooth like soft-serve.
  3. 3In a small bowl, lightly whisk the coconut milk until frothy.
  4. 4Layer the mango mix and coconut milk into a glass.
  5. 5Use a spoon to create a gentle swirl pattern.
  6. 6Top with toasted coconut flakes.

General Tips & Tricks

To get those perfect layers, always remember the “density rule.” Heavier liquids—like thick fruit purees or sugar syrups—go in first. Light liquids—like milk or soda—go in last. Use the back of a spoon to break the fall of the liquid as you pour it in. This prevents the layers from splashing together. And for heaven’s sake, use clear glassware!

Conclusion

Making these aesthetic mango drinks is the quickest way to beat the heat. They’re healthy, beautiful, and honestly, they just make you feel good. Grab some fruit and give them a shot. You won’t regret it!

10 Refreshing Mango Drinks for Summer Entertaining

10 Refreshing Mango Drinks for Summer Entertaining

Sweet, golden, dripping with juice. These mango drinks are summer in a glass. I

Sweet, golden, dripping with juice. These mango drinks are summer in a glass.

I still remember the first time I had a real Alphonso mango. I was sitting on a porch in the middle of a humid July afternoon, the kind where the air feels like a warm blanket. My best friend handed me a glass filled with a thick, icy orange puree topped with a sprig of mint. One sip and the heat just… evaporated. Now, every time the temperature climbs above 80, I find myself hovering over the blender, stained yellow up to my elbows, trying to recreate that magic.

Whether you’ve got a crate of fresh fruit from the market or a bag of frozen chunks in the freezer, these ten pick-me-ups are exactly what your next pool party needs. We aren’t just talking about basic juice here. We’re getting into creamy textures, spicy rims, and herbal infusions.

Classic Creamy Mango Lassi

Classic Creamy Mango Lassi

This is the holy grail of mango drinks. It’s thick, tangy, and walks the line between a beverage and a dessert perfectly. It’s my go-to when I’ve accidentally over-spiced the dinner curry. The cooling yogurt saves my taste buds every single time.

Ingredients

* 2 cups fresh mango pulp — use honey mangos if you can find them
* 2 cups plain Greek yogurt — full fat gives the best texture
* 1/2 cup whole milk — to thin it out to your liking
* 3 tbsp honey — or agave nectar
* 1/4 tsp ground cardamom — the secret ingredient!
* Pistachios — crushed for garnish

Instructions

1. Peel and cube your mangos, discarding the large pit.
2. Toss the mango, yogurt, milk, honey, and cardamom into a high-speed blender.
3. Whiz it on high for about 45 seconds until it’s silky smooth.
4. Taste a spoonful. If it’s too tart, add another drizzle of honey and pulse again.
5. Pour into tall glasses and top with a sprinkle of crushed nuts.

Tips

* Freeze the fruit — If you want it extra cold without diluting it with ice, use frozen mango chunks.
* Vegan swap — Use coconut yogurt and almond milk for a dairy-free version that’s just as lush.

Honestly, this lassi is a staple in my kitchen. My kids call it “orange sunshine milk” and they’ll drink it faster than I can wash the blender. It’s incredibly filling, so I sometimes just have a big glass for a quick summer breakfast on the go.

📋 Recipe Card

Classic Creamy Mango Lassi

⏱️ Prep: 10 minutes🍳 Cook: 0 minutes👥 Serves: 2🔥 Calories: 280
⏱️ Total Time: 10 minutes

🥗 Ingredients

  • 2 cups fresh mango pulp
  • 2 cups plain Greek yogurt
  • 1/2 cup whole milk
  • 3 tbsp honey
  • 1/4 tsp ground cardamom
  • Crushed pistachios for garnish

📋 Instructions

  1. 1Peel and cube fresh mangos, discarding the pits.
  2. 2Place mango, yogurt, milk, honey, and cardamom into a blender.
  3. 3Blend on high until completely smooth.
  4. 4Taste and adjust sweetness with extra honey if desired.
  5. 5Pour into glasses and garnish with crushed pistachios.

Spicy Mango Michelada Mocktail

Spicy Mango Michelada Mocktail

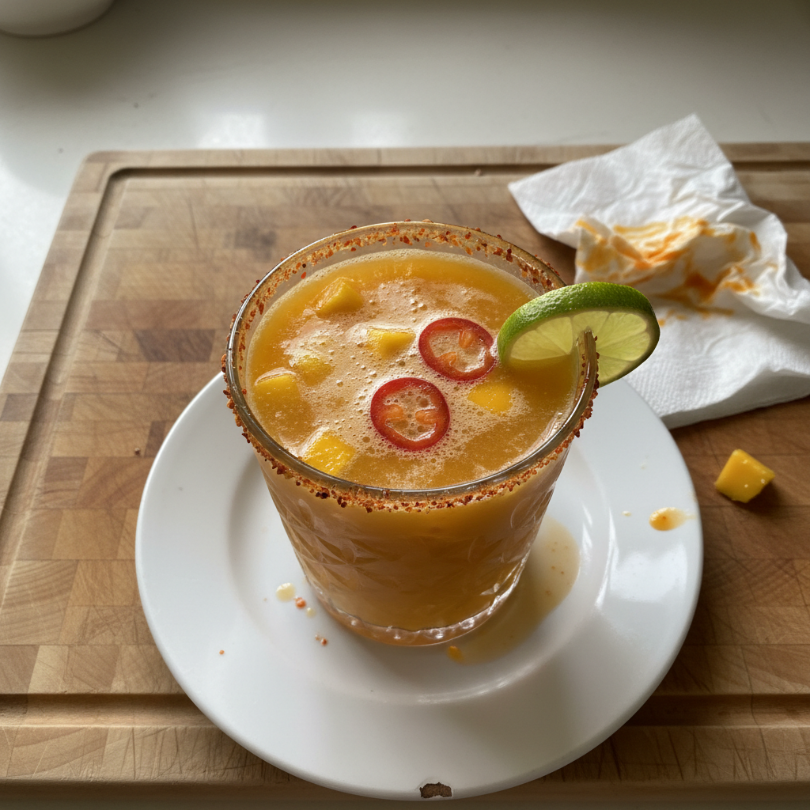
If you love a little kick, this is the drink for you. It’s savory, salty, and hits you with a slow heat that feels right at home at a backyard BBQ. It’s essentially a party in a glass with a rim that’ll make your mouth water.

Ingredients

* 1 cup mango juice — chilled
* 1/2 cup sparkling water — or non-alcoholic light beer
* 2 tbsp fresh lime juice
* 3 dashes hot sauce — like Cholula or Tapatio
* 1 tsp Worcestershire sauce
* Tajín seasoning — for the rim
* Lime wedges — for garnish

Instructions

1. Run a lime wedge around the rim of a heavy glass.
2. Dip the rim into a small plate of Tajín until it’s well-coated.
3. Fill the glass with plenty of ice cubes.
4. Stir together the mango juice, lime juice, hot sauce, and Worcestershire in a separate pitcher.
5. Pour the mixture over the ice and top with the sparkling water.
6. Give it one gentle stir and serve immediately.

Tips

* Go authentic — Use a Mexican lager if you want the “real” boozy experience.
* Extra spice — Garnish with a slice of fresh jalapeño for more fire.

I first had something like this at a dusty roadside stand in Arizona. I thought the combination of fruit and hot sauce was weird until I actually tried it. Now, I crave that salty-spicy-sweet combo every time the sun stays out past 7 PM.

📋 Recipe Card

Spicy Mango Michelada Mocktail

⏱️ Prep: 5 minutes🍳 Cook: 0 minutes👥 Serves: 1🔥 Calories: 110
⏱️ Total Time: 5 minutes

🥗 Ingredients

  • 1 cup mango juice
  • 1/2 cup sparkling water
  • 2 tbsp fresh lime juice
  • 3 dashes hot sauce
  • 1 tsp Worcestershire sauce
  • Tajín seasoning for the rim
  • Lime wedges for garnish

📋 Instructions

  1. 1Rim a glass with a lime wedge and dip into Tajín seasoning.
  2. 2Fill the glass with ice.
  3. 3In a separate container, stir together mango juice, lime juice, hot sauce, and Worcestershire.
  4. 4Pour the mixture over the ice.
  5. 5Top with sparkling water and a lime wedge.

Sparkling Mango Basil Soda

Sparkling Mango Basil Soda

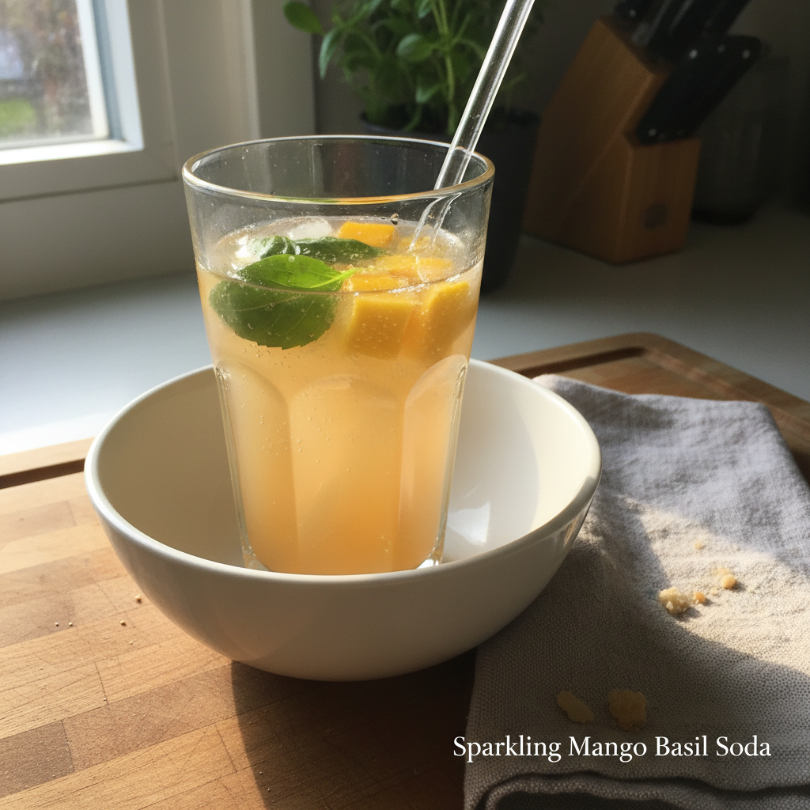
Basil isn’t just for pizza, guys. When you muddle it with sweet mango, it brings an earthy, peppery note that makes the fruit taste even brighter. It’s incredibly sophisticated for how little effort it takes.

Ingredients

* 1/2 cup mango puree — strained for a clear look
* 6 large basil leaves — fresh is a must
* 1 tbsp simple syrup — or sugar to taste
* 1 cup club soda — very cold
* Ice chunks

Instructions

1. Drop the basil leaves and simple syrup into the bottom of a glass.
2. Muddle them with a wooden spoon until the basil smells very fragrant.
3. Add the mango puree and stir it into the basil syrup.
4. Pack the glass with ice.
5. Pour the club soda over the top.
6. Garnish with a sprig of basil and a mango slice.

Tips

* Infuse the syrup — You can boil sugar and water with basil leaves beforehand for a deeper flavor.
* Make it a pitcher — Scale up the recipe for a crowd; just add the soda right before serving.

This is the drink I serve when I want to look fancy without actually doing any work. My neighbor, who “hates fruit in her water,” ended up asking for seconds of this one. It’s light enough that it doesn’t weigh you down during a heatwave.

📋 Recipe Card

Sparkling Mango Basil Soda

⏱️ Prep: 5 minutes🍳 Cook: 0 minutes👥 Serves: 1🔥 Calories: 95
⏱️ Total Time: 5 minutes

🥗 Ingredients

  • 1/2 cup mango puree
  • 6 fresh basil leaves
  • 1 tbsp simple syrup
  • 1 cup club soda
  • Ice

📋 Instructions

  1. 1Muddle basil leaves and simple syrup in the bottom of a glass.
  2. 2Stir in the mango puree.
  3. 3Add ice to fill the glass.
  4. 4Top with cold club soda and stir gently.
  5. 5Garnish with a whole basil leaf.

Frozen Mango Daiquiri (Alcohol-Free)

Frozen Mango Daiquiri (Alcohol-Free)

The ultimate slushie for grown-ups (and kids too, obviously). It’s thick, frosty, and perfectly balanced between sweet and sour. It feels like a tropical vacation you didn’t have to pack a suitcase for.

Ingredients

* 3 cups frozen mango chunks
* 1/4 cup fresh lime juice
* 1/2 cup orange juice — for sweetness and color
* 2 tbsp agave nectar
* 1 cup ice

Instructions

1. Combine all ingredients in your blender.
2. Pulse a few times to break up the big frozen chunks.
3. Blend on high until the texture is like a thick sorbet.
4. Scrape down the sides if needed and blend for another 10 seconds.
5. Spoon into chilled glasses.

Tips

* Rim it with sugar — A sugar rim adds a little crunch that balances the tart lime.
* Watch the consistency — If it’s too thick, add a splash more orange juice.

I made a giant batch of these for my sister’s baby shower last year. We sat out on the deck, and even though we weren’t at a beach resort, these daiquiris made it feel like we were. Just watch out for the brain freeze.

📋 Recipe Card

Frozen Mango Daiquiri (Alcohol-Free)

⏱️ Prep: 5 minutes🍳 Cook: 0 minutes👥 Serves: 2🔥 Calories: 190
⏱️ Total Time: 5 minutes

🥗 Ingredients

  • 3 cups frozen mango chunks
  • 1/4 cup fresh lime juice
  • 1/2 cup orange juice
  • 2 tbsp agave nectar
  • 1 cup ice

📋 Instructions

  1. 1Add all ingredients to a high-powered blender.
  2. 2Pulse to break down large frozen pieces.
  3. 3Blend on high until a smooth slushie consistency is reached.
  4. 4Pour into chilled glasses and serve immediately.

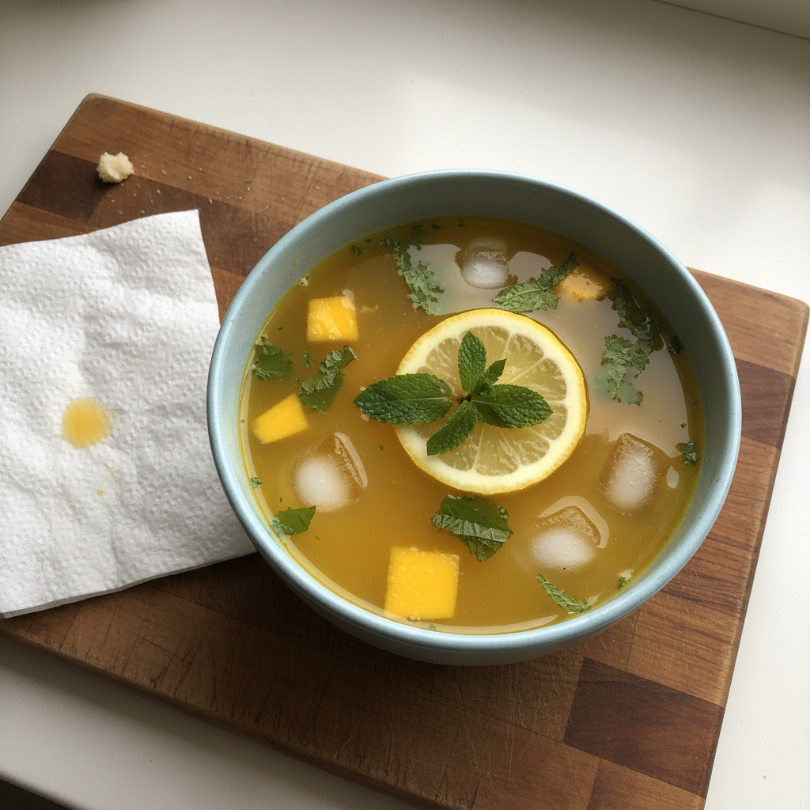
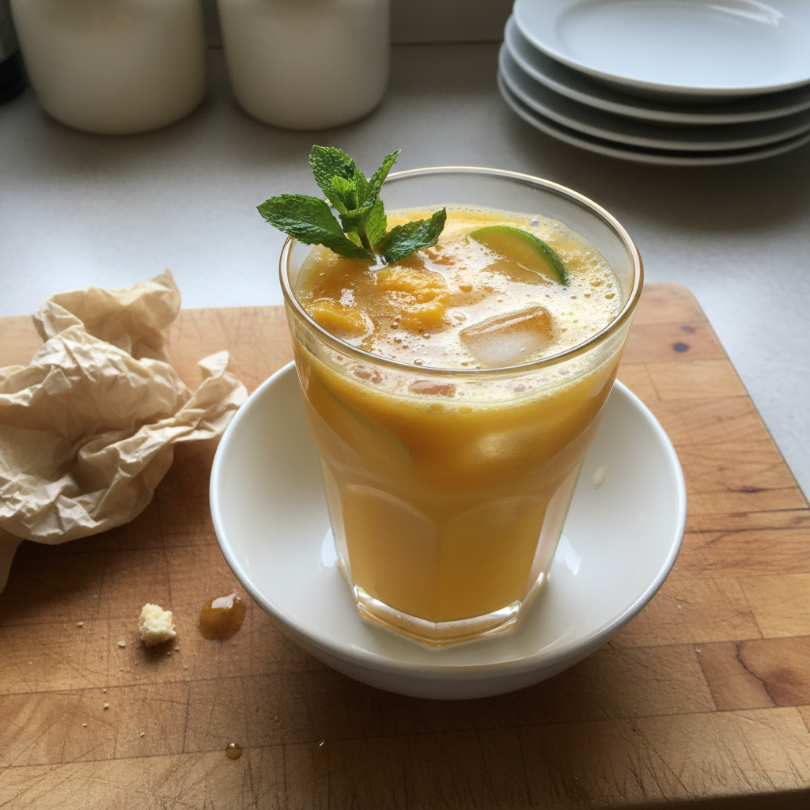
Mango Mint Lemonade

Mango Mint Lemonade

Standard lemonade is fine, but mango makes it legendary. The mint adds a cooling finish that lingers. It’s the ultimate thirst-quencher for those afternoons spent mowing the lawn or gardening.

Ingredients

* 1 cup fresh lemon juice — about 5-6 lemons
* 1.5 cups mango nectar
* 1/2 cup sugar — dissolved in 1/2 cup warm water (simple syrup)
* 4 cups cold water
* Handful of fresh mint leaves

Instructions

1. Mix the lemon juice, mango nectar, and simple syrup in a large pitcher.
2. Stir in the cold water.
3. Clap the mint leaves between your hands once (this releases the oils) and toss them in.
4. Chill in the fridge for at least an hour to let the flavors marry.
5. Serve over plenty of ice.

Tips

* Use real lemons — The bottled stuff just won’t cut it here.
* Sparkle it up — Swap the plain water for sparkling water for some bubbles.

Lemonade was the first thing I ever “learned” to make as a kid. Adding mango felt like a total rebellion against my mom’s recipe. It turns out, the rebellion tasted much better.

📋 Recipe Card

Mango Mint Lemonade

⏱️ Prep: 15 minutes🍳 Cook: 0 minutes👥 Serves: 6🔥 Calories: 150
⏱️ Total Time: 15 minutes

🥗 Ingredients

  • 1 cup fresh lemon juice
  • 1.5 cups mango nectar
  • 1/2 cup sugar (made into simple syrup)
  • 4 cups cold water
  • 1 handful fresh mint leaves

📋 Instructions

  1. 1Stir lemon juice, mango nectar, and simple syrup in a large pitcher.
  2. 2Add cold water and stir well.
  3. 3Gently bruise mint leaves and add to the pitcher.
  4. 4Chill for at least one hour before serving over ice.

Mango Ginger Fizz

Mango Ginger Fizz

Ginger brings a sharp, spicy bite that cuts right through the richness of the mango. It’s refreshing, slightly medicinal in the best way, and great for digestion after a big meal.

Ingredients

* 1/4 cup mango puree
* 1 tsp freshly grated ginger — squeezed for juice
* 1 tbsp lime juice
* Ginger ale or Ginger beer — to top
* Ice

Instructions

1. Press the grated ginger through a fine-mesh sieve to get the juice.
2. Combine the ginger juice, mango puree, and lime juice in a glass.
3. Add ice to fill.
4. Topping it off with ginger beer (for more spice) or ginger ale (for more sweetness).
5. Stir gently so you don’t lose the carbonation.

Tips

* Don’t skip the fresh ginger — Ground ginger won’t give you that refreshing zing.
* Add a garnish — A piece of candied ginger on a toothpick looks amazing.

I’m a sucker for ginger. This fizz is my go-to when I’m feeling a bit sluggish from the heat. It wakes up your senses immediately. Plus, it’s a bit more “adult” than a regular fruit punch.

📋 Recipe Card

Mango Ginger Fizz

⏱️ Prep: 10 minutes🍳 Cook: 0 minutes👥 Serves: 1🔥 Calories: 130
⏱️ Total Time: 10 minutes

🥗 Ingredients

  • 1/4 cup mango puree
  • 1 tsp fresh ginger juice
  • 1 tbsp lime juice
  • 1 cup ginger ale or ginger beer
  • Ice

📋 Instructions

  1. 1Extract juice from 1 tablespoon of grated ginger.
  2. 2Mix ginger juice, mango puree, and lime juice in a glass.
  3. 3Fill glass with ice.
  4. 4Pour ginger ale over the top and stir slowly.

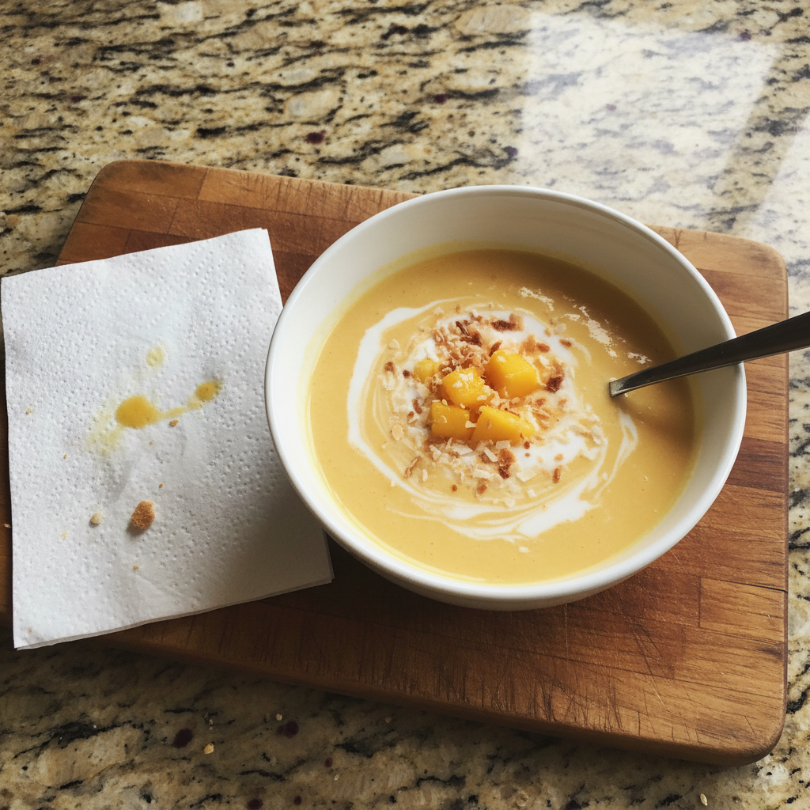
Creamy Mango Coconut Cooler

Creamy Mango Coconut Cooler

Think of this as a lighter, more drinkable version of mango sticky rice. It’s tropical, slightly nutty from the coconut, and incredibly soothing. It feels like a hug in a glass.

Ingredients

* 1 cup mango pulp
* 1 cup coconut milk — from a carton, not the heavy canned stuff
* 1/2 cup coconut water
* 1 tbsp maple syrup
* Toasted coconut flakes — for garnish

Instructions

1. Blend the mango pulp, coconut milk, coconut water, and syrup until smooth.
2. Pour into glasses filled with ice.
3. Top with toasted coconut flakes for a bit of texture.
4. Enjoy immediately while cold.

Tips

* Canned coconut milk — If you use the canned stuff, it’ll be more like a shake.
* Keep it cold — Ensure all liquids are chilled before blending.

Coconut and mango are a match made in heaven. I once lived off these for a week during a vacation in Florida. Every time I make one now, I can practically hear the ocean waves.

📋 Recipe Card

Creamy Mango Coconut Cooler

⏱️ Prep: 5 minutes🍳 Cook: 0 minutes👥 Serves: 2🔥 Calories: 210
⏱️ Total Time: 5 minutes

🥗 Ingredients

  • 1 cup mango pulp
  • 1 cup carton coconut milk
  • 1/2 cup coconut water
  • 1 tbsp maple syrup
  • Toasted coconut flakes for garnish

📋 Instructions

  1. 1Combine mango pulp, coconut milk, coconut water, and syrup in a blender.
  2. 2Blend until completely smooth.
  3. 3Pour into glasses with ice cubes.
  4. 4Sprinkle toasted coconut flakes on top.

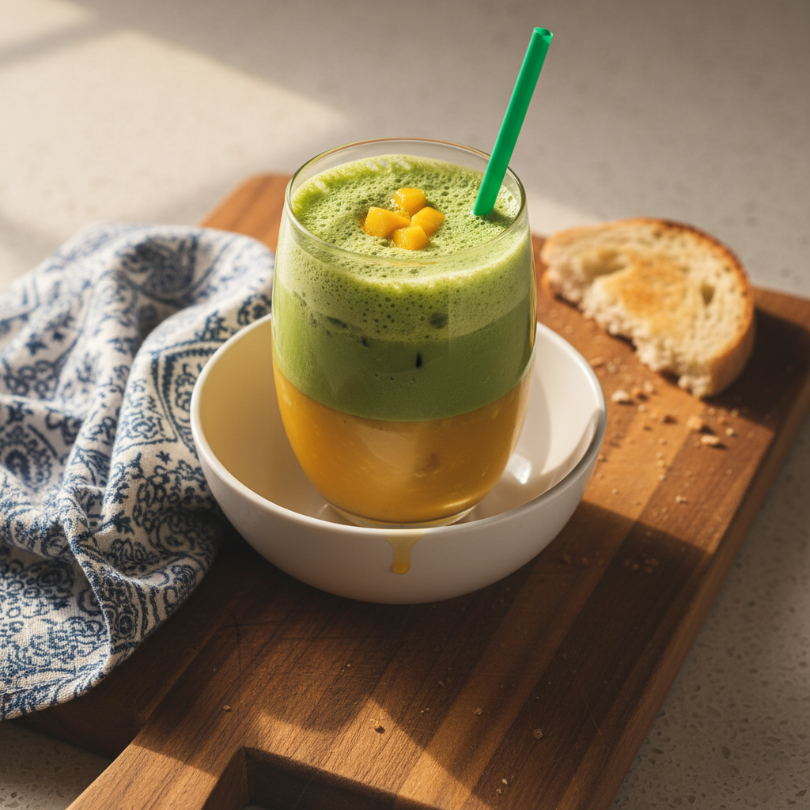
Mango Matcha Iced Tea

Mango Matcha Iced Tea

For a caffeinated kick that isn’t heavy coffee, try this. The earthy green tea flavor pairs surprisingly well with the tropical sweetness of mango. It’s a beautiful layered drink too!

Ingredients

* 1 tsp matcha powder
* 1/4 cup hot water — not boiling
* 1/2 cup mango juice — at the bottom
* 1/2 cup milk of choice
* Ice

Instructions

1. Whisk the matcha powder with hot water until frothy and clump-free.
2. Pour the mango juice into the bottom of a glass.
3. Add ice.
4. Slowly pour the milk over the ice.
5. Layer the matcha mixture on the very top for a cool ombre effect.

Tips

* Sweeten the matcha — If you find matcha too bitter, add a drop of honey to the whisking stage.
* Layering trick — Pouring the matcha over the back of a spoon helps it stay on top.

I’m a bit of a matcha nerd. This drink is my afternoon savior when the “3 PM slump” hits hard. It looks so pretty when you first make it that you almost don’t want to stir it. Almost.

📋 Recipe Card

Mango Matcha Iced Tea

⏱️ Prep: 10 minutes🍳 Cook: 0 minutes👥 Serves: 1🔥 Calories: 120
⏱️ Total Time: 10 minutes

🥗 Ingredients

  • 1 tsp matcha powder
  • 1/4 cup warm water
  • 1/2 cup mango juice
  • 1/2 cup almond or oat milk
  • Ice

📋 Instructions

  1. 1Whisk matcha powder and warm water until no lumps remain.
  2. 2Pour mango juice into the bottom of a glass.
  3. 3Fill with ice, then slowly pour in the milk.
  4. 4Carefully pour the matcha on top to create layers.

Mango Iced Green Tea

Mango Iced Green Tea

Clean, simple, and light. If you want something you can drink all day long without a sugar crash, this is the one. It’s subtle and sophisticated.

Ingredients

* 2 green tea bags — steeped and cooled
* 1/2 cup mango nectar
* Fresh mango slices
* Honey — to taste
* 2 cups water

Instructions

1. Steep your tea bags in 2 cups of hot water for 3 minutes. Remove bags and let the tea cool.
2. Stir in the mango nectar and honey.
3. Add fresh mango slices to the pitcher.
4. Let it sit in the fridge for a few hours.
5. Serve over ice.

Tips

* Cold brew it — You can steep the tea bags in cold water overnight for a smoother taste.
* Minty twist — Toss some mint in here too for extra freshness.

This is what I keep in a huge jug in my fridge all July. It beats store-bought bottled tea any day of the week. My husband usually drains half the pitcher before I even get a glass!

📋 Recipe Card

Mango Iced Green Tea

⏱️ Prep: 10 minutes🍳 Cook: 5 minutes👥 Serves: 4🔥 Calories: 80
⏱️ Total Time: 2 hours 15 minutes

🥗 Ingredients

  • 2 green tea bags
  • 2 cups water
  • 1/2 cup mango nectar
  • Fresh mango slices
  • 1 tbsp honey

📋 Instructions

  1. 1Steep green tea bags in hot water for 3 minutes, then remove bags.
  2. 2Stir in honey and mango nectar while tea is warm.
  3. 3Let tea cool to room temperature, then refrigerate.
  4. 4Serve in glasses with fresh mango slices and ice.

Mango Hibiscus Punch

Mango Hibiscus Punch

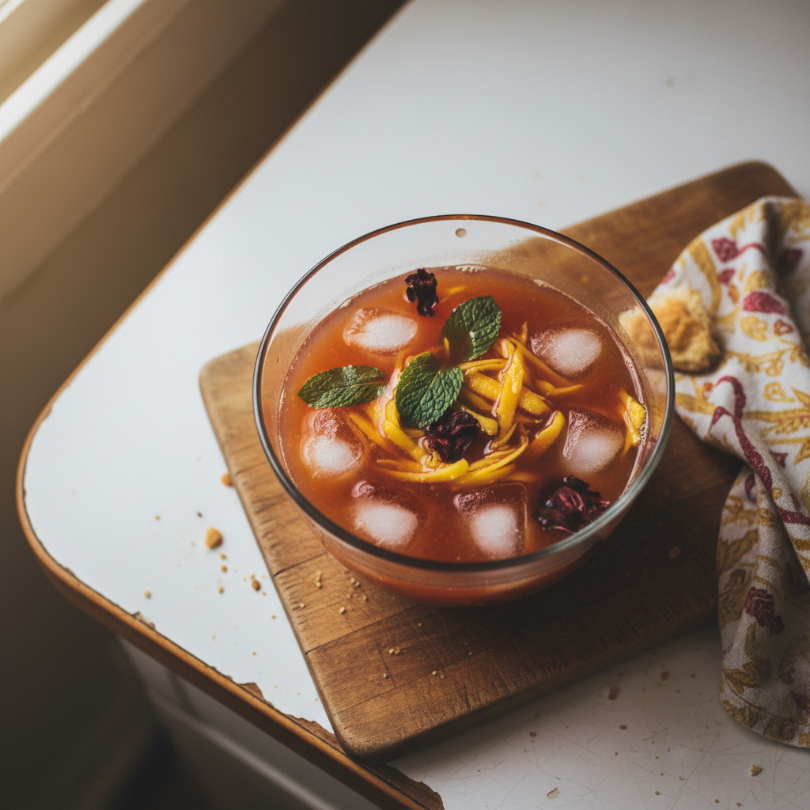
The color of this drink is absolutely stunning—a deep, ruby red mixed with bright orange. It’s tart, floral, and looks like a sunset. It’s the ultimate party punch.

Ingredients

* 2 cups dried hibiscus flowers — brewed into a strong tea (2 cups)
* 2 cups mango juice
* 1 cup pineapple juice
* 1 lime — sliced into rounds
* Liter of sparkling water

Instructions

1. Brew the hibiscus tea and let it cool completely.
2. Combine the hibiscus tea, mango juice, and pineapple juice in a punch bowl.
3. Drop in the lime slices.
4. Add the sparkling water just before guests arrive.
5. Serve with plenty of ice.

Tips

* Don’t over-steep — Hibiscus can get very bitter if left too long. 5-7 minutes is perfect.
* Ice ring — Freeze a ring of water with fruit in it to keep the punch cold without diluting it too much.

I made this for a housewarming party once, and people were hovering over the punch bowl. It’s just so visually striking. People will think you spent hours on it, but it’s really just about the brewing.

📋 Recipe Card

Mango Hibiscus Punch

⏱️ Prep: 15 minutes🍳 Cook: 5 minutes👥 Serves: 8🔥 Calories: 140
⏱️ Total Time: 1 hour

🥗 Ingredients

  • 2 cups brewed hibiscus tea (chilled)
  • 2 cups mango juice
  • 1 cup pineapple juice
  • 1 lime, sliced
  • 1 liter sparkling water

📋 Instructions

  1. 1Brew hibiscus flowers in hot water, strain, and chill.
  2. 2In a punch bowl, combine the tea, mango juice, and pineapple juice.
  3. 3Add lime slices.
  4. 4Pour in sparkling water just before serving over ice.

General Tips & Tricks

Always use ripe mangos for the best natural sweetness. If your fruit isn’t quite there, leave it in a paper bag on the counter for a day. Also, don’t be afraid to strain your purees. Mango can be fibrous, and a quick pass through a sieve makes your drinks feel much more professional and smooth.

Conclusion

Summer is way too short to drink boring water. Whether you’re team spicy or team creamy, these mango drinks are going to make your next gathering a total hit. Pick one, grab a blender, and let’s get sipping!

The Ultimate 5-Minute Mango Smoothie

The Ultimate 5-Minute Mango Smoothie

Cold, creamy, and ridiculously bright. This smoothie is like sipping sunshine through a straw.

Cold, creamy, and ridiculously bright. This smoothie is like sipping sunshine through a straw. It’s thick enough for a spoon but perfect for a quick gulp.

I’ll never forget the first time I had a “real” mango. I was twenty, backpacking through a humid corner of Southeast Asia, and a street vendor handed me a sliced mango so ripe it was practically melting. I sat on a plastic stool, juice running down my chin, absolutely floored by the flavor. Ever since then, I’ve been trying to recreate that hit of pure tropical gold in my own kitchen. This smoothie is the closest I’ve ever gotten without the plane ticket. It’s my go-to when the morning feels grayscale and I need a jolt of energy.

Why You’ll Love This Recipe

– Lightning fast — You can literally make this in 3 minutes flat, even when you’re half-asleep.
– Naturally sweet — No refined sugars here; the ripe fruit does all the heavy lifting for you.
– Super creamy — Using frozen fruit creates a thick, milkshake-like texture that feels like a treat.
– Highly customizable — It’s a base recipe that plays well with greens, seeds, or different milks.

Essential Ingredients

– Frozen mango chunks — These are the MVP. Using frozen fruit instead of ice keeps the flavor intense and the texture velvety.
– Greek yogurt — This adds a tangy kick and a massive protein boost. If you’re vegan, a thick coconut yogurt is a fantastic swap.
– Milk of choice — I usually reach for unsweetened almond milk or oat milk. Use coconut milk (the carton kind) for an extra tropical vibe.
– Honey or maple syrup — Just a drizzle if your mangoes aren’t quite sweet enough. Totally optional.
– Lime juice — Don’t skip this! A tiny squeeze of lime cuts through the sweetness and makes the flavors pop.

How to Make It

Start by grabbing your blender. I like to pour the liquid in first—this helps the blades move and prevents that annoying frozen “bridge” at the bottom. Toss in about a cup of your preferred milk. Next, pile in the frozen mango chunks and the Greek yogurt. If you’re feeling fancy, add the lime juice and a tiny pinch of sea salt (trust me on the salt).

Turn the blender on low to get things moving, then crank it to high for about 45 seconds. You want to see a little vortex forming in the middle. If it’s too thick and won’t budge, just splash in a bit more milk. Stop once it looks completely smooth and silky. Pour it into a tall glass immediately. If I have an extra minute, I’ll top it with a few hemp seeds or a sprig of mint. Delicious.

Variations & Substitutions

– Go green — Add a handful of baby spinach. It’ll change the color, but you won’t taste the leaves at all.
– Protein power — Stir in a scoop of vanilla protein powder for a post-workout meal.
– Tropical twist — Swap half the mango for frozen pineapple or peeled orange sections.
– Make it vegan — Use soy milk and a plant-based yogurt or a half-scoop of nut butter.

The Ultimate 5-Minute Mango Smoothie preparation

Serving Suggestions

This is a meal on its own, but it’s killer alongside some avocado toast or a handful of raw almonds. If you make it slightly thicker by using less milk, you can pour it into a bowl and top it with granola and shredded coconut for an easy smoothie bowl.

How to Store & Reheat

Smoothies are always best fresh. The texture changes as it melts. However, if you have leftovers, pour them into a silicone muffin tin and freeze them. Next time you want a smoothie, just pop two “muffins” into the blender with a splash of milk. It’ll stay good in the freezer for up to a month.

FAQ

Can I use fresh mango instead of frozen?
Yes, but add a handful of ice cubes. Frozen mango gives it that thick, frosty texture we all love.

How do I make it even thicker?
Use less milk or add a tablespoon of chia seeds. Let it sit for two minutes after blending to thicken up.

What’s the best milk for this?
Oat milk is the creamiest, but coconut milk (from the carton) tastes the most like a vacation.

I hope this becomes your new favorite morning ritual. It’s fast, it’s healthy, and it genuinely tastes like a treat. Give it a whirl!

📋 Recipe Card

Easy 5-Minute Mango Smoothie

⏱️ Prep: 3 minutes🍳 Cook: 0 minutes👥 Serves: 1🔥 Calories: 245
⏱️ Total Time: 3 minutes

🥗 Ingredients

  • 1 1/2 cups frozen mango chunks
  • 1/2 cup Greek yogurt (plain or vanilla)
  • 1 cup unsweetened almond milk (or milk of choice)
  • 1 teaspoon honey or maple syrup (optional)
  • 1 teaspoon fresh lime juice
  • A pinch of sea salt

📋 Instructions

  1. 1Pour the milk and lime juice into the blender base first to ensure smooth blending.
  2. 2Add the frozen mango chunks, Greek yogurt, and sweetener if using.
  3. 3Start the blender on a low speed, then gradually increase to high.
  4. 4Blend for 45-60 seconds until the mixture is completely smooth and no fruit chunks remain.
  5. 5If the smoothie is too thick, add an extra splash of milk and pulse again.
  6. 6Pour into a chilled glass and serve immediately.
4 Best High Protein Desserts for Fat Loss & Cravings

4 Best High Protein Desserts for Fat Loss & Cravings

Frozen yogurt that tastes like velvet. A warm, gooey brownie that actually hits your

Frozen yogurt that tastes like velvet. A warm, gooey brownie that actually hits your macros. These treats stop the late-night kitchen raids for good.

I used to be the person who’d finish a healthy dinner and immediately hunt for a hidden bag of chocolate chips. It felt like my body was screaming for a “closer” to the meal. But sugar crashes are the worst when you’re trying to stay on track. Last October, I started experimenting with Greek yogurt and whey protein to see if I could make something that didn’t taste like chalk. It changed everything. These four recipes are the ones I make on repeat—especially when I’m trying to lean out but still want to feel like I’m “cheating.” They’re fast, filling, and actually taste like real food.

Fudgy Chocolate Protein Mug Cake

Fudgy Chocolate Protein Mug Cake

This is my “emergency” dessert. You know those nights when you’re tired, the kitchen is clean, but you need a chocolate fix *now*? This takes two minutes. It’s dense, moist, and doesn’t have that weird rubbery texture most microwave cakes have. I like to underbake mine slightly so the center stays a bit molten.

Ingredients

– 1 scoop chocolate whey protein — go for a blend if you can for better texture
– 1 tbsp unsweetened cocoa powder — the dark kind is best
– 1/4 tsp baking powder — gives it that necessary lift
– 3 tbsp unsweetened almond milk — or any milk you have in the fridge
– 1 tsp mini dark chocolate chips — because we aren’t monsters
– 1 tsp stevia or maple syrup — just a touch of extra sweetness

Instructions

1. Grab a standard coffee mug and spray it with a tiny bit of non-stick oil.
2. Whisk the dry stuff directly in the mug. Make sure the protein powder and cocoa are mixed well so you don’t get a dry puff of powder mid-bite.
3. Stir in the milk. It’ll look thick, like brownie batter. That’s exactly what you want.
4. Fold in the chocolate chips and press a few into the top.
5. Microwave on high for about 45–55 seconds. Don’t overdo it! If the top looks set but slightly tacky, it’s done.
6. Let it sit for one minute. This is the hardest part, but it helps the texture finish setting.

Tips

– Check your protein type. Whey-casein blends work best for baking because they don’t dry out as fast as pure whey isolate.
– Add a pinch of salt. It makes the chocolate flavor pop like crazy.

I make this at least three times a week. It’s my go-to when I’ve had a stressful day and just want to curl up on the couch. It’s incredibly satisfying because of the volume. Plus, using a mug means no pile of dishes to scrub later.

📋 Recipe Card

Recipe 1: Fudgy Chocolate Protein Mug Cake

⏱️ Prep: 2 minutes🍳 Cook: 1 minute👥 Serves: 1🔥 Calories: 185
⏱️ Total Time: 3 minutes

🥗 Ingredients

  • 1 scoop (30g) chocolate whey protein
  • 1 tbsp unsweetened cocoa powder
  • 1/4 tsp baking powder
  • 3 tbsp unsweetened almond milk
  • 1 tsp mini dark chocolate chips
  • 1 tsp stevia or maple syrup

📋 Instructions

  1. 1Lightly grease a microwave-safe mug with cooking spray.
  2. 2Whisk the protein powder, cocoa powder, and baking powder in the mug until combined.
  3. 3Stir in the almond milk and sweetener until a thick batter forms.
  4. 4Gently fold in the chocolate chips.
  5. 5Microwave on high for 45-55 seconds until the top is set but still soft.
  6. 6Let rest for 1 minute before eating.

Creamy Peanut Butter Cookie Dough Bowls

Creamy Peanut Butter Cookie Dough Bowls

I call this “legal” cookie dough. It’s thick, creamy, and packed with protein thanks to a base of Greek yogurt. Most people think yogurt desserts are thin and runny, but when you mix in the right ingredients, it turns into a spoonable dough that tastes like a REESE’S cup.

Ingredients

– 3/4 cup non-fat plain Greek yogurt — it must be Greek for the thickness
– 1 tbsp peanut butter powder — all the flavor, way less fat
– 1/2 scoop vanilla protein powder — adds sweetness and structure
– 1/2 tsp vanilla extract — don’t skip this, it provides that “baked” aroma
– 1 tbsp crushed graham crackers — for that slightly gritty cookie feel
– A drizzle of honey — optional, but recommended if your yogurt is tart

Instructions

1. Spoon the yogurt into a small bowl. Use a paper towel to blot the top if there’s any liquid (whey) sitting on top.
2. Mix in the protein powder and peanut butter powder slowly. If you stir too fast, the powder will fly everywhere.
3. Add the vanilla and honey. Keep stirring until it’s completely smooth and looks like thick frosting.
4. Sprinkle the graham crackers on top right before you eat it so they stay crunchy.
5. Chill for 10 minutes if you want a firmer, colder texture.

Tips

– Use a wide bowl. It makes it feel like more food, which helps with the psychological side of cravings.
– The PB powder matters. If you use real peanut butter, it’s still good, but the calories jump up significantly.

This is the ultimate post-workout treat. It’s cold, refreshing, but feels heavy enough to actually kill a craving. My husband, who usually hates “healthy” versions of things, actually steals bites of this every time.

📋 Recipe Card

Recipe 2: Creamy Peanut Butter Cookie Dough Bowls

⏱️ Prep: 5 minutes🍳 Cook: 0 minutes👥 Serves: 1🔥 Calories: 210
⏱️ Total Time: 5 minutes

🥗 Ingredients

  • 3/4 cup non-fat plain Greek yogurt
  • 1 tbsp peanut butter powder (PB2)
  • 1/2 scoop vanilla protein powder
  • 1/2 tsp vanilla extract
  • 1 tbsp crushed graham crackers
  • 1 tsp honey (optional)

📋 Instructions

  1. 1Place the Greek yogurt in a small mixing bowl.
  2. 2Stir in the peanut butter powder and vanilla protein powder until smooth.
  3. 3Add the vanilla extract and honey, mixing thoroughly.
  4. 4Top with the crushed graham crackers just before serving for maximum crunch.
  5. 5Optional: Chill in the freezer for 5-10 minutes for a thicker texture.

Berry Cheesecake Protein Fluff

Berry Cheesecake Protein Fluff

If you miss eating huge portions of food, this is for you. Fluff is a volume eater’s dream. It’s light, airy, and looks like a giant bowl of soft-serve ice cream. The secret is using frozen berries to create that icy, thick consistency.

Ingredients

– 1 cup frozen strawberries — slightly thawed for 5 minutes
– 1/2 scoop vanilla whey protein — acts as the binder
– 1/4 cup splash of milk — just enough to get the blades moving
– 1 tbsp sugar-free cheesecake pudding mix — this is the “cheat code” for flavor
– 5-6 ice cubes — for extra volume

Instructions

1. Throw the frozen berries and ice cubes into a high-powered blender or food processor.
2. Pulse until crushed. It’ll look like a grainy slushy at first.
3. Add the protein powder, pudding mix, and milk.
4. Blend on high for 2–3 minutes. You’ll see the mixture start to expand and turn pale pink.
5. Watch for the “fluff.” It should double in size as air gets whipped into the protein.
6. Transfer to a bowl and eat immediately. It loses its air if it sits too long!

Tips

– A good blender is key. You need something with enough power to whip the air in.
– Don’t add too much liquid. If it’s too wet, it becomes a smoothie. We want it thick enough to hold a peak.

This feels like a magic trick. You start with a handful of berries and end up with a massive bowl of mousse. It’s perfect for those days when you’ve used most of your calories on dinner but still feel like “eating your feelings.”

📋 Recipe Card

Recipe 3: Berry Cheesecake Protein Fluff

⏱️ Prep: 5 minutes🍳 Cook: 0 minutes👥 Serves: 1🔥 Calories: 160
⏱️ Total Time: 5 minutes

🥗 Ingredients

  • 1 cup frozen strawberries
  • 1/2 scoop vanilla whey protein
  • 1/4 cup unsweetened almond milk
  • 1 tbsp sugar-free cheesecake pudding mix
  • 5-6 ice cubes

📋 Instructions

  1. 1Add frozen strawberries and ice cubes to a high-speed blender and pulse until broken down.
  2. 2Add the protein powder, pudding mix, and milk.
  3. 3Blend on high speed for 2-3 minutes until the mixture doubles in volume and becomes airy.
  4. 4If the blender gets stuck, add a tiny splash more milk.
  5. 5Spoon into a large bowl and serve immediately while cold and fluffy.

Cinnamon Sugar Baked Apple Crisp

Cinnamon Sugar Baked Apple Crisp

When it’s cold outside, I want something warm. This recipe uses a clever trick for the “oat” topping—mixing protein powder with a tiny bit of oats to create a crunchy, sweet rubble that tastes like autumn.

Ingredients

– 1 medium apple — Honeycrisp or Granny Smith work best
– 1/2 tsp cinnamon — be generous with it
– 1/4 cup rolled oats — for that classic crunch
– 1/2 scoop salted caramel or vanilla protein powder — the flavor base
– 1 tbsp melted coconut oil or butter — to bind the topping
– A squeeze of lemon juice — prevents the apple from browning

Instructions

1. Preheat your oven to 375°F (190°C).
2. Core and slice the apple into thin wedges. Toss them in a small baking dish with lemon juice and a sprinkle of cinnamon.
3. Mix the topping. In a separate small bowl, combine the oats, protein powder, remaining cinnamon, and melted oil. It should look like wet sand.
4. Crumble the mixture over the apples, covering them completely.
5. Bake for 15 minutes until the apples are soft and the topping looks golden and crispy.
6. Let it cool for 5 minutes. The topping gets crunchier as it cools down!

Tips

– Microwave shortcut. If you’re in a rush, microwave the apples for 2 minutes first, then add the topping and broil for 3 minutes.
– Top with yogurt. A dollop of cold Greek yogurt on top of the hot apples is heaven.

This is my Sunday night staple. It smells like a professional bakery, and it’s a great way to get some fiber in while still feeling like you’re having a decadent crumble. It’s cozy, sweet, and doesn’t leave you feeling bloated.

📋 Recipe Card

Recipe 4: Cinnamon Sugar Baked Apple Crisp

⏱️ Prep: 10 minutes🍳 Cook: 15 minutes👥 Serves: 1🔥 Calories: 240
⏱️ Total Time: 25 minutes

🥗 Ingredients

  • 1 medium Honeycrisp or Granny Smith apple, sliced
  • 1/2 tsp ground cinnamon
  • 1/4 cup rolled oats
  • 1/2 scoop salted caramel or vanilla protein powder
  • 1 tbsp melted coconut oil
  • 1 tsp lemon juice

📋 Instructions

  1. 1Preheat your oven to 375°F (190°C).
  2. 2In a small baking dish, toss the apple slices with lemon juice and half the cinnamon.
  3. 3In a separate bowl, mix the oats, protein powder, remaining cinnamon, and melted coconut oil until crumbly.
  4. 4Spread the oat mixture evenly over the apples.
  5. 5Bake for 15-18 minutes until the apples are tender and the topping is golden brown.
  6. 6Allow to cool slightly before serving.

General Tips & Tricks

When making high-protein desserts, remember that protein powder brands vary wildly. Some absorb more liquid than others. Always start with less liquid and add a teaspoon at a time until you hit that dreamy, creamy consistency. Also, don’t overcook anything in the microwave—it’s the fastest way to turn a treat into a brick.

Conclusion

Eating for fat loss doesn’t mean eating boring food. These four recipes are proof that you can hit your protein goals while actually enjoying your “diet.” Give the mug cake a try tonight—you won’t regret it!

4 High Protein Desserts for Weight Loss That Actually Taste Good

4 High Protein Desserts for Weight Loss That Actually Taste Good

Dark chocolate melting over a warm spoon. The smooth, velvety pull of a creamy

Dark chocolate melting over a warm spoon. The smooth, velvety pull of a creamy cheesecake. You don’t have to give these up just to see the scale move.

I used to be the person who thought “fitness food” meant eating plain Greek yogurt while staring longingly at a box of brownies. It was miserable. Then, about three years ago, during a particularly rainy Tuesday in March, I had a total kitchen meltdown because I wanted a cookie so badly I could cry. I started raiding my pantry, mixing protein powder with almond butter and a prayer. It wasn’t perfect, but it sparked an obsession. I’ve spent hundreds of hours since then hacking my favorite treats. These four are the absolute winners—the ones I actually make when the cravings hit hard. They’re fast, messy in the best way, and packed with the protein your muscles are screaming for.

Fudgy Chocolate Protein Brownie Bites

Fudgy Chocolate Protein Brownie Bites

These aren’t those weird, spongy “cake-over” brownies that taste like cardboard. They’re dense, rich, and intensely chocolatey. I use pumpkin puree as the secret weapon here. It sounds crazy, but you can’t taste it at all. It just keeps things moist without adding a ton of fat or sugar. It’s my go-to when I need a chocolate fix at 9 PM but don’t want to ruin my progress.

Ingredients

* 1/2 cup canned pumpkin puree — not pumpkin pie filling!
* 2 scoops chocolate whey protein powder — I like a fudge or milk chocolate flavor.
* 3 tbsp cocoa powder — unsweetened for that deep dark cocoa hit.
* 1/4 cup creamy almond butter — provides the healthy fats and structure.
* 2 tbsp sugar-free maple syrup — or honey if you aren’t worried about the carbs.
* 1/4 tsp sea salt — to balance the sweetness.
* 2 tbsp mini dark chocolate chips — because we aren’t monsters.

Instructions

1. Stir together the pumpkin, almond butter, and syrup in a medium bowl until it looks like a smooth paste.
2. Add in the protein powder, cocoa, and salt. Mix it well. This part takes some elbow grease. The dough will be thick and a bit sticky.
3. Fold in the chocolate chips gently.
4. Roll the dough into 10 small balls. If your hands get too sticky, wet them slightly with water.
5. Chill them in the fridge for at least 20 minutes to firm up. They taste way better cold.

Tips

* Don’t overmix — Once the dry bits disappear, stop.
* Check your powder — Casein protein makes these too dry; stick with whey or a whey-casein blend.

I’ve made these for my non-fitness friends and they had no clue there was pumpkin or protein powder inside. They’re just “good brownies.” I love that I can eat three of them and feel like I actually ate a meal’s worth of protein. Plus, no baking means no waiting.

📋 Recipe Card

Recipe 1: Fudgy Chocolate Protein Brownie Bites

⏱️ Prep: 10 minutes🍳 Cook: 0 minutes👥 Serves: 10🔥 Calories: 85
⏱️ Total Time: 30 minutes

🥗 Ingredients

  • 1/2 cup canned pumpkin puree
  • 2 scoops chocolate whey protein powder
  • 3 tbsp unsweetened cocoa powder
  • 1/4 cup creamy almond butter
  • 2 tbsp sugar-free maple syrup
  • 1/4 tsp sea salt
  • 2 tbsp mini dark chocolate chips

📋 Instructions

  1. 1In a medium bowl, combine pumpkin puree, almond butter, and maple syrup until smooth.
  2. 2Stir in the protein powder, cocoa powder, and salt. Mix until a thick dough forms.
  3. 3Fold in the mini chocolate chips.
  4. 4Roll the dough into 10 even balls (about 1 inch each).
  5. 5Place on a plate and refrigerate for 20 minutes to set before serving.

5-Minute Berry Protein Cheesecake Jars

5-Minute Berry Protein Cheesecake Jars

This is basically a “deconstructed” cheesecake that you can eat for breakfast if you want. It’s light, tangy, and feels incredibly fancy even though it takes less time than making toast. The base is low-fat cottage cheese, but wait! Don’t click away. When you blend it, it turns into a silk-smooth cream that rivals any Philadelphia cream cheese block.

Ingredients

* 1 cup low-fat cottage cheese — I prefer the 2% fat version for creaminess.
* 1 scoop vanilla protein powder — looks for a high-quality isolate.
* 1 tsp vanilla extract — don’t skip this, it adds that “bakery” scent.
* 1/2 cup fresh strawberries or blueberries — mashed slightly with a fork.
* 2 graham cracker sheets — crushed into crumbs for the “crust.”
* 1 tsp lemon zest — optional, but gives it a bright pop.

Instructions

1. Blend the cottage cheese, protein powder, and vanilla in a small blender or food processor. Run it until it’s 100% smooth. No lumps allowed.
2. Place the graham cracker crumbs at the bottom of two small jars or glasses.
3. Pour the cream mixture over the crumbs.
4. Top with the mashed berries and a little lemon zest if you’re feeling fancy.
5. Eat immediately or let it set in the fridge for an hour for a thicker texture.

Tips

* The Blend is King — You really have to blend it for at least 45 seconds to get that velvet texture.
* Swap the fruit — Peaches or raspberries work incredibly well here too.

I used to hate cottage cheese until I tried this. Now, it’s a staple. The lemon zest is what really sells the “cheesecake” lie to your brain. It’s cold, refreshing, and satisfies that creamy craving perfectly. Honestly, it’s a lifesaver on hot summer nights.

📋 Recipe Card

Recipe 2: 5-Minute Berry Protein Cheesecake Jars

⏱️ Prep: 5 minutes🍳 Cook: 0 minutes👥 Serves: 2🔥 Calories: 210
⏱️ Total Time: 5 minutes

🥗 Ingredients

  • 1 cup low-fat (2%) cottage cheese
  • 1 scoop vanilla protein powder
  • 1 tsp vanilla extract
  • 1/2 cup fresh strawberries, mashed
  • 2 graham cracker sheets, crushed
  • 1 tsp lemon zest

📋 Instructions

  1. 1Add cottage cheese, protein powder, and vanilla extract to a blender.
  2. 2Blend on high for 45-60 seconds until completely smooth and creamy.
  3. 3Divide crushed graham crackers between two small jars.
  4. 4Top with the cheesecake mixture.
  5. 5Layer the mashed strawberries on top and garnish with lemon zest.

Peanut Butter Cookie Dough Bark

Peanut Butter Cookie Dough Bark

If you’re the person who licks the bowl every time you bake cookies, this one is for you. It’s essentially a high-protein, “safe to eat” cookie dough that we freeze into shards. It’s crunchy, salty, and sweet. I keep a bag of this in my freezer at all times for “emergency” snacking.

Ingredients

* 1 cup non-fat Greek yogurt — make sure it’s thick, like Fage brand.
* 1/4 cup powdered peanut butter — (like PB2) to keep the fat lower but flavor high.
* 1 tbsp creamy peanut butter — for that authentic mouthfeel.
* 1 scoop vanilla or unflavored protein powder.
* 1 tbsp honey or agave.
* 1/4 cup puffed rice cereal — this gives it that “cookie” crunch.
* 1 tbsp dark chocolate chips.

Instructions

1. Whisk the yogurt, powdered peanut butter, regular peanut butter, protein powder, and honey in a bowl.
2. Stir in the puffed rice once the mixture is smooth.
3. Line a small baking sheet with parchment paper. This is non-negotiable or it will stick forever.
4. Spread the mixture thin across the paper, about 1/4 inch thick.
5. Sprinkle chocolate chips on top and press them in slightly.
6. Freeze for 2 hours until rock hard, then crack it into pieces with your hands.

Tips

* Thin is better — If it’s too thick, it’s hard to bite into once frozen.
* Store it fast — It melts quickly, so keep the pieces in a freezer bag and only take out what you’re eating right then.

The crunch from the puffed rice is everything. It makes you feel like you’re eating a brittle or a candy bar. I’ve found that having this in the freezer keeps me from diving into a jar of actual peanut butter and eating the whole thing with a spoon. It’s portion control that doesn’t feel like punishment.

📋 Recipe Card

Recipe 3: Peanut Butter Cookie Dough Bark

⏱️ Prep: 10 minutes🍳 Cook: 0 minutes👥 Serves: 4🔥 Calories: 165
⏱️ Total Time: 2 hours 10 minutes

🥗 Ingredients

  • 1 cup non-fat Greek yogurt
  • 1/4 cup powdered peanut butter
  • 1 tbsp creamy peanut butter
  • 1 scoop vanilla protein powder
  • 1 tbsp honey
  • 1/4 cup puffed rice cereal
  • 1 tbsp dark chocolate chips

📋 Instructions

  1. 1In a bowl, mix Greek yogurt, powdered peanut butter, protein powder, honey, and creamy peanut butter until smooth.
  2. 2Gently fold in the puffed rice cereal.
  3. 3Spread the mixture onto a parchment-lined baking sheet in a thin, even layer.
  4. 4Sprinkle with chocolate chips and press them in slightly.
  5. 5Freeze for at least 2 hours. Break into shards and store in a freezer-safe bag.

Salted Caramel Protein Fluff

Salted Caramel Protein Fluff

This is for the “volume eaters.” If you want a giant bowl of food that feels like a cloud for very few calories, listen up. It’s airy, whipped, and massive. It uses xanthan gum, which might sound like a lab chemical, but it’s just a plant-based thickener that turns a protein shake into a giant marshmallow.

Ingredients

* 1 scoop salted caramel protein powder — or vanilla with a pinch of extra salt.
* 1/2 cup almond milk — unsweetened.
* 1 cup frozen strawberries or 1 cup ice — the frozen fruit adds more flavor.
* 1/4 tsp xanthan gum — the secret ingredient for the fluff.
* 1 tsp stevia or sweetener of choice.

Instructions

1. Add the milk, protein, and frozen fruit/ice to a high-speed blender.
2. Blend on high until the ice is totally crushed and it looks like a thick smoothie.
3. Add the xanthan gum and the sweetener.
4. Whip it on the highest setting for 2-3 minutes. You will literally watch the mixture double or triple in size in the blender. It gets huge.
5. Pour into a giant bowl and eat it immediately with a spoon.

Tips

* Don’t ignore the timer — You really need to blend for the full 3 minutes to get the air incorporated.
* Eat it fresh — This doesn’t store well; it will deflate if you put it in the fridge.

The first time I made this, I thought I broke my blender because the foam was so thick. It’s wild. Use a big bowl—I’m serious. It’s so filling that I usually struggle to finish it, which is a weird problem to have when you’re trying to lose weight. It’s basically magic.

📋 Recipe Card

Recipe 4: Salted Caramel Protein Fluff

⏱️ Prep: 5 minutes🍳 Cook: 0 minutes👥 Serves: 1🔥 Calories: 180
⏱️ Total Time: 5 minutes

🥗 Ingredients

  • 1 scoop salted caramel protein powder
  • 1/2 cup unsweetened almond milk
  • 1 cup ice cubes (or frozen berries)
  • 1/4 tsp xanthan gum
  • 1 tsp stevia or preferred sweetener

📋 Instructions

  1. 1Place almond milk, ice, and protein powder in a high-speed blender.
  2. 2Blend until the ice is completely pulverized and smooth.
  3. 3Add the xanthan gum and sweetener.
  4. 4Whip on the highest blender setting for 2-3 minutes until the volume triples.
  5. 5Transfer to a large bowl and eat immediately with a spoon.

General Tips & Tricks

When you’re baking or mixing with protein powder, remember that moisture is your friend. Protein powder (especially whey) acts like a sponge and can make desserts dry. Always look for “wet” binders like yogurt, applesauce, or pumpkin. Also, salt your sweets! A tiny pinch of flaky salt makes even the cheapest protein powder taste like a gourmet dessert.

Conclusion

Weight loss doesn’t have to be a boring slog through salad town. These treats give you that “end of the day” reward while fueling your body with the protein it needs. Pick one, whip it up tonight, and let me know which one becomes your new obsession!

4 Guilt-Free High Protein Desserts for Your Weight Loss Journey

4 Guilt-Free High Protein Desserts for Your Weight Loss Journey

I remember sitting on my kitchen floor three years ago, staring at a tub

I remember sitting on my kitchen floor three years ago, staring at a tub of Greek yogurt and feeling totally defeated by my “clean eating” goals. I wanted a brownie. Like, badly. But every recipe I found online tasted like literal cardboard or required sixteen different kinds of expensive powders.

That night, I started experimenting. I realized that dessert doesn’t have to be the enemy of your progress. It can actually be the thing that keeps you on track.

These recipes are my absolute favorites. They’re the ones I make when I’m craving something sweet at 9:00 PM but still want to hit my protein goals. They aren’t just “good for being healthy.” They’re actually delicious. Let’s get into it.

Fudgy Chocolate Protein Brownie Batter

Fudgy Chocolate Protein Brownie Batter

This is for the people who secretly prefer the batter over the actual baked brownie. It’s thick, rich, and ridiculously chocolatey. I use a secret ingredient—garbanzo beans—but I promise you cannot taste them. They just provide a silky, fudgy base that keeps you full for hours. It’s my go-to when I need a chocolate fix fast.

Ingredients

– 1 can (15 oz) chickpeas — drained and rinsed very well
– 1/2 cup chocolate protein powder — use a whey-casein blend for the best texture
– 1/4 cup almond butter — creamy works best
– 3 tbsp maple syrup — or your favorite liquid sweetener
– 1/4 cup dark cocoa powder — the Dutch-processed kind is awesome here
– 1/4 cup dark chocolate chips — for that essential crunch
– A pinch of sea salt — to balance the sweetness

Instructions

1. Rinse the chickpeas under cold water until the foam is completely gone.
2. Pat them dry with a paper towel. This is key for a smooth texture.
3. Throw everything except the chocolate chips into a high-speed blender or food processor.
4. Process on high until the mixture is completely smooth and looks like real frosting.
5. Scrape down the sides as needed. If it’s too thick, add a splash of almond milk.
6. Fold in the chocolate chips by hand.
7. Transfer to a bowl and eat it straight with a spoon or use it as a dip for apple slices.

Tips

– Skin the beans — If you have five extra minutes, pinch the skins off the chickpeas for an even creamier feel.
– Chill it — Pop the batter in the fridge for 30 minutes before eating. It thickens up beautifully.

I was so skeptical the first time I made this. I mean, beans? In dessert? But then I tried a spoonful and my mind was blown. It’s dense, decadent, and keeps me from raiding the pantry for Oreos later. My husband didn’t even know there were beans in it until I showed him the empty can.

📋 Recipe Card

Recipe 1: Fudgy Chocolate Protein Brownie Batter

⏱️ Prep: 10 minutes🍳 Cook: 0 minutes👥 Serves: 4🔥 Calories: 210
⏱️ Total Time: 10 minutes

🥗 Ingredients

  • 1 can (15 oz) chickpeas, drained and rinsed
  • 1/2 cup chocolate protein powder
  • 1/4 cup almond butter
  • 3 tbsp maple syrup
  • 1/4 cup dark cocoa powder
  • 1/4 cup dark chocolate chips
  • 1 pinch sea salt

📋 Instructions

  1. 1Rinse the chickpeas thoroughly and pat dry with paper towels.
  2. 2Add chickpeas, protein powder, almond butter, maple syrup, cocoa powder, and salt to a food processor.
  3. 3Blend until completely smooth, scraping down the sides as needed.
  4. 4If the batter is too thick, add 1-2 tablespoons of almond milk.
  5. 5Fold in the chocolate chips by hand.
  6. 6Serve immediately or chill for a thicker consistency.

Creamy Strawberry Cheesecake Jars

Creamy Strawberry Cheesecake Jars

These little jars are a total lifesaver for meal prep. They feel like a fancy bistro dessert but they’re packed with protein thanks to a mix of cottage cheese and Greek yogurt. Don’t let the cottage cheese scare you—once it’s blended, it becomes a velvety cream that tastes exactly like cheesecake filling.

Ingredients

– 1 cup low-fat cottage cheese — look for the small curd variety
– 1/2 cup plain Greek yogurt — 0% or 2% fat both work
– 2 tbsp honey — or agave nectar
– 1 tsp vanilla extract — don’t skimp on this!
– 1 cup fresh strawberries — chopped into small pieces
– 4 graham crackers — crushed into crumbs for the “crust”
– Lemon zest — just a tiny bit for brightness

Instructions

1. Blend the cottage cheese, Greek yogurt, honey, and vanilla until it’s perfectly smooth. No lumps allowed!
2. Stir in the lemon zest for that authentic cheesecake tang.
3. Grab four small mason jars or glasses.
4. Layer the bottom of each jar with the crushed graham cracker crumbs.
5. Spoon the creamy mixture over the crumbs.
6. Top each jar with a generous handful of chopped strawberries.
7. Refrigerate for at least an hour to let the flavors meld together.

Tips

– Switch the fruit — Blueberries or raspberries are amazing if strawberries aren’t in season.
– High protein crust — You can mix the crumbs with a tablespoon of protein powder for an extra boost.

I’m obsessed with the texture of these. They’re so light and refreshing. I usually make a batch on Sunday nights so I have a quick “treat” ready for those mid-afternoon slumps. It’s the perfect way to use up that cottage cheese sitting in the back of your fridge.

📋 Recipe Card

Recipe 2: Creamy Strawberry Cheesecake Jars

⏱️ Prep: 15 minutes🍳 Cook: 0 minutes👥 Serves: 4🔥 Calories: 185
⏱️ Total Time: 15 minutes

🥗 Ingredients

  • 1 cup low-fat cottage cheese
  • 1/2 cup plain Greek yogurt
  • 2 tbsp honey
  • 1 tsp vanilla extract
  • 1 cup fresh strawberries, chopped
  • 4 graham crackers, crushed
  • 1/2 tsp lemon zest

📋 Instructions

  1. 1Combine cottage cheese, Greek yogurt, honey, and vanilla in a blender.
  2. 2Blend on high until the mixture is silky smooth with no lumps.
  3. 3Stir in the lemon zest.
  4. 4Place 1 crushed graham cracker into the bottom of 4 small jars.
  5. 5Top each with the cheesecake mixture.
  6. 6Finish with a layer of fresh strawberries.
  7. 7Chill for at least 1 hour before serving.

Peanut Butter Protein Cookies

Peanut Butter Protein Cookies

Three ingredients. That’s all you need for these chewy, nutty cookies. They’re flourless, which makes them naturally gluten-free, and they satisfy that peanut butter craving instantly. I love making these when I have five minutes to spare before I need to head out the door. They smell incredible while they’re baking.

Ingredients

– 1 cup natural peanut butter — the drippy kind with just peanuts and salt
– 1/2 cup vanilla protein powder — whey works best for the texture here
– 1 large egg — at room temperature if possible
– Optional: 2 tbsp stevia — if you want them a bit sweeter

Instructions

1. Preheat your oven to 350°F (175°C) and line a baking sheet with parchment paper.
2. Mix the peanut butter, protein powder, and egg in a medium bowl.
3. Stir until a dough forms. It should be thick and slightly tacky.
4. Scoop about a tablespoon of dough and roll it into a ball.
5. Place on the baking sheet and press down with a fork to make a criss-cross pattern.
6. Bake for 8-10 minutes. Don’t overbake! They will look soft but will firm up as they cool.
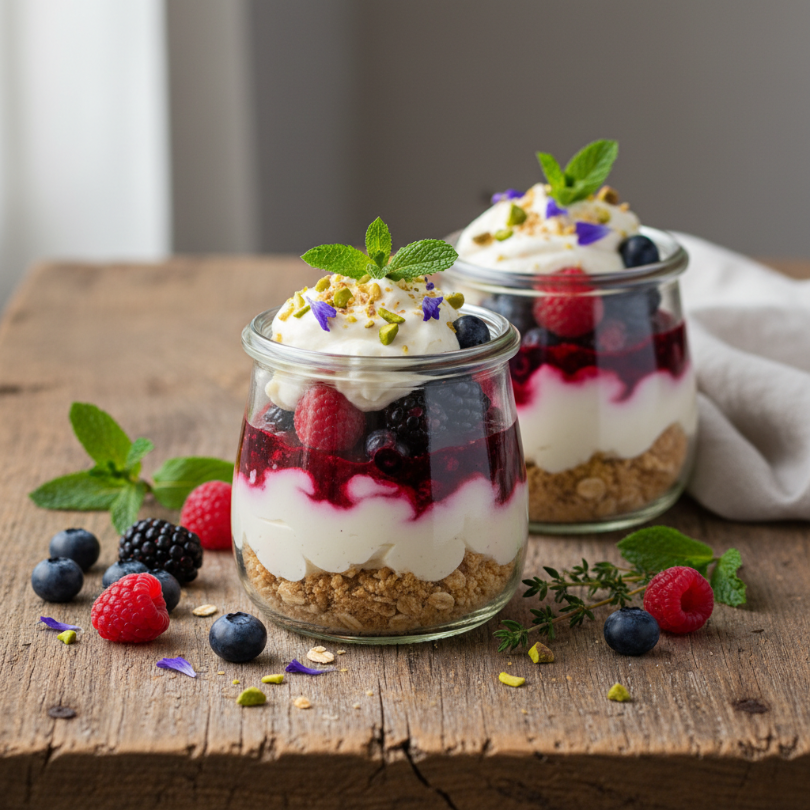
7. Let them cool on the pan for at least 5 minutes before moving them.

Tips

– Check your PB — If your peanut butter is very salty, skip any extra salt in the recipe.
– Add chocolate — Press a few sugar-free chocolate chips into the tops before baking.

These aren’t your grandma’s soft-and-pillowy sugar cookies. They’re dense and chewy, which I actually prefer. They’re incredibly filling. One or two of these with a cup of coffee is basically the perfect breakfast-for-dessert situation.

📋 Recipe Card

Recipe 3: Peanut Butter Protein Cookies

⏱️ Prep: 5 minutes🍳 Cook: 10 minutes👥 Serves: 12🔥 Calories: 120
⏱️ Total Time: 15 minutes

🥗 Ingredients

  • 1 cup natural creamy peanut butter
  • 1/2 cup vanilla protein powder
  • 1 large egg
  • 2 tbsp stevia (optional)

📋 Instructions

  1. 1Preheat oven to 350°F and line a baking sheet with parchment paper.
  2. 2In a medium bowl, mix the peanut butter, protein powder, and egg until a dough forms.
  3. 3Roll the dough into 12 even balls and place on the baking sheet.
  4. 4Use a fork to flatten each ball into a criss-cross pattern.
  5. 5Bake for 8-10 minutes until the edges are just set.
  6. 6Cool on the pan for 5 minutes before transferring to a wire rack.

Salted Caramel Protein Mousse

Salted Caramel Protein Mousse

This mousse is impossibly airy. It uses whipped egg whites and protein powder to create a cloud-like texture that feels like a total indulgence. The salt cuts through the caramel perfectly. It’s fancy enough to serve to guests, but easy enough to make on a Tuesday night in your pajamas.

Ingredients

– 2 large egg whites — must be pasteurized since they stay raw
– 1 scoop salted caramel protein powder — or vanilla with a drop of caramel extract
– 1/2 cup non-fat Greek yogurt — cold from the fridge
– 1/4 tsp sea salt — for that salted caramel vibe
– 1 tsp stevia or monk fruit — adjust to your taste

Instructions

1. Whip the egg whites in a clean bowl using a hand mixer until stiff peaks form.
2. Whisk the Greek yogurt, protein powder, and sweetener in a separate bowl until smooth.
3. Fold 1/3 of the whipped egg whites into the yogurt mixture very gently to lighten it up.
4. Add the rest of the egg whites and fold with a spatula. Don’t stir! You want to keep all that air inside.
5. Divide into two small bowls or ramekins.
6. Sprinkle the sea salt over the top.
7. Chill for 20 minutes before serving for the best “mousse” consistency.

Tips

– Clean bowl — Make sure your whisk and bowl are totally grease-free, or the egg whites won’t whip.
– Toppings — A drizzle of sugar-free caramel sauce takes this to another level.

This is the “emergency” dessert. When I’m dying for something sweet but I’ve already eaten most of my calories for the day, this is my savior. It’s high volume, low calorie, and feels like eating a caramel cloud. Just be careful with the folding part—patience is a virtue here!

📋 Recipe Card

Recipe 4: Salted Caramel Protein Mousse

⏱️ Prep: 10 minutes🍳 Cook: 0 minutes👥 Serves: 2🔥 Calories: 145
⏱️ Total Time: 10 minutes

🥗 Ingredients

  • 2 large pasteurized egg whites
  • 1 scoop salted caramel protein powder
  • 1/2 cup non-fat Greek yogurt
  • 1/4 tsp sea salt
  • 1 tsp monk fruit sweetener

📋 Instructions

  1. 1Beat egg whites in a clean glass bowl until stiff peaks form.
  2. 2In a separate bowl, whisk Greek yogurt, protein powder, and sweetener until smooth.
  3. 3Gently fold 1/3 of the egg whites into the yogurt mixture to lighten it.
  4. 4Slowly fold in the remaining egg whites using a spatula, being careful not to deflate them.
  5. 5Pour into ramekins and sprinkle with sea salt.
  6. 6Chill for 20 minutes before enjoying.

General Tips & Tricks

When making protein desserts, the type of powder matters. Whey tends to dry things out in the oven, while Casein or blends stay much moister. Always add a pinch of salt to balance the artificial sweeteners found in many powders. If a batter feels too dry, add liquid one tablespoon at a time. It goes from “perfect” to “soup” very quickly!

Conclusion

Eating healthy doesn’t mean saying goodbye to your favorite flavors. These four treats prove you can have your cake—or brownie batter—and eat it too. Try one tonight. You’ll be surprised how much better you feel when dessert actually fuels your body!

3 High Protein Desserts for Weight Loss in Minutes

3 High Protein Desserts for Weight Loss

Satisfy your sweet tooth while hitting your macros with these easy, high-protein desserts that

Satisfy your sweet tooth while hitting your macros with these easy, high-protein desserts that take under five minutes to prep and taste like a total treat.

high protein desserts, weight loss sweets, easy protein recipes, healthy dessert, low calorie treats, 5 minute recipes

Sweet, creamy, and actually filling. These desserts don’t just kill a craving; they keep you full. No sugar crashes here.

I used to be the person who finished every single dinner by scouring the pantry for chocolate. It didn’t matter how big the meal was—my brain just needed that “sweet finish.” When I started focusing on weight loss, I thought those nights were over. I’ve spent too many Tuesdays staring sadly at a plain rice cake. But then I started playing with Greek yogurt and protein powders. These three recipes are my literal lifesavers. They’re what I make when I’m tired, it’s 9:00 PM, and I want something that feels like a cheat meal but fits my goals.

Chocolate Peanut Butter Protein Pudding

Chocolate Peanut Butter Protein Pudding

Think of this like a grown-up version of those little plastic pudding cups, but it’s packed with actual nutrition. It’s thick enough to stand a spoon up in. The secret is using Greak yogurt as the base—it gives it this tangy cheesecake-like vibe that pairs so well with dark cocoa.

Ingredients

* 3/4 cup Non-fat Greek Yogurt — I prefer Fage for the thickest texture.
* 1 scoop Chocolate Protein Powder — whey or a whey-casein blend works best.
* 1 tbsp Cocoa Powder — for that extra deep chocolate hit.
* 1 tbsp PB2 or Peanut Flour — all the flavor, none of the heavy oils.
* 1-2 tsp Maple Syrup or Stevia — adjust based on how sweet your protein powder is.
* A pinch of Sea Salt — trust me, it makes the chocolate pop.

Instructions

1. Plop your Greek yogurt into a small bowl. Use a spatula to smooth it out first.
2. Sift in the protein powder, cocoa powder, and PB2 to avoid any weird chalky clumps.
3. Stir slowly. It’ll look dry at first, but keep going until it turns into a glossy, dark pudding.
4. Add your sweetener and that tiny pinch of salt.
5. If it’s too thick, add a teaspoon of almond milk, but I like mine like fudge.
6. Top with a few lily’s dark chocolate chips if you’re feeling fancy.

Tips

* Cold is better — If you can wait 10 minutes, pop it in the freezer. It firms up into a mousse.
* Watch the clumping — Mix the powders together before adding them to the yogurt for the smoothest result.

Honestly, I eat this at least three times a week. It’s my “I’m stressed and need chocolate” bowl. The first time I made it, I was shocked at how much it actually felt like dessert. It’s heavy, rich, and hits that peanut butter craving without needing a nap afterward.

📋 Recipe Card

Chocolate Peanut Butter Protein Pudding

⏱️ Prep: 3 mins🍳 Cook: 0 mins👥 Serves: 1🔥 Calories: 210
⏱️ Total Time: 3 mins

🥗 Ingredients

  • 3/4 cup Non-fat Greek Yogurt
  • 1 scoop Chocolate Protein Powder
  • 1 tbsp Cocoa Powder
  • 1 tbsp PB2 Peanut Flour
  • 1 tsp Maple Syrup or Stevia
  • Pinch of sea salt

📋 Instructions

  1. 1Place the Greek yogurt in a small mixing bowl.
  2. 2Add the protein powder, cocoa powder, and PB2.
  3. 3Stir with a spatula until the powders are fully incorporated and the mixture is smooth.
  4. 4Add sweetener and salt, then stir again.
  5. 5Optional: Top with 1/2 tsp of dark chocolate chips.

Vanilla Berry Protein Fluff

Vanilla Berry Protein Fluff

This one is for the volume eaters. It’s light, airy, and looks like a massive mountain of soft-serve ice cream. We use frozen berries to create a cold, thick texture that feels much more indulgent than it actually is. It’s massive but low in calories.

Ingredients

* 1 cup Frozen Mixed Berries — strawberries or raspberries work amazing here.
* 1/2 scoop Vanilla Protein Powder — a high-quality whey works best for fluffing.
* 1/4 cup Unsweetened Almond Milk — just enough to get the blender moving.
* 1/2 tsp Xanthan Gum — this is the magic ingredient that creates the “fluff” texture.
* 1 tsp Vanilla Extract — for that bakery aroma.

Instructions

1. Toss the frozen berries and almond milk into a high-speed blender or food processor.
2. Pulse until the berries are broken down into a thick, icy slush.
3. Add the protein powder, vanilla, and the xanthan gum.
4. Blend on high for a full 2-3 minutes. You’ll literally see the mixture double in size as air gets whipped in.
5. Scrape down the sides and blend for another 30 seconds until it’s stiff enough that it won’t fall out of an upside-down bowl.
6. Serve immediately.

Tips

* Don’t skip the xanthan gum — It’s what makes it fluffy instead of just being a runny smoothie.
* Eat it fast — Since it’s mostly air and frozen fruit, it loses its “poof” if it sits out too long.

This is my go-to when I’m “bored-eating.” It takes a while to finish because the volume is so high, which satisfies that hand-to-mouth habit. My husband thought it was whipped cream the first time he saw it. It’s refreshing, tart, and totally hits the spot on a hot evening.

📋 Recipe Card

Vanilla Berry Protein Fluff

⏱️ Prep: 2 mins🍳 Cook: 3 mins👥 Serves: 1🔥 Calories: 185
⏱️ Total Time: 5 mins

🥗 Ingredients

  • 1 cup Frozen Mixed Berries
  • 1/2 scoop Vanilla Protein Powder
  • 1/4 cup Unsweetened Almond Milk
  • 1/2 tsp Xanthan Gum
  • 1 tsp Vanilla Extract

📋 Instructions

  1. 1Add frozen berries and almond milk to a high-speed blender.
  2. 2Pulse until the berries reach a slushy consistency.
  3. 3Add the protein powder, xanthan gum, and vanilla extract.
  4. 4Whip on high for 2-3 minutes until the volume doubles and looks like soft-serve.
  5. 5Serve immediately in a large bowl.

1-Minute Snickerdoodle Mug Cake

1-Minute Snickerdoodle Mug Cake

Sometimes you just need a warm cake. This snickerdoodle version is cozy, cinnamon-heavy, and cooks in about 60 seconds. We use oat flour or almond flour to keep it gluten-free and filling, plus a good dose of cinnamon to help regulate blood sugar.

Ingredients

* 1 scoop Vanilla Protein Powder — use one that you actually like the taste of!
* 1 tbsp Oat Flour — or coconut flour if you want it lower carb.
* 1/2 tsp Baking Powder — this gives us that “cakey” rise.
* 1 tsp Cinnamon — don’t be shy with it.
* 3 tbsp Egg Whites — this provides the structure and extra protein.
* 1 tbsp Unsweetened Applesauce — this keeps the cake moist without oil.

Instructions

1. Find your favorite microwave-safe mug (the wider, the better).
2. Whisk the dry ingredients (protein, flour, baking powder, cinnamon) together directly in the mug.
3. Stir in the egg whites and applesauce until the batter is smooth.
4. Microwave on high for 45 to 60 seconds. Stop when the top looks set but still slightly springy.
5. Let it sit for one minute—this is crucial for the texture to finish setting.
6. Dust with a little extra cinnamon and enjoy while warm.

Tips

* Don’t overcook — Protein powder can turn into rubber if you microwave it for too long. Start with 45 seconds.
* Mug size matters — Use a 12oz mug so it doesn’t overflow and make a mess of your microwave.

I was a skeptic of “protein cakes” for a long time. Usually, they’re dry and sad. But the applesauce here is a total game-changer. It’s moist and actually feels like a muffin. I love making this on rainy afternoons when I’m working from home and need a little pick-me-up.

📋 Recipe Card

1-Minute Snickerdoodle Mug Cake

⏱️ Prep: 2 mins🍳 Cook: 1 min👥 Serves: 1🔥 Calories: 160
⏱️ Total Time: 3 mins

🥗 Ingredients

  • 1 scoop Vanilla Protein Powder
  • 1 tbsp Oat Flour
  • 1/2 tsp Baking Powder
  • 1 tsp Cinnamon
  • 3 tbsp Egg Whites
  • 1 tbsp Unsweetened Applesauce

📋 Instructions

  1. 1In a microwave-safe mug, whisk together the dry ingredients.
  2. 2Add the egg whites and applesauce, mixing until no clumps remain.
  3. 3Microwave on high for 45-60 seconds.
  4. 4Remove carefully and let stand for 60 seconds to set.
  5. 5Sprinkle with extra cinnamon and serve warm.

General Tips & Tricks

When working with protein powder in desserts, always remember that whey can be drying. If your mixture feels like sand, add a tablespoon of Greek yogurt or a splash of milk. Also, salt is your friend. A tiny pinch of sea salt balances the artificial sweetness found in many protein powders.

Conclusion

Eating for weight loss doesn’t have to be a drag. These desserts prove you can have your cake—or pudding, or fluff—and still feel amazing. Try one of these tonight. Your sweet tooth will thank you.